> ## Documentation Index
> Fetch the complete documentation index at: https://docs.flowla.com/llms.txt
> Use this file to discover all available pages before exploring further.
# Microsoft Entra ID SSO setup
> Connect Flowla to Entra ID using OpenID Connect (OIDC) to enable Single Sign-On for your organization.
SSO lets your team log in to Flowla using their existing Microsoft credentials — no separate passwords, no extra accounts to manage. This guide is a simplified, Flowla-focused walkthrough derived from the [official Microsoft guide](https://learn.microsoft.com/en-us/entra/identity/enterprise-apps/add-application-portal-setup-oidc-sso#configure-oidc-sso-for-custom-non-gallery-applications), which you can refer to for full platform details.
### Prerequisites
* Microsoft Entra user account with one of the following roles: Cloud Application Administrator, Application Administrator, Owner of the service principal
* Admin access to your Flowla workspace
User emails in Flowla must match user emails in Entra ID; otherwise authentication will fail.
***
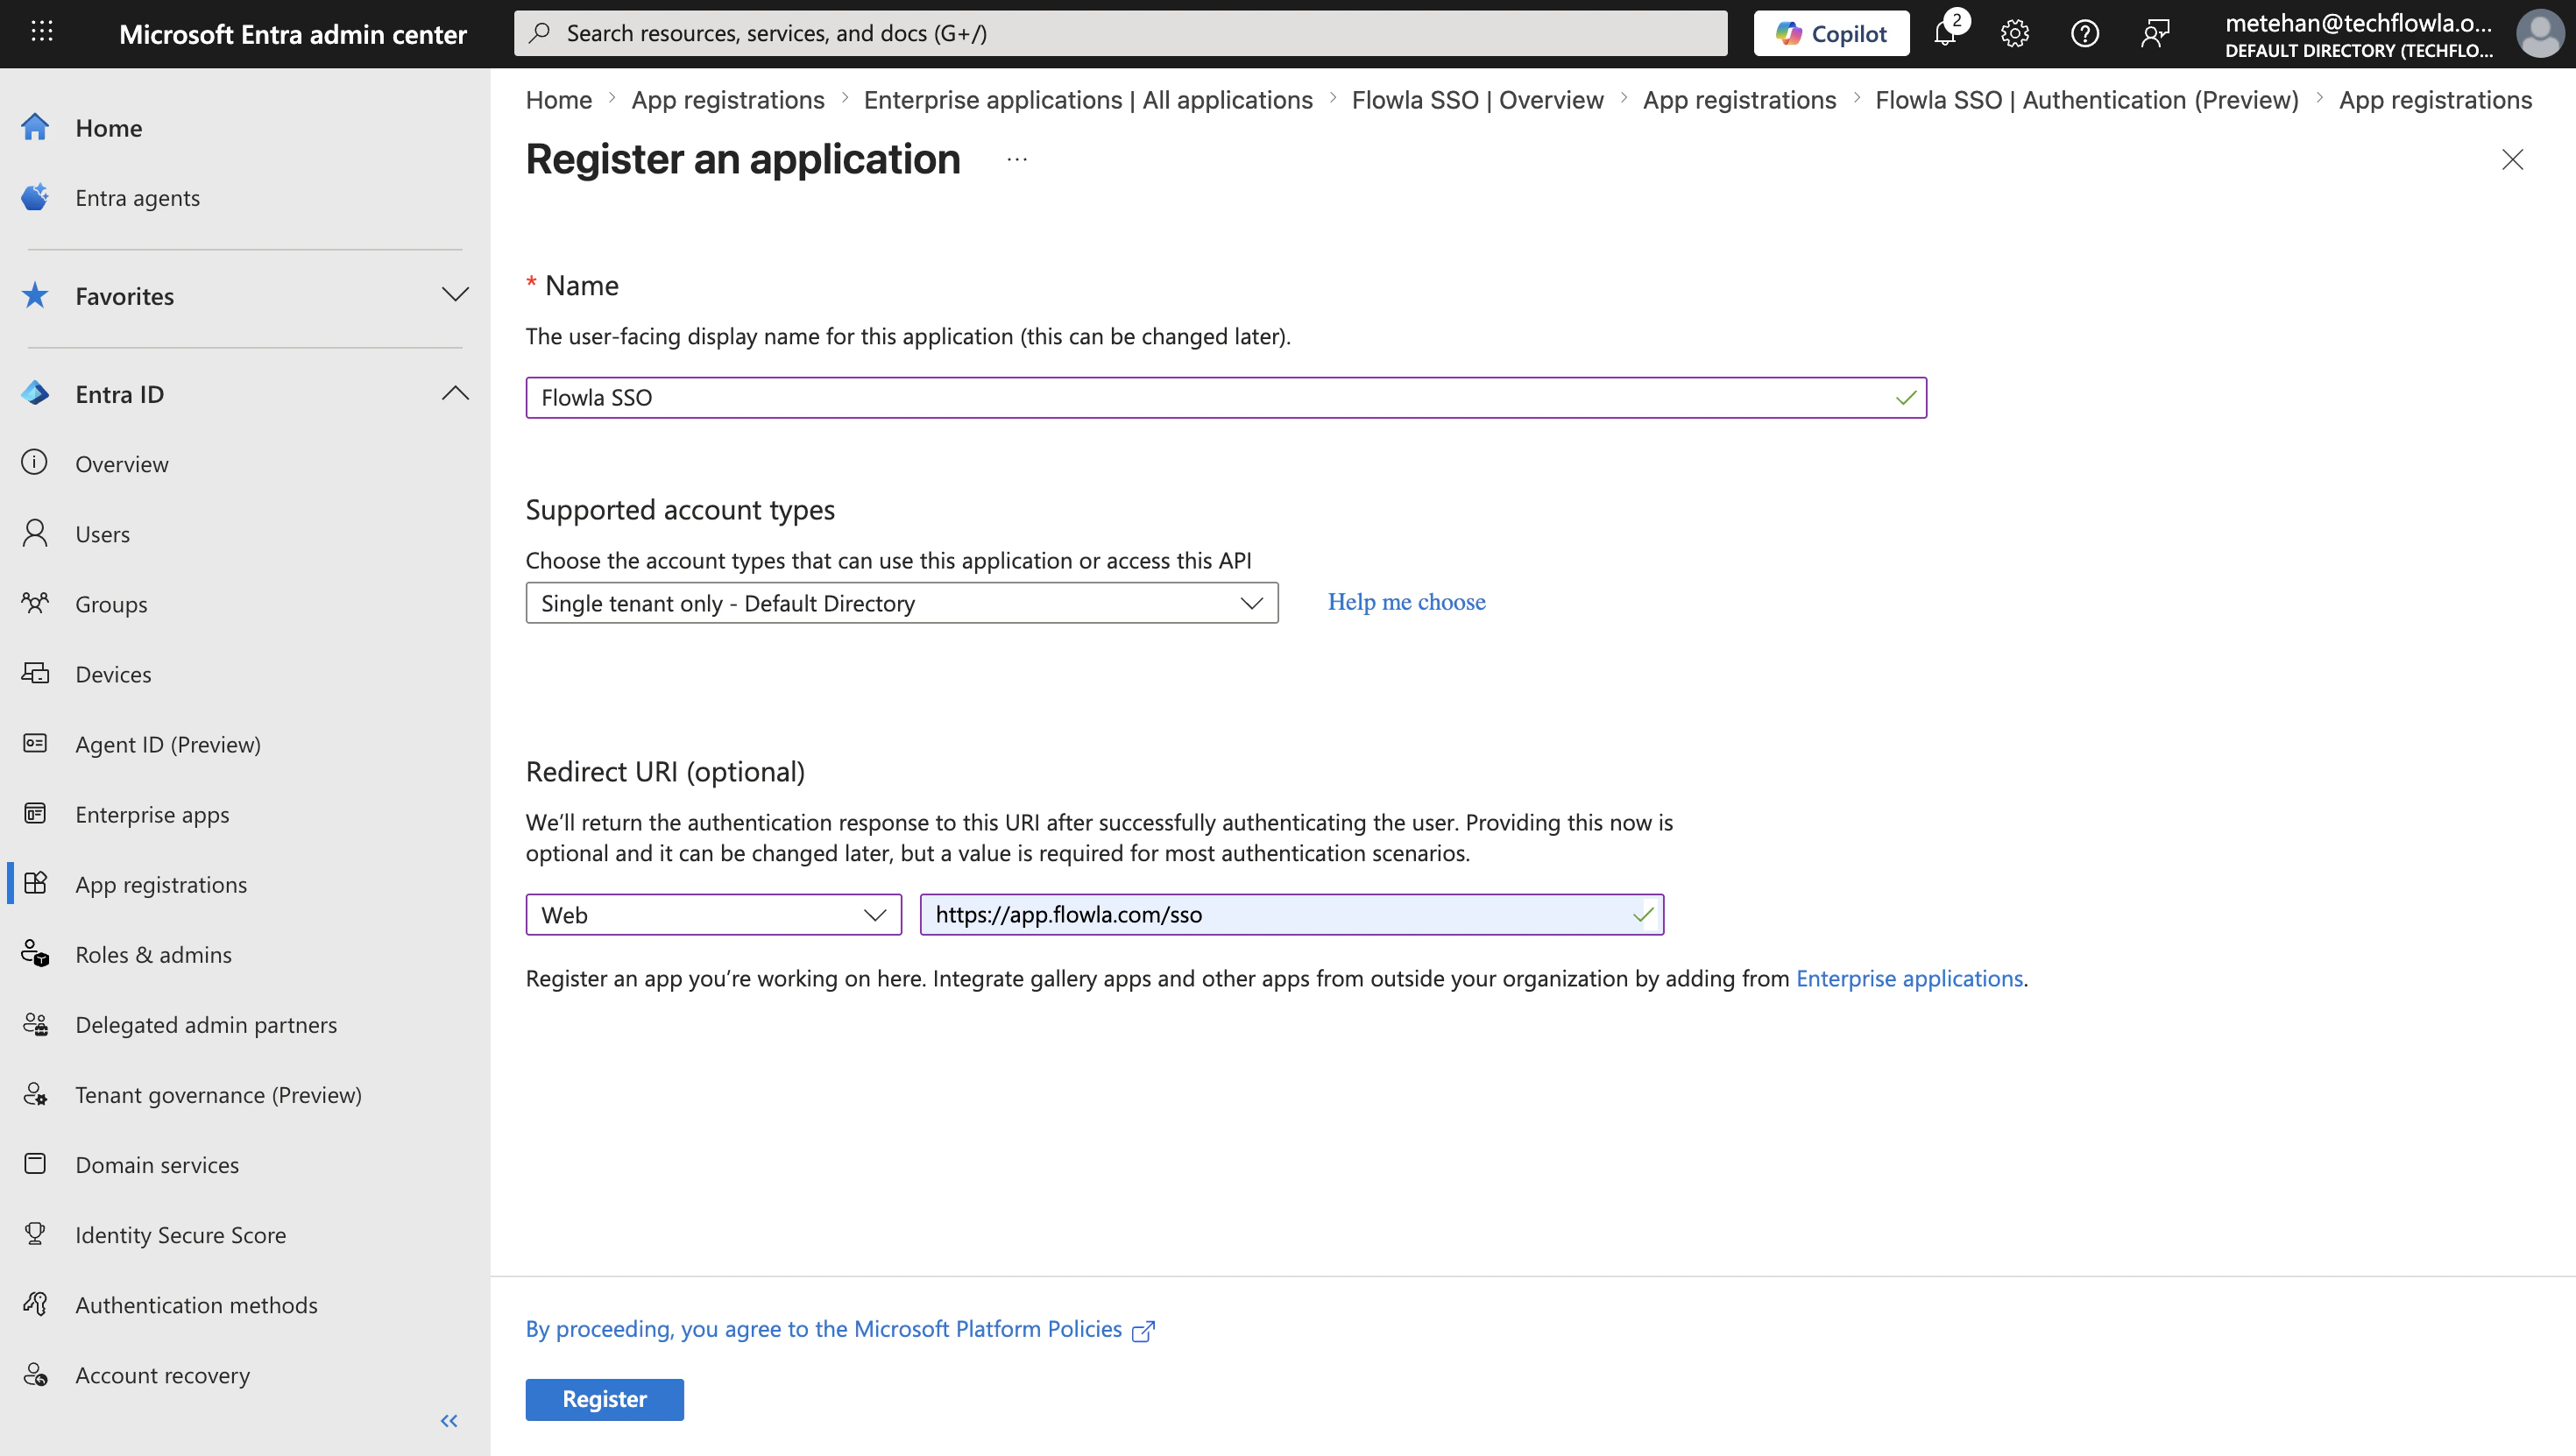
Sign in to the Microsoft Entra admin center as at least a Cloud Application Administrator. Browse to **Entra ID → App registrations → New registration**.
Fill in the following:
* **Name**: e.g. "Flowla SSO"
* **Supported account types**: select the appropriate option for your organization
* **Platform type**: Web
* **Redirect URI**: `https://app.flowla.com/sso`
Click **Register**.
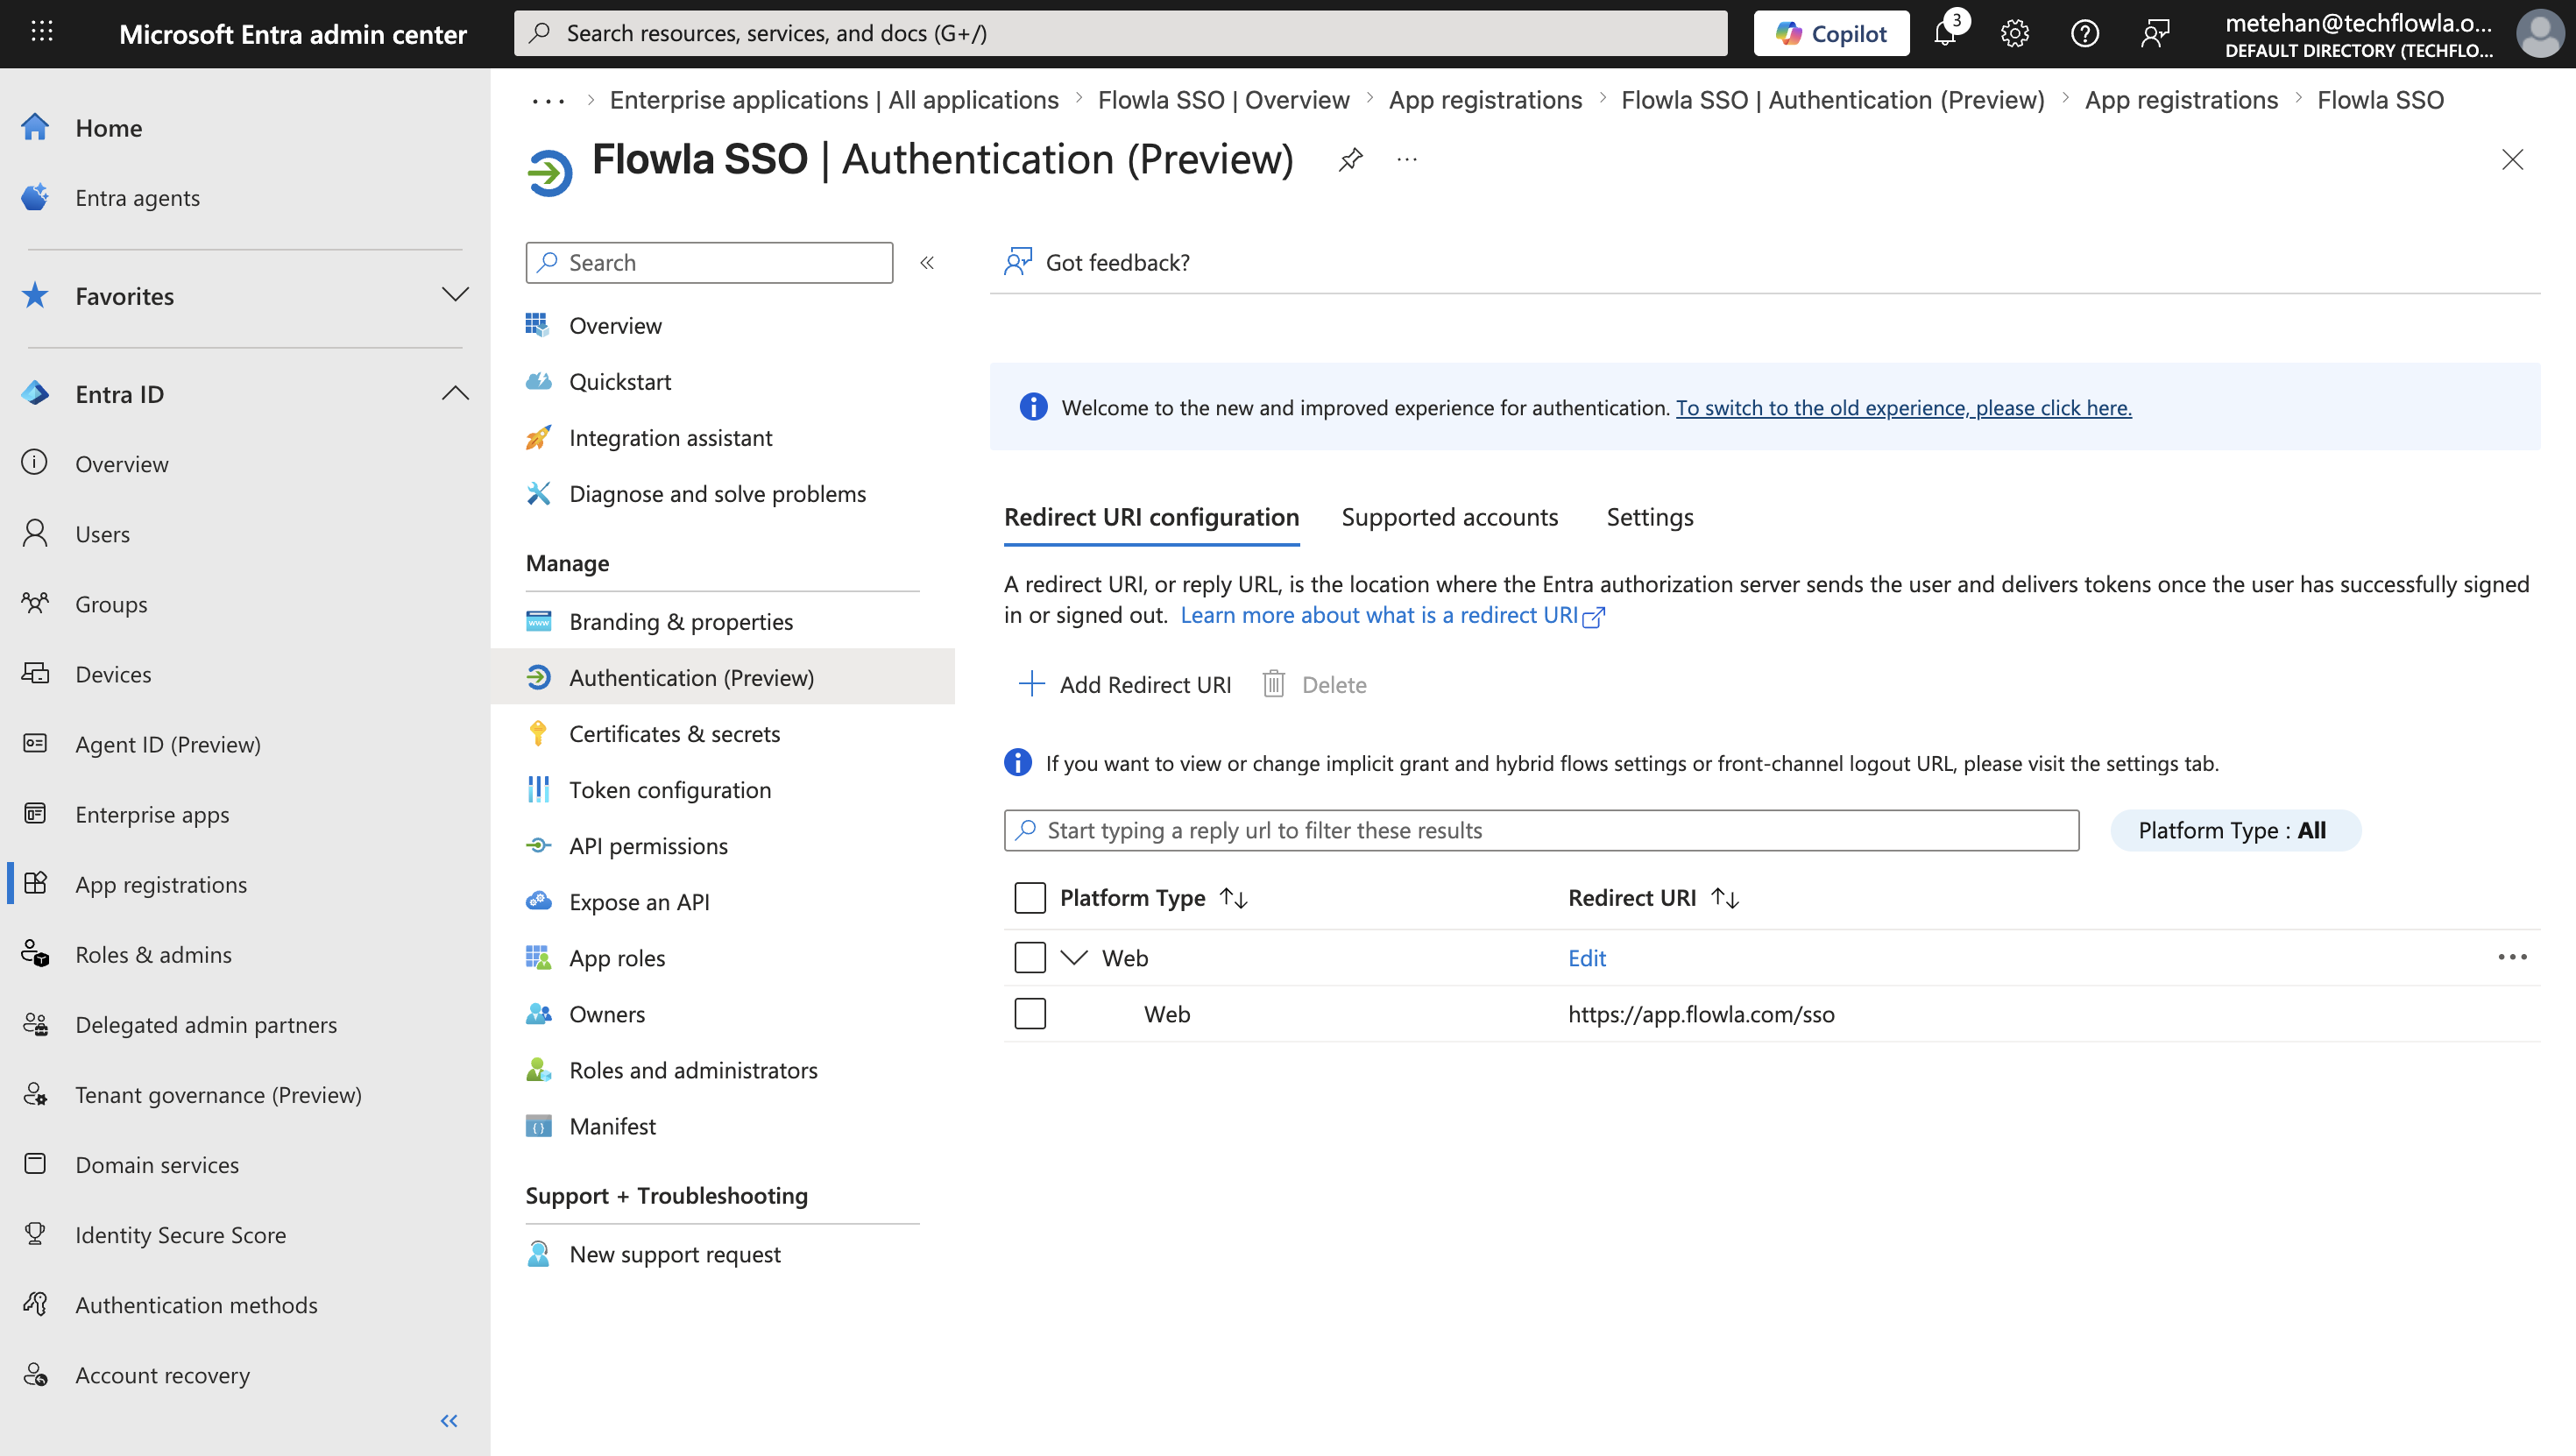
 In your app registration, navigate to **Authentication**. Verify your redirect URIs are correctly configured under the **Web** platform — this enables the standard Authorization Code flow.
 Navigate to **Certificates & secrets** and select **New client secret**. Add a description, select an expiration period, then click **Add**.
Copy the secret value immediately — it cannot be shown again.
Protect your Client Secret Value by keeping it confidential. Avoid sharing it in public repositories, forums, or unencrypted channels.
Navigate to **Certificates & secrets** and select **New client secret**. Add a description, select an expiration period, then click **Add**.
Copy the secret value immediately — it cannot be shown again.
Protect your Client Secret Value by keeping it confidential. Avoid sharing it in public repositories, forums, or unencrypted channels.

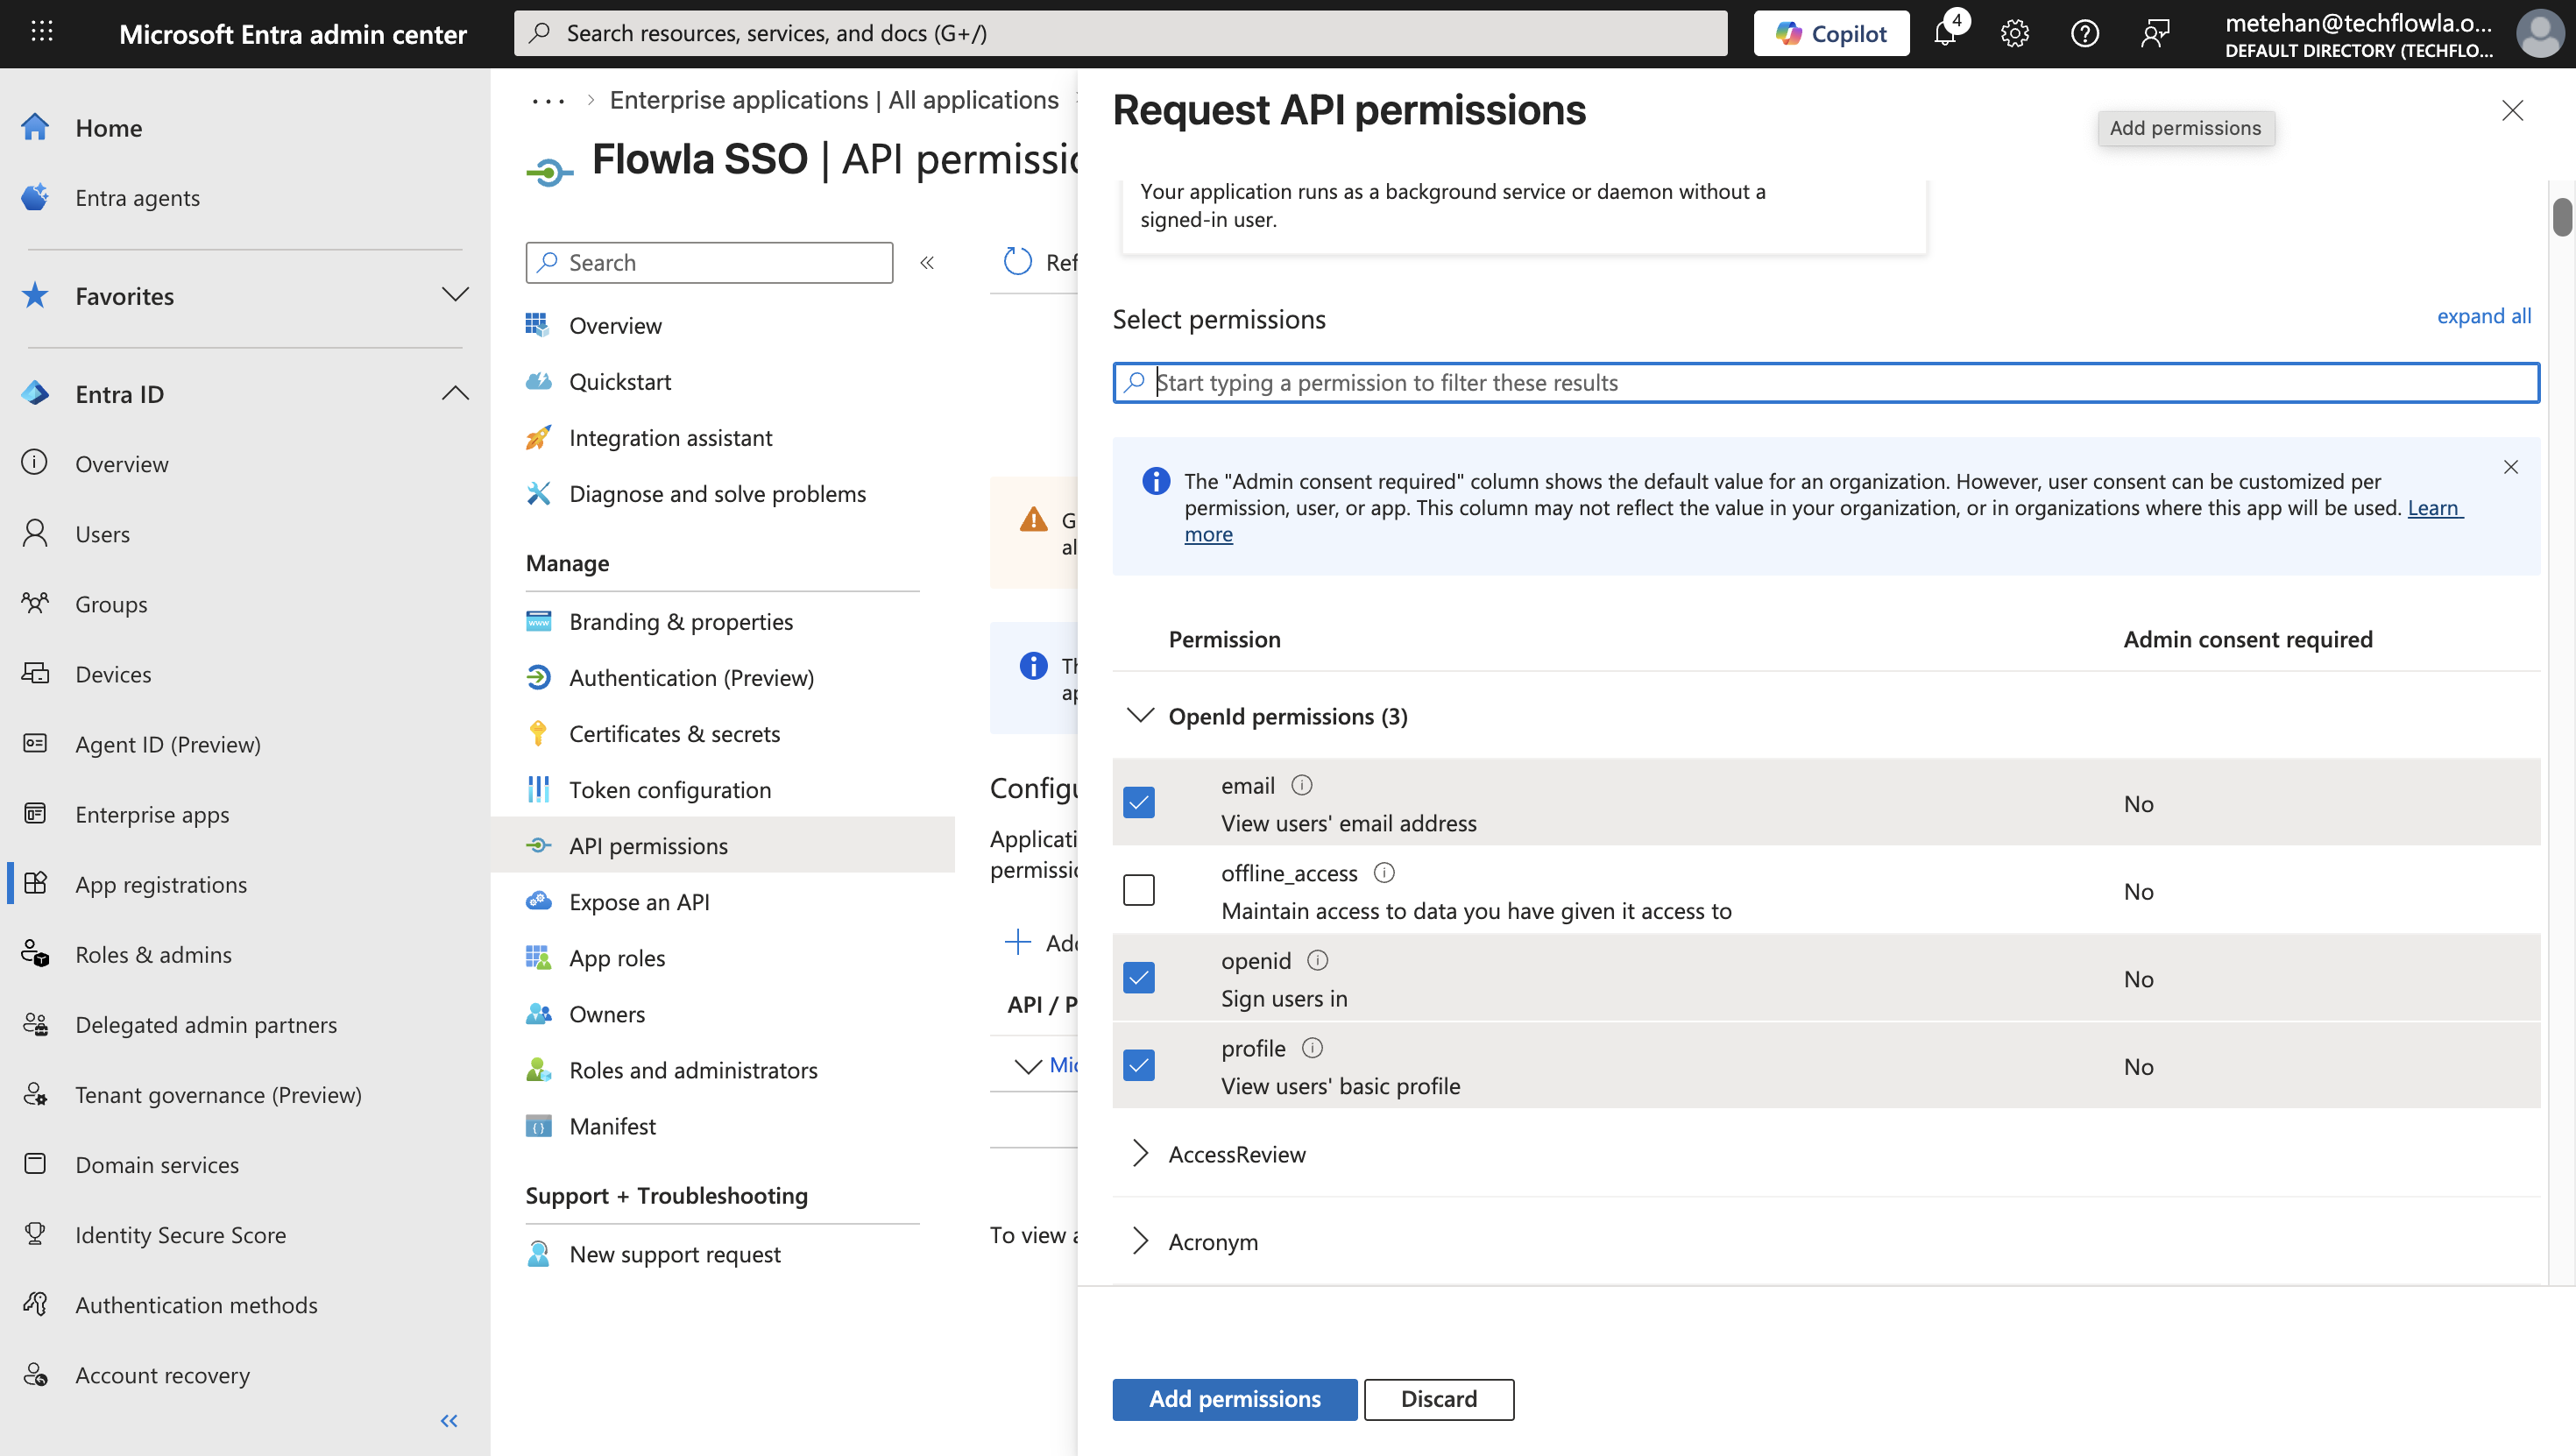
 Navigate to **API permissions → Add a permission → Microsoft Graph → Delegated permissions**. Search for and add:
* `openid` — required for OIDC authentication
* `profile` — access to the user's basic profile information
* `email` — access to the user's email address
Click **Add permissions**.
Navigate to **API permissions → Add a permission → Microsoft Graph → Delegated permissions**. Search for and add:
* `openid` — required for OIDC authentication
* `profile` — access to the user's basic profile information
* `email` — access to the user's email address
Click **Add permissions**.
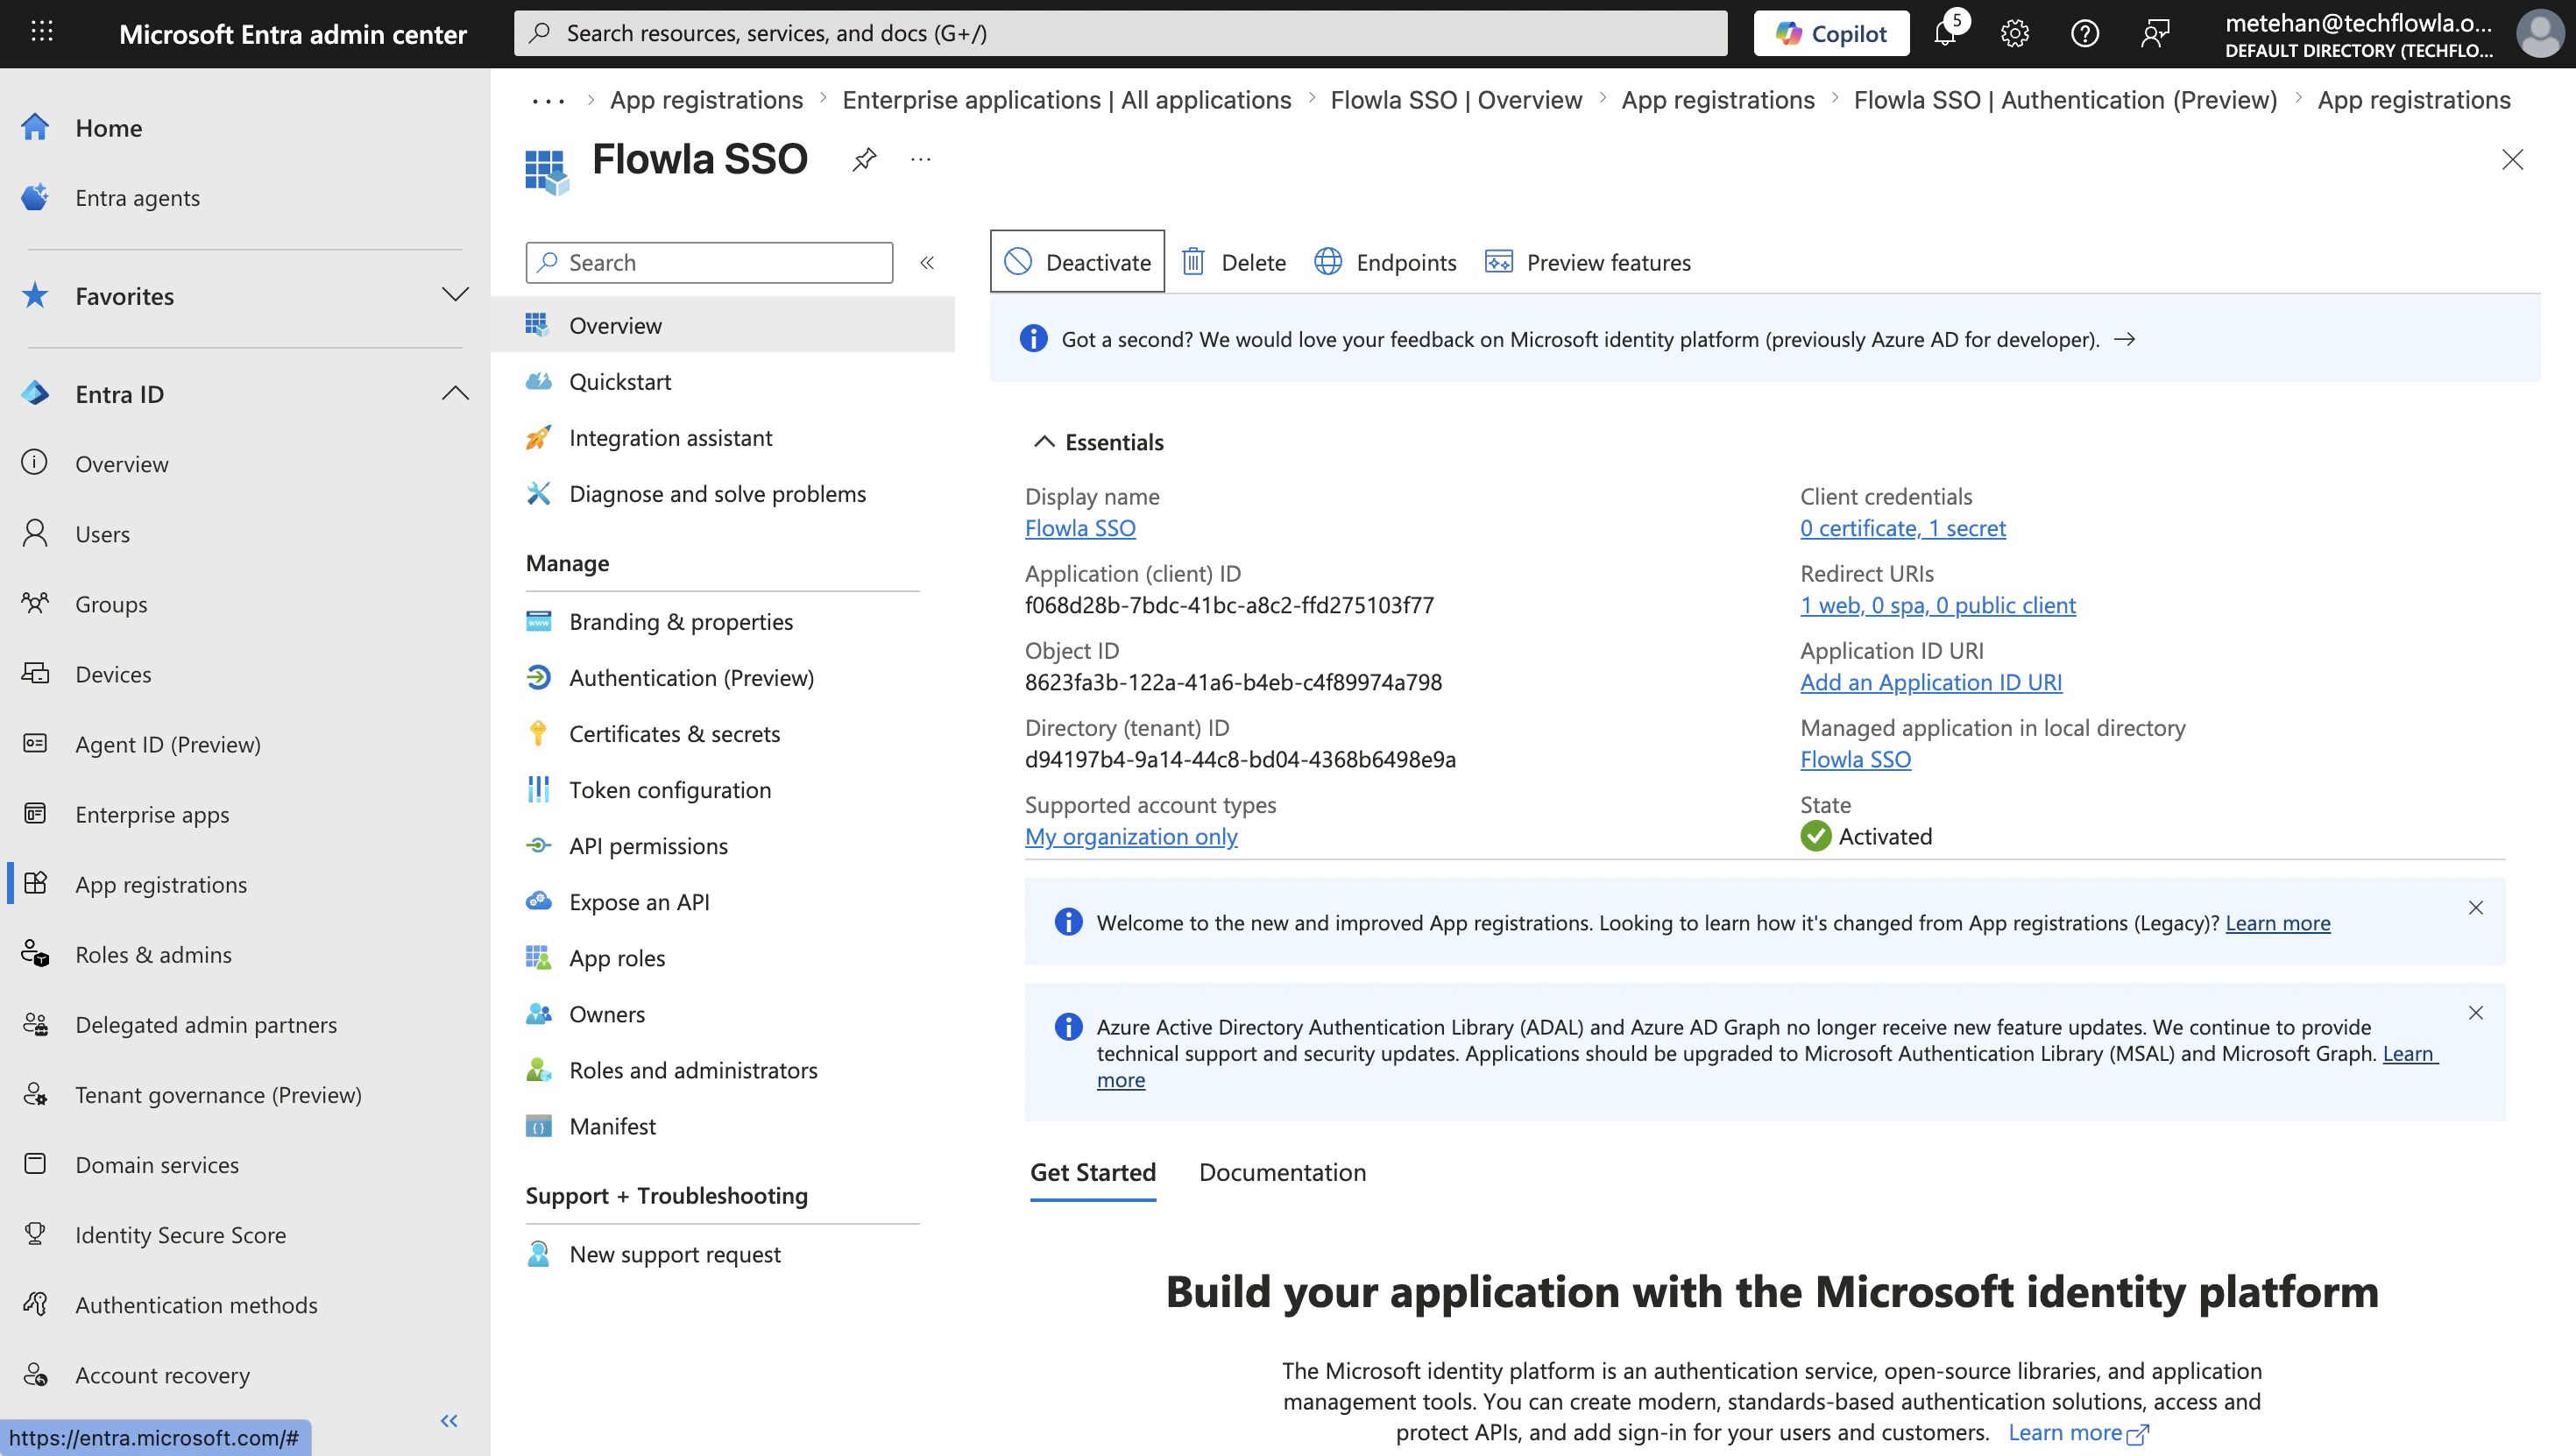
 From the **Overview** page, note the following — you'll need these in the next step:
* **Application (client) ID**: your app's unique identifier
* **Directory (tenant) ID**: used to build your Identity Provider URL: `https://login.microsoftonline.com/{tenant}/v2.0/`
* **Client Secret Value**: the value you copied in Step 3
From the **Overview** page, note the following — you'll need these in the next step:
* **Application (client) ID**: your app's unique identifier
* **Directory (tenant) ID**: used to build your Identity Provider URL: `https://login.microsoftonline.com/{tenant}/v2.0/`
* **Client Secret Value**: the value you copied in Step 3
 In Flowla, go to **Settings → Security & Permissions** and click **Enable SSO**. Fill in the form with the values from Entra ID:
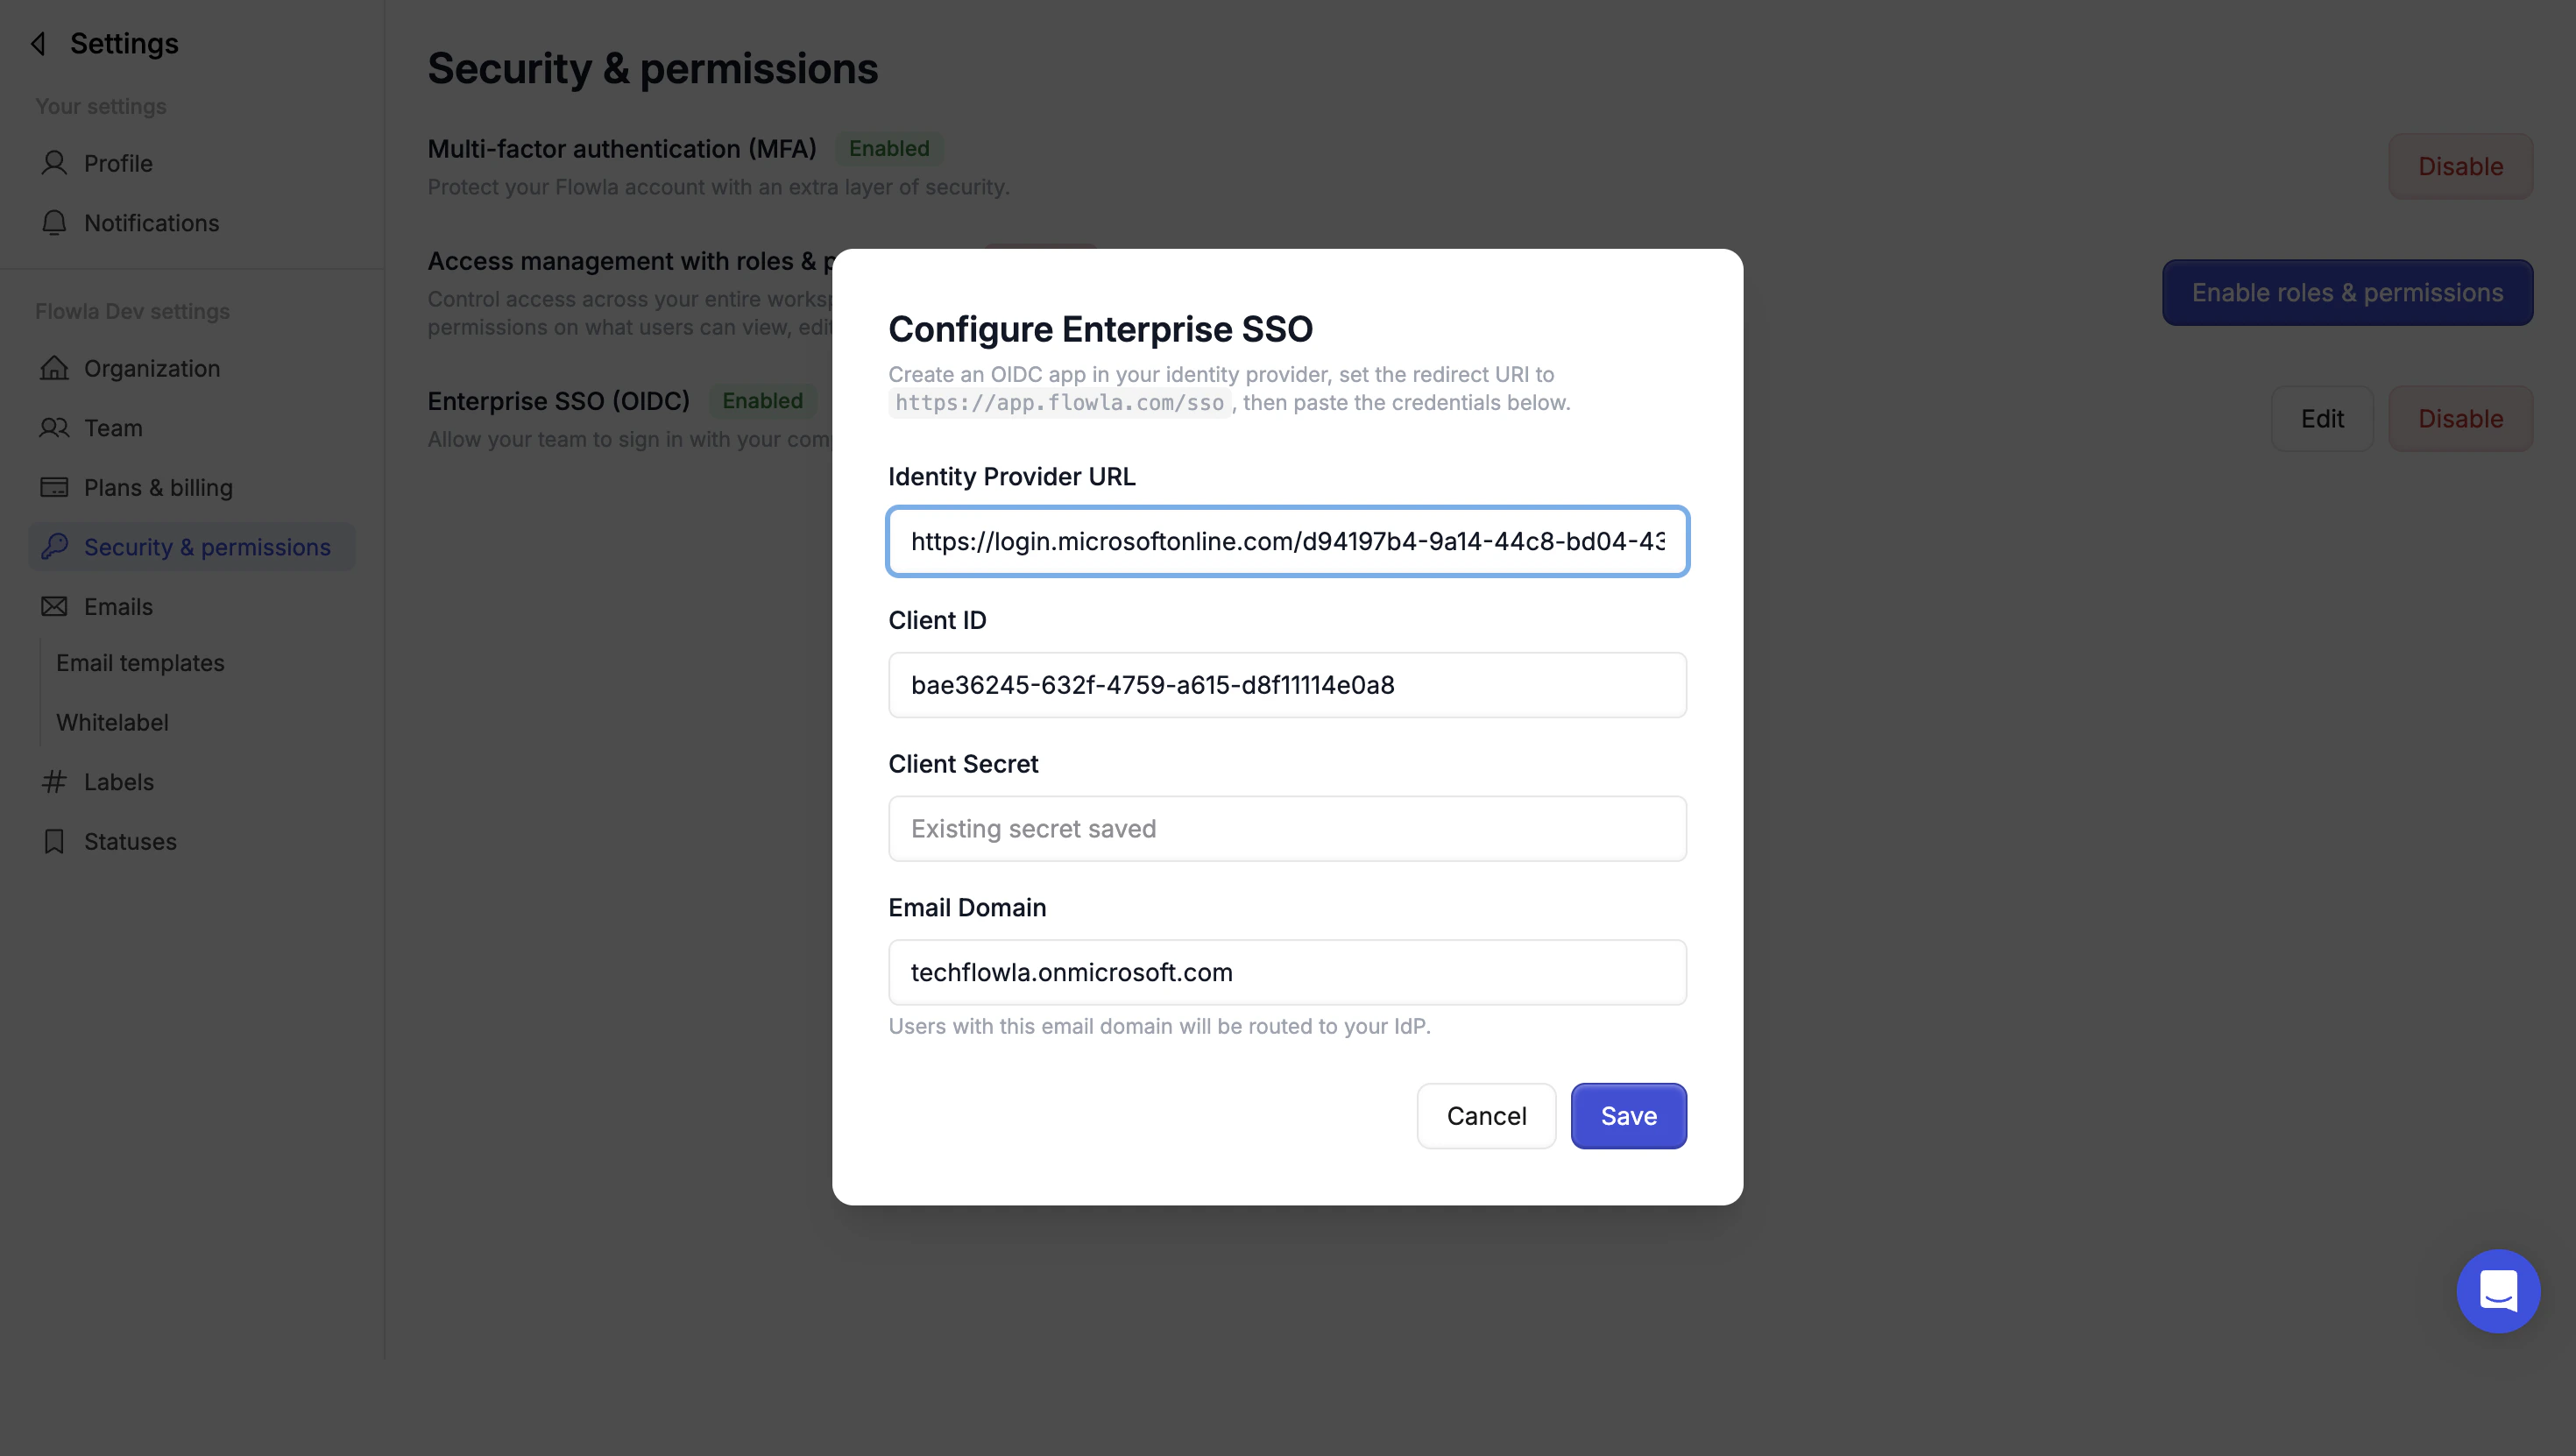 Paste `https://login.microsoftonline.com/{tenant}/v2.0/` (replace `{tenant}` with your Directory tenant ID)
Paste the Application (client) ID
Paste the Client Secret Value (not the secret ID)
Enter the email domain your organization uses (e.g. `yourcompany.com`). Users with this domain will be required to sign in via SSO.
Click **Save** to activate SSO. Open a new browser session and verify you can sign in via Entra ID.
Official guide for configuring OIDC SSO for a custom non-gallery application.
Paste `https://login.microsoftonline.com/{tenant}/v2.0/` (replace `{tenant}` with your Directory tenant ID)
Paste the Application (client) ID
Paste the Client Secret Value (not the secret ID)
Enter the email domain your organization uses (e.g. `yourcompany.com`). Users with this domain will be required to sign in via SSO.
Click **Save** to activate SSO. Open a new browser session and verify you can sign in via Entra ID.
Official guide for configuring OIDC SSO for a custom non-gallery application.