Prerequisites
- Microsoft Entra user account with one of the following roles: Cloud Application Administrator, Application Administrator, Owner of the service principal
- Admin access to your Flowla workspace
Register your application
Sign in to the Microsoft Entra admin center as at least a Cloud Application Administrator. Browse to Entra ID → App registrations → New registration.Fill in the following: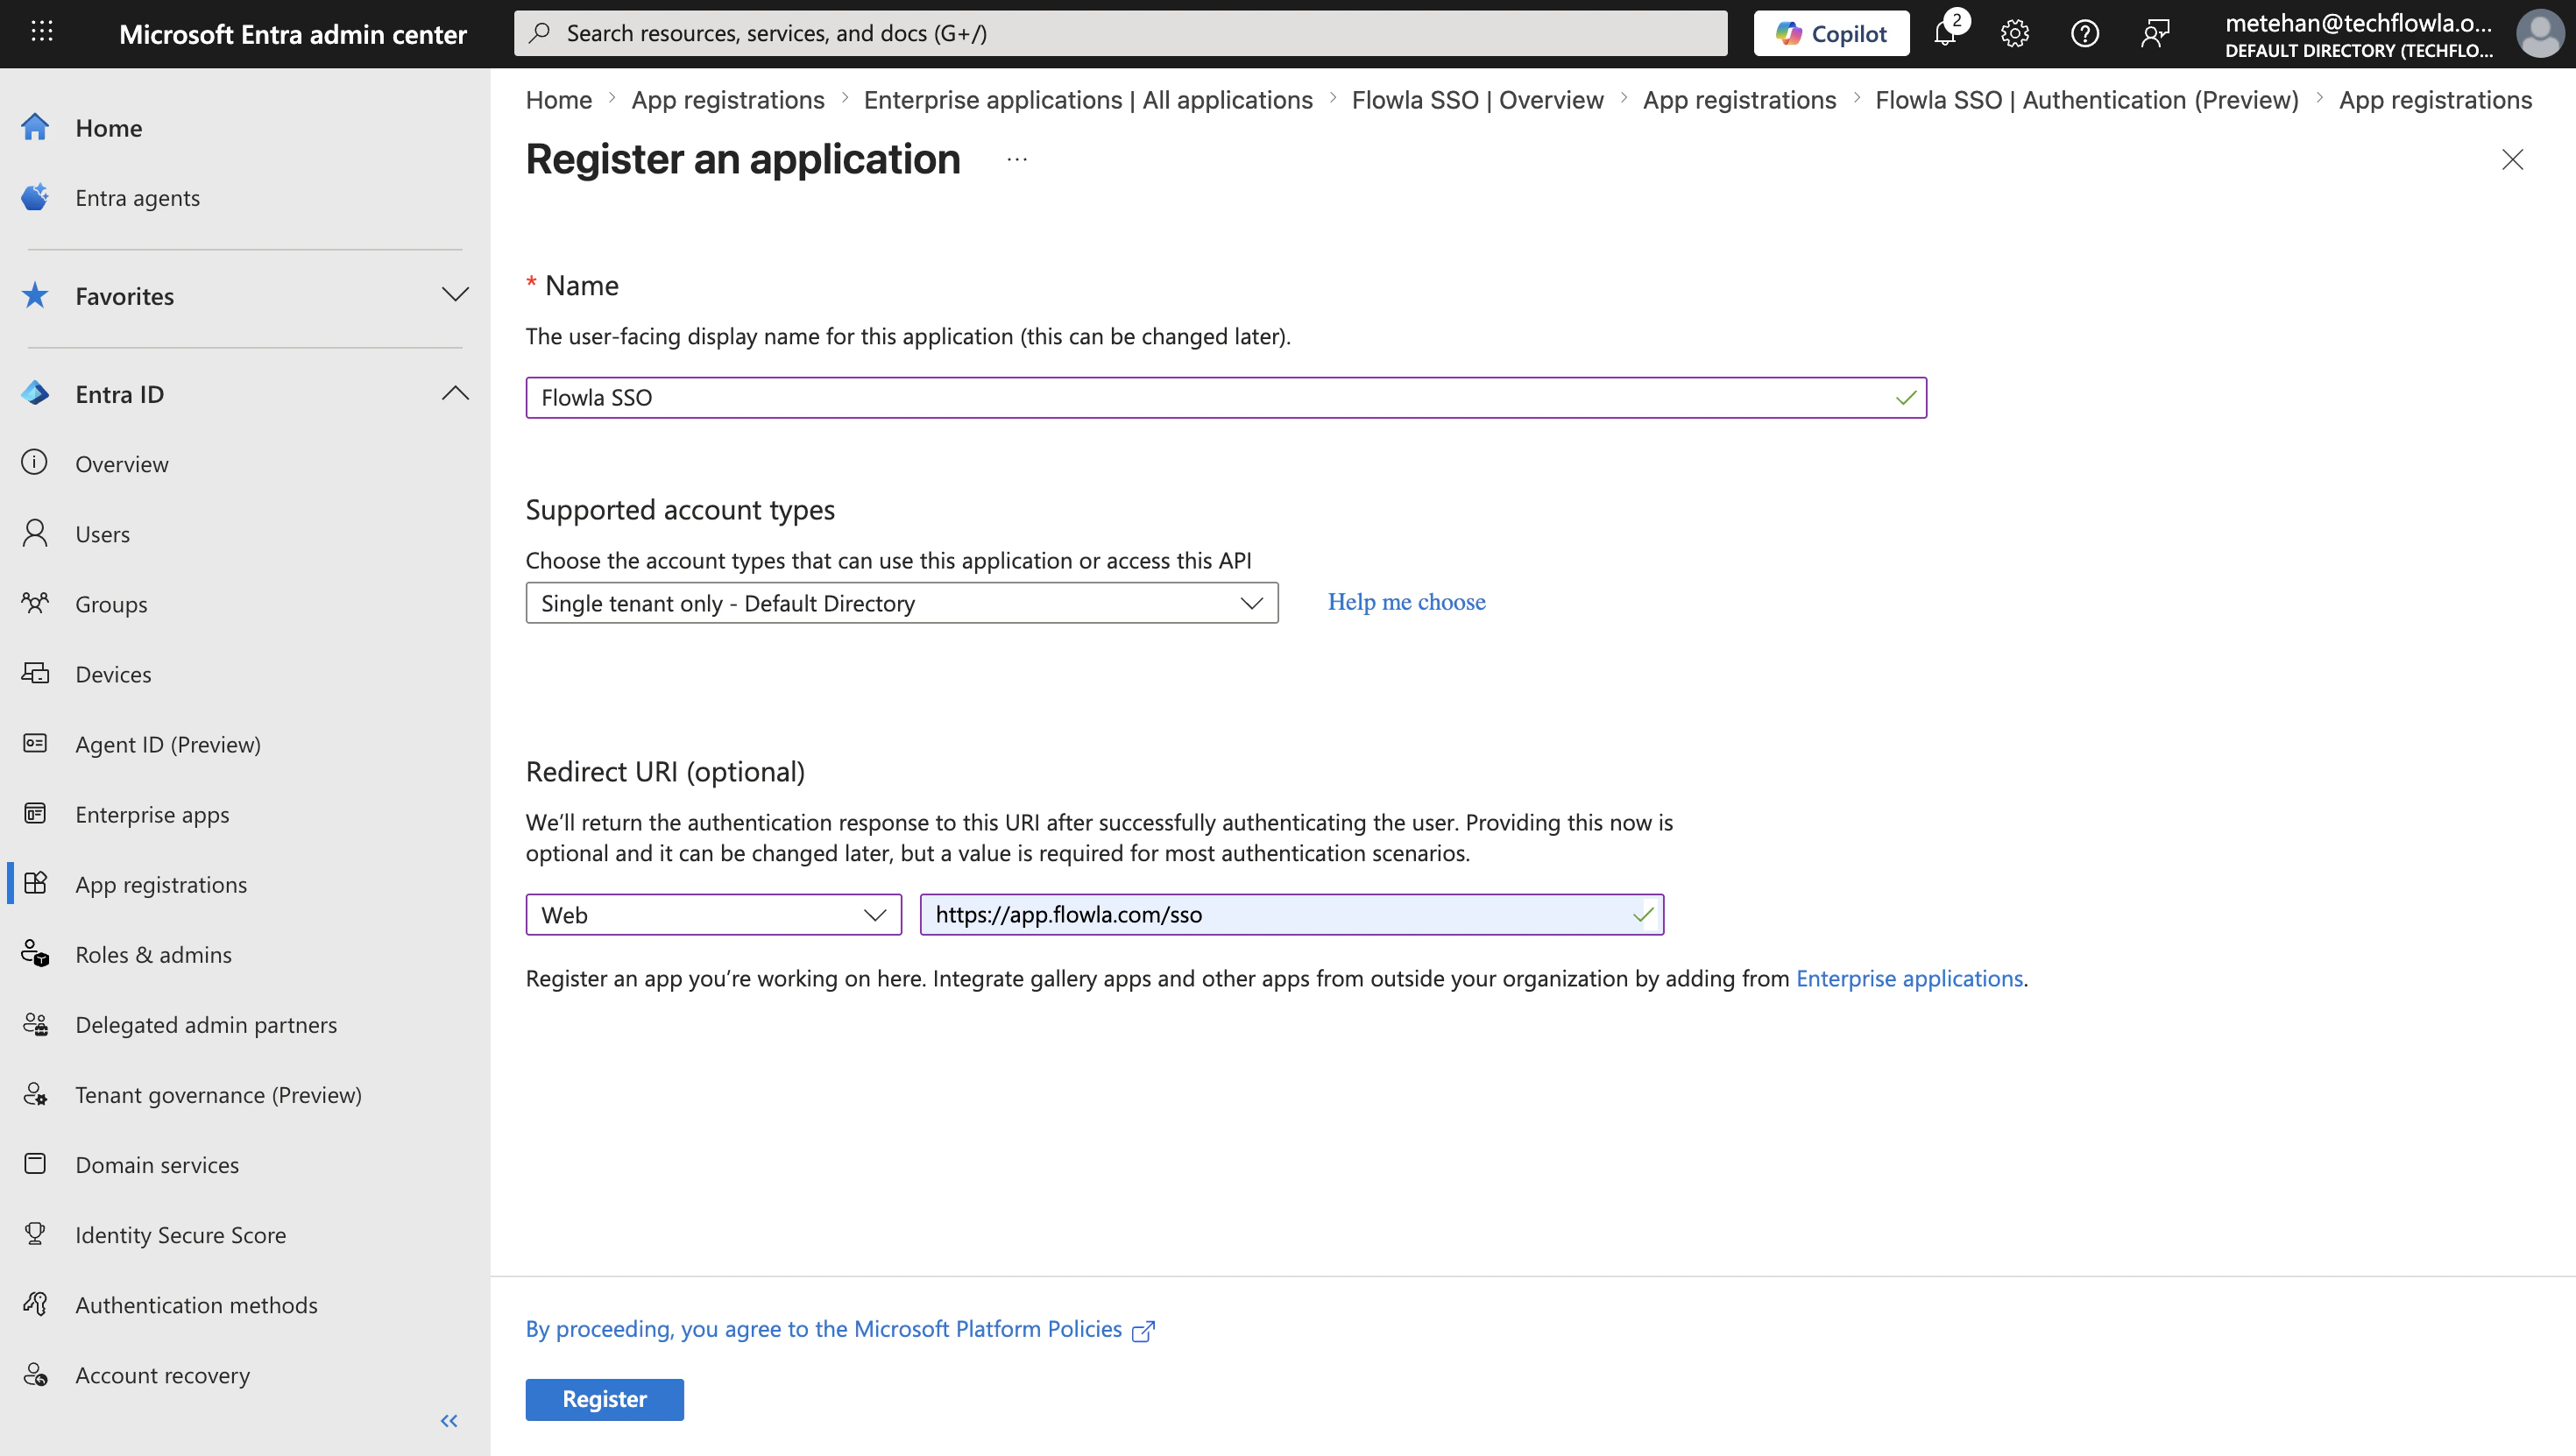
- Name: e.g. “Flowla SSO”
- Supported account types: select the appropriate option for your organization
- Platform type: Web
- Redirect URI:
https://app.flowla.com/sso
Configure authentication settings
In your app registration, navigate to Authentication. Verify your redirect URIs are correctly configured under the Web platform — this enables the standard Authorization Code flow.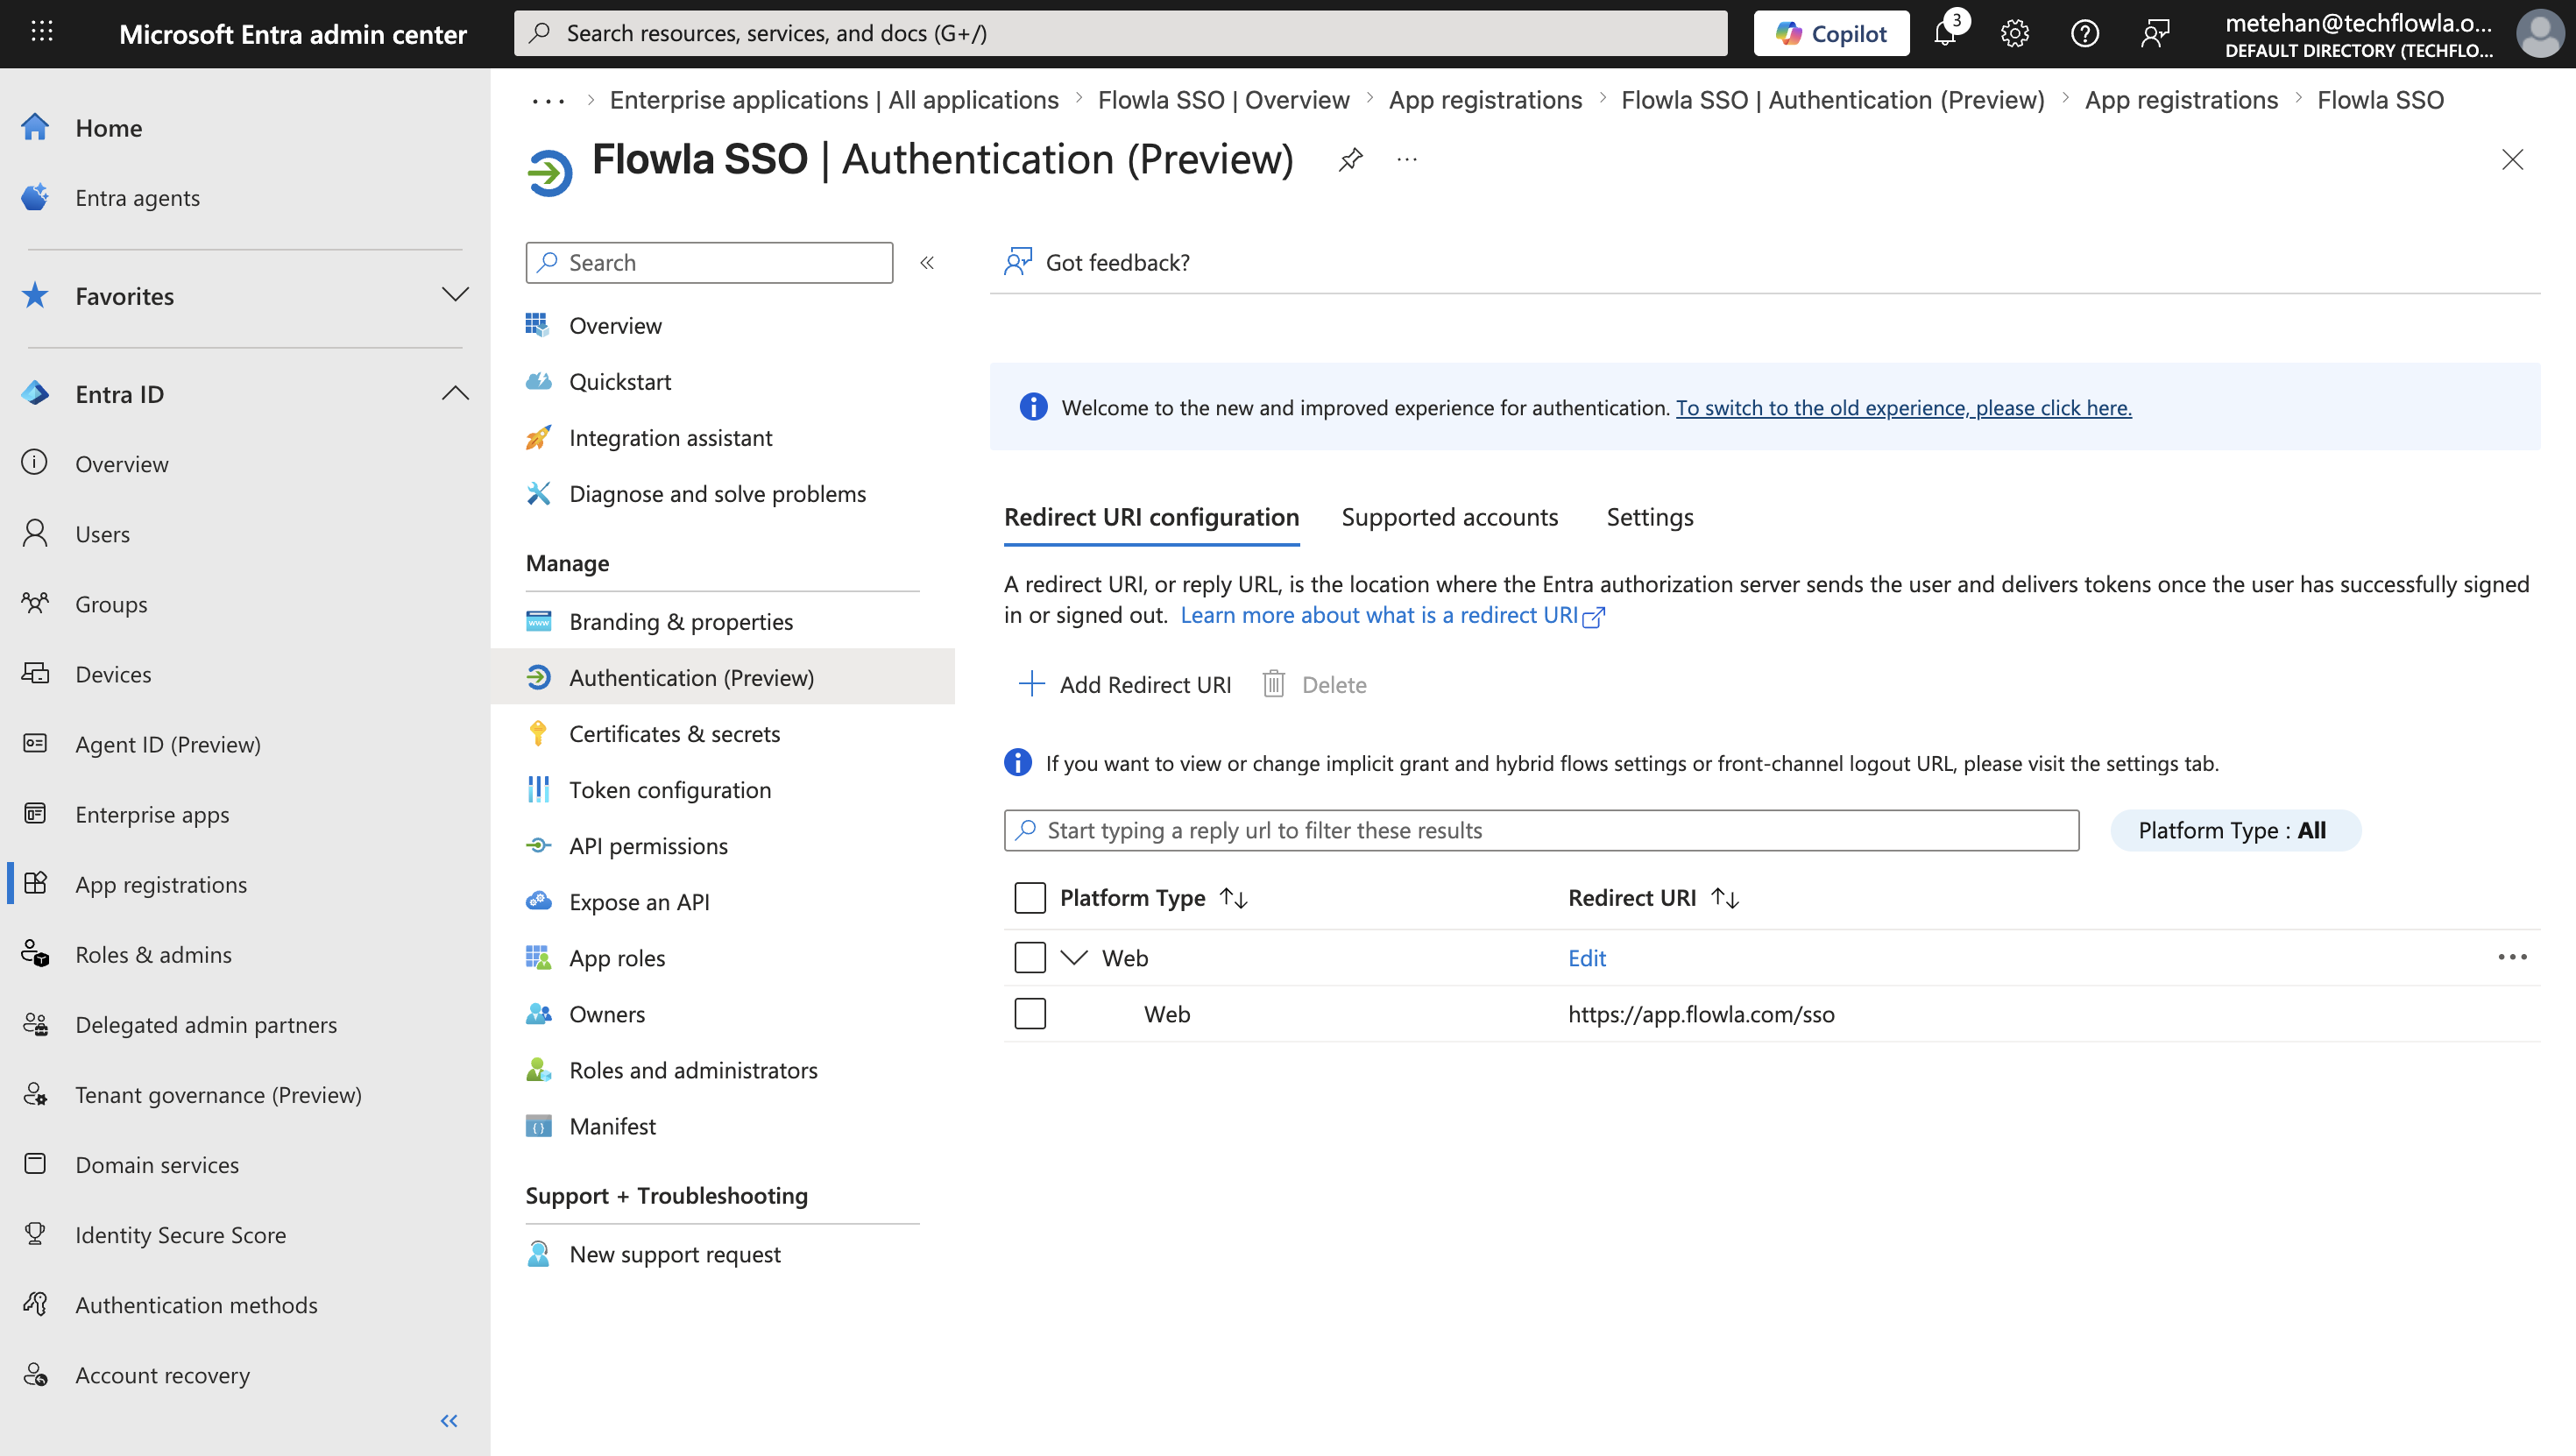
Configure client credentials
Navigate to Certificates & secrets and select New client secret. Add a description, select an expiration period, then click Add.Copy the secret value immediately — it cannot be shown again.

Configure API permissions
Navigate to API permissions → Add a permission → Microsoft Graph → Delegated permissions. Search for and add: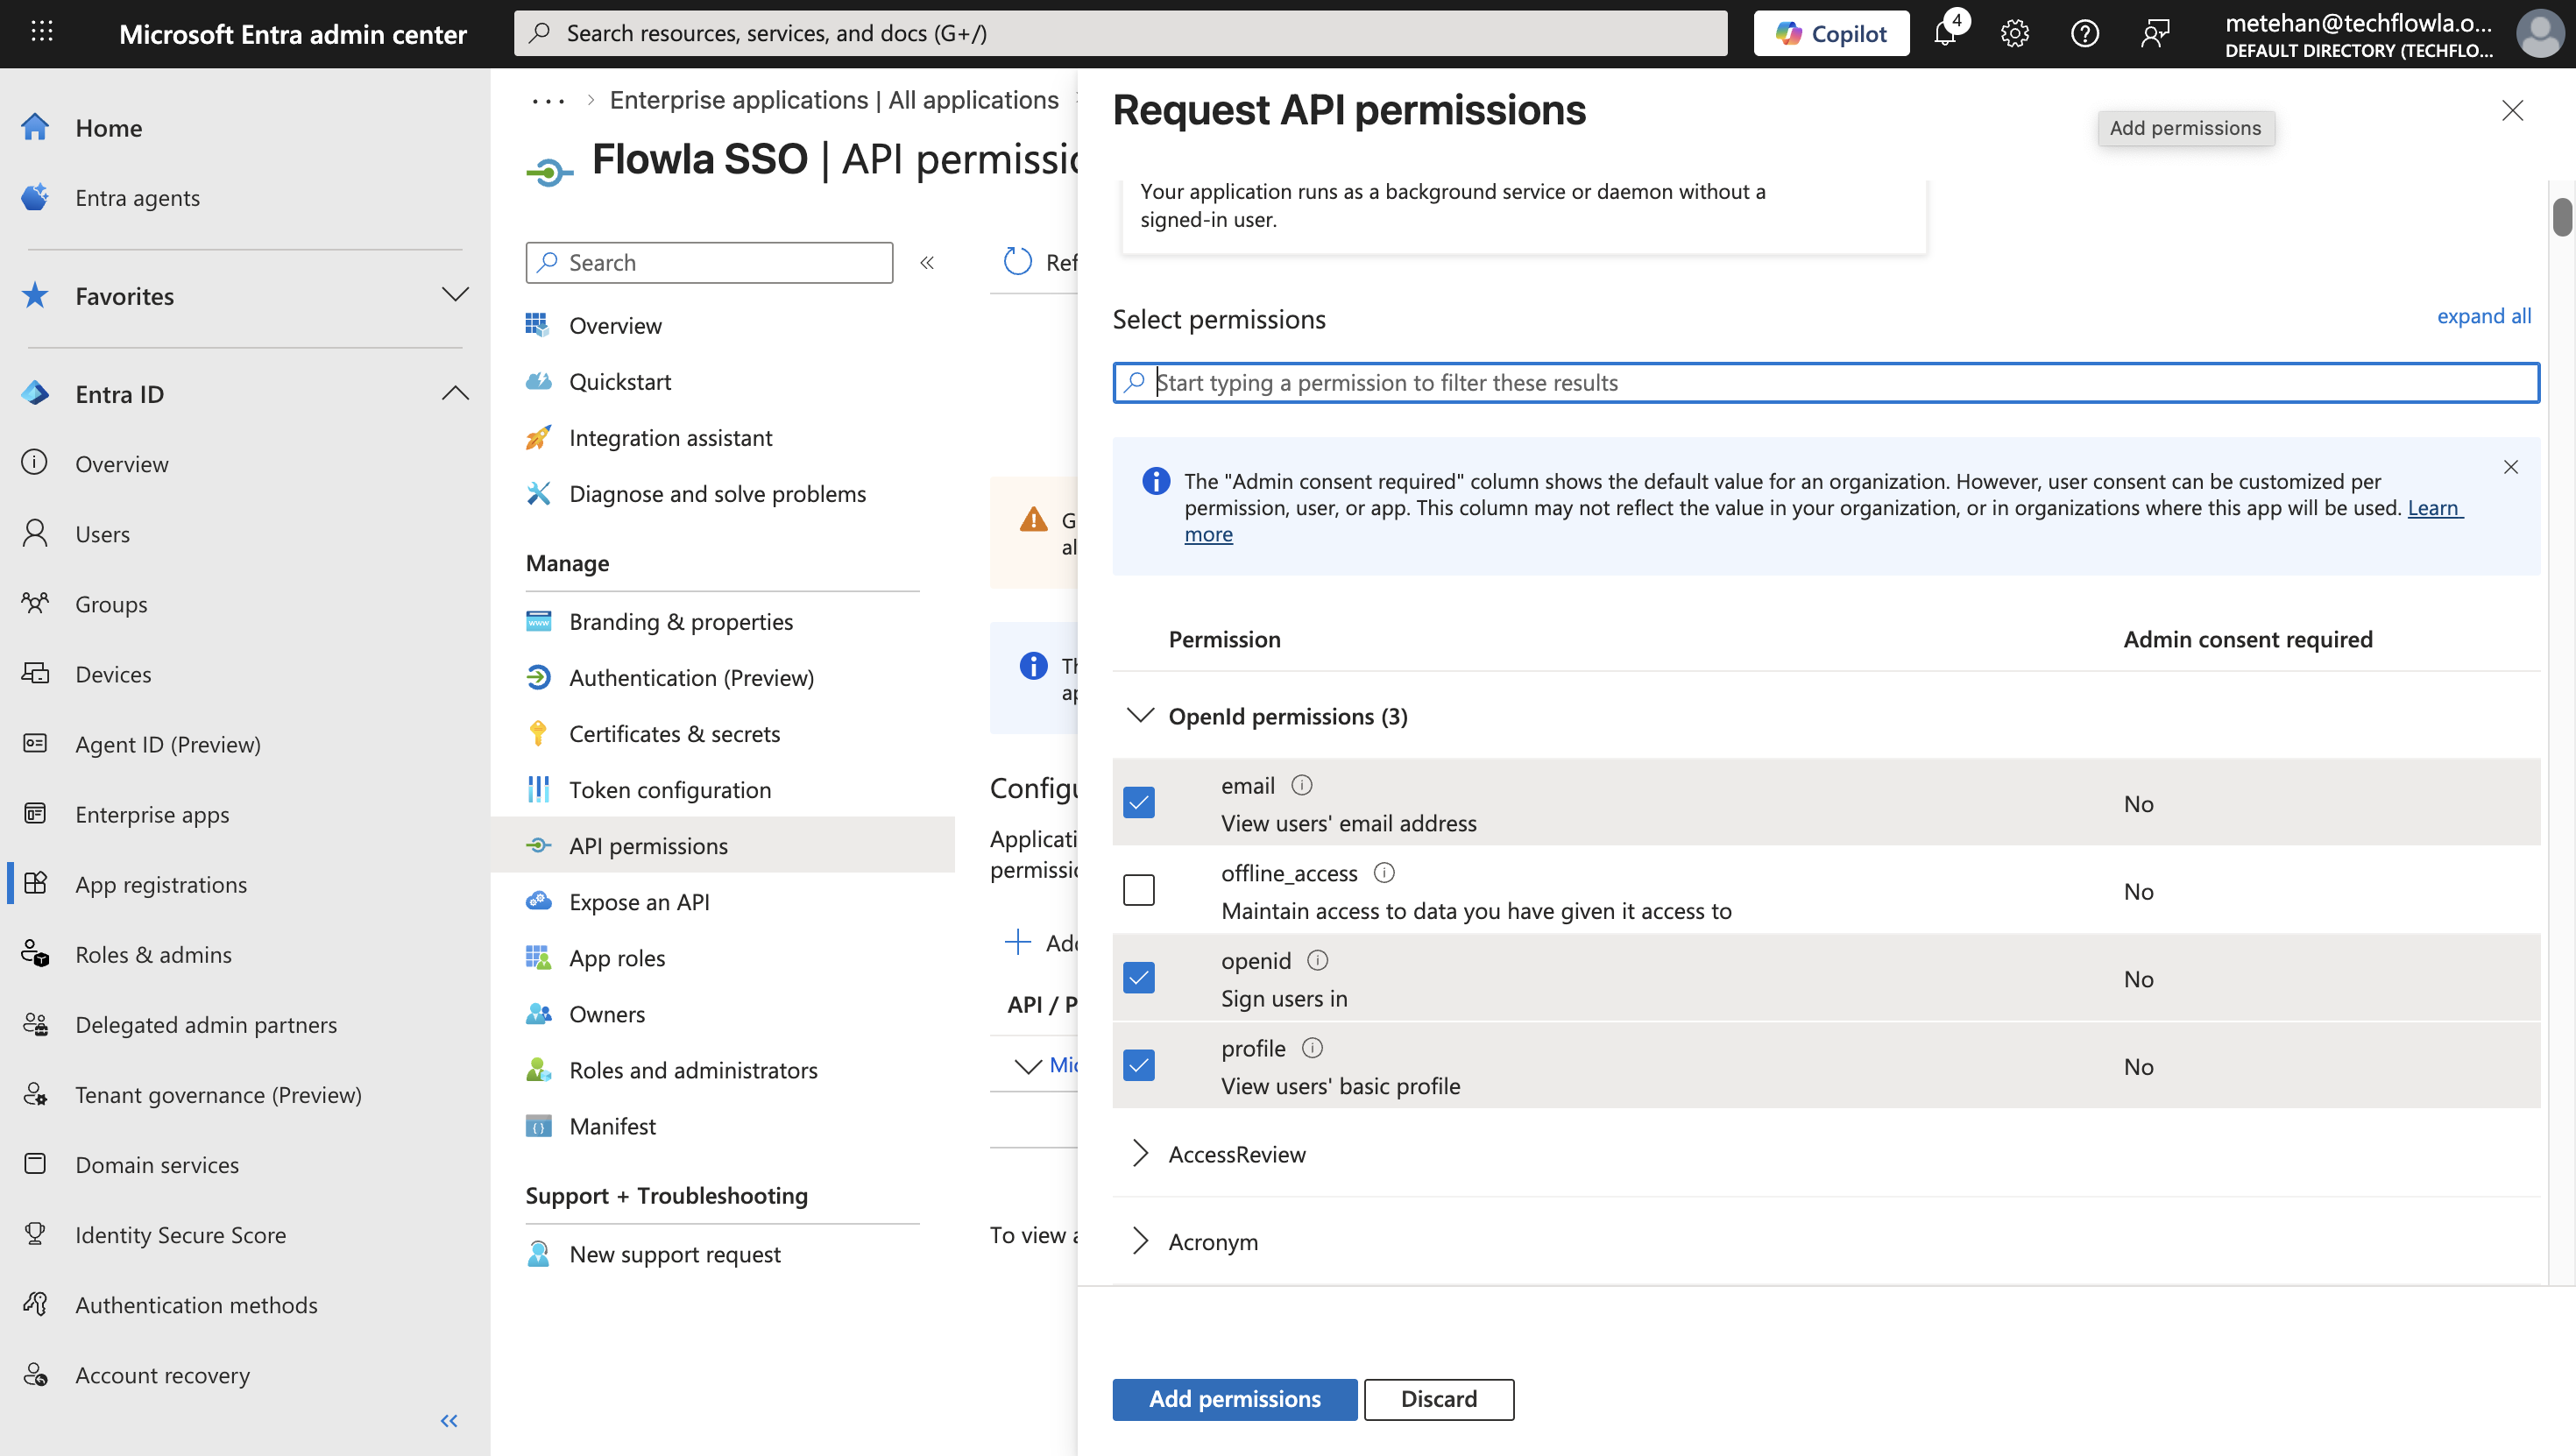
openid— required for OIDC authenticationprofile— access to the user’s basic profile informationemail— access to the user’s email address
Gather application details
From the Overview page, note the following — you’ll need these in the next step: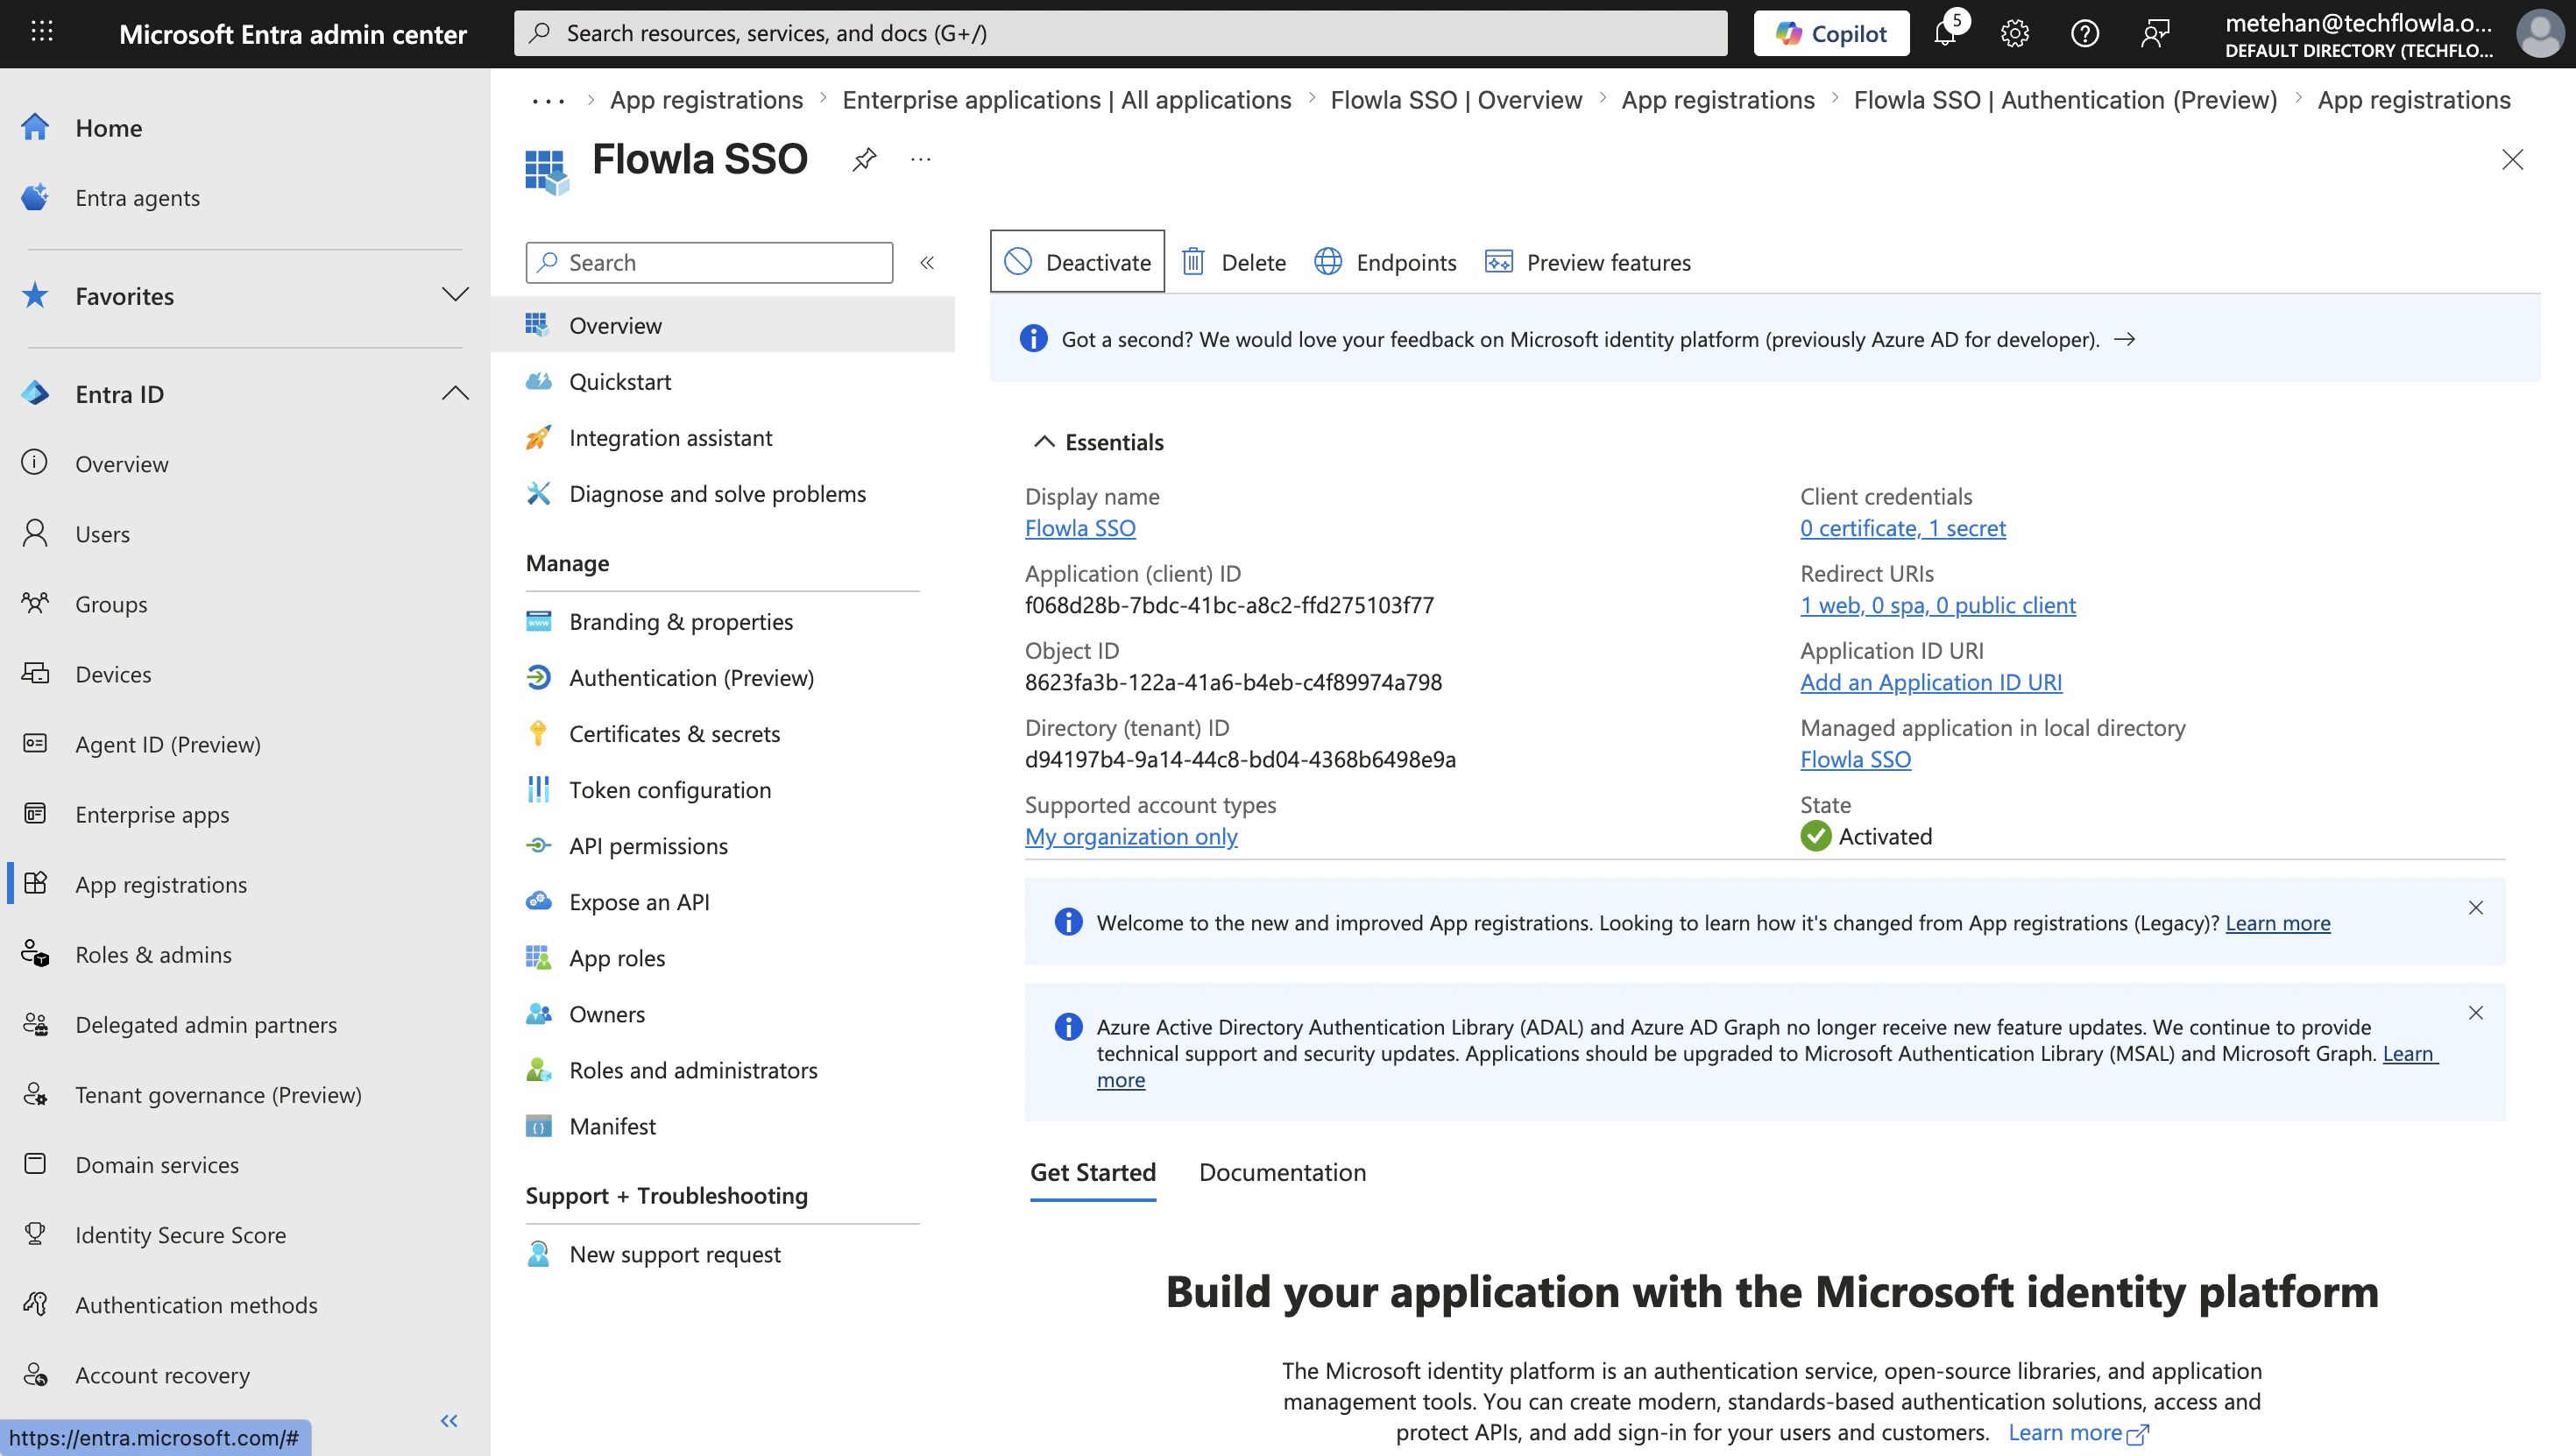
- Application (client) ID: your app’s unique identifier
- Directory (tenant) ID: used to build your Identity Provider URL:
https://login.microsoftonline.com/{tenant}/v2.0/ - Client Secret Value: the value you copied in Step 3
Enable SSO in Flowla
In Flowla, go to Settings → Security & Permissions and click Enable SSO. Fill in the form with the values from Entra ID: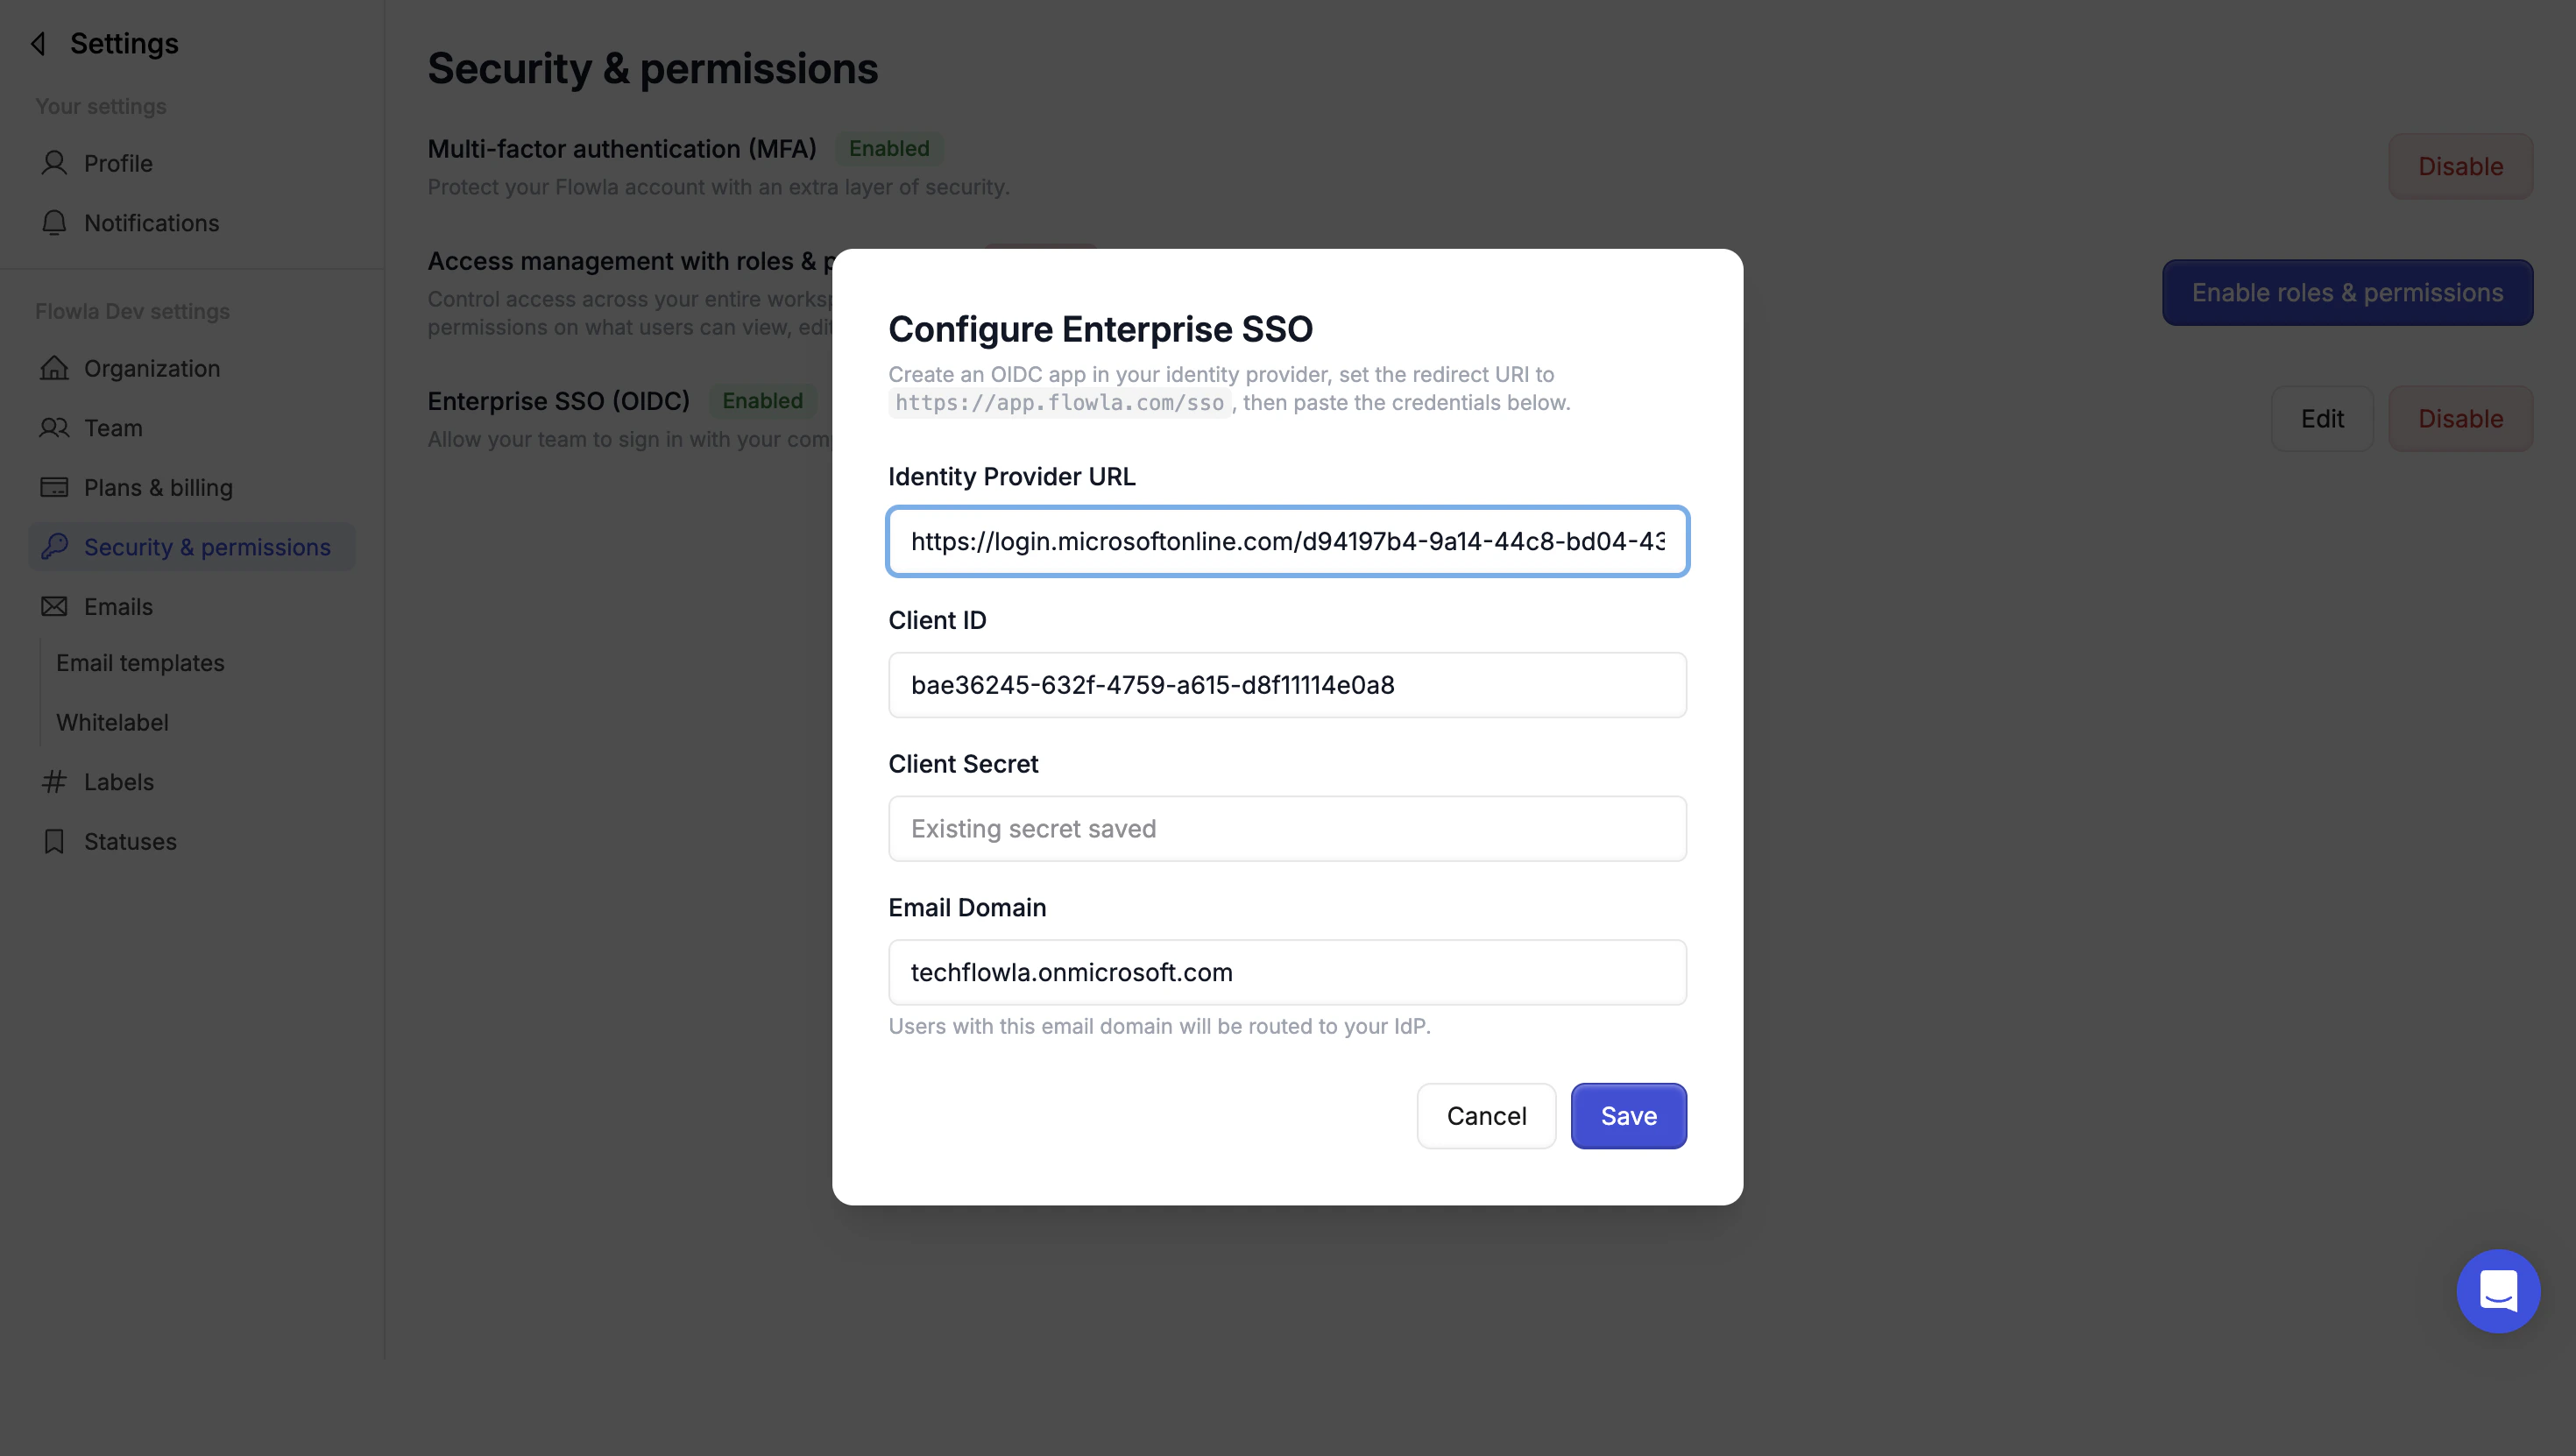
Enter your Identity Provider URL
Paste
https://login.microsoftonline.com/{tenant}/v2.0/ (replace {tenant} with your Directory tenant ID)Set your email domain
Enter the email domain your organization uses (e.g.
yourcompany.com). Users with this domain will be required to sign in via SSO.For more information, visit Microsoft Entra ID OIDC setup (non-gallery application)
Official guide for configuring OIDC SSO for a custom non-gallery application.