Prerequisites
- Admin access to your Okta account
- Admin access to your Flowla workspace
Step 1 — Create an App Integration in Okta
Sign in to your Okta Admin Console, then navigate to Applications → Applications and click Create App Integration.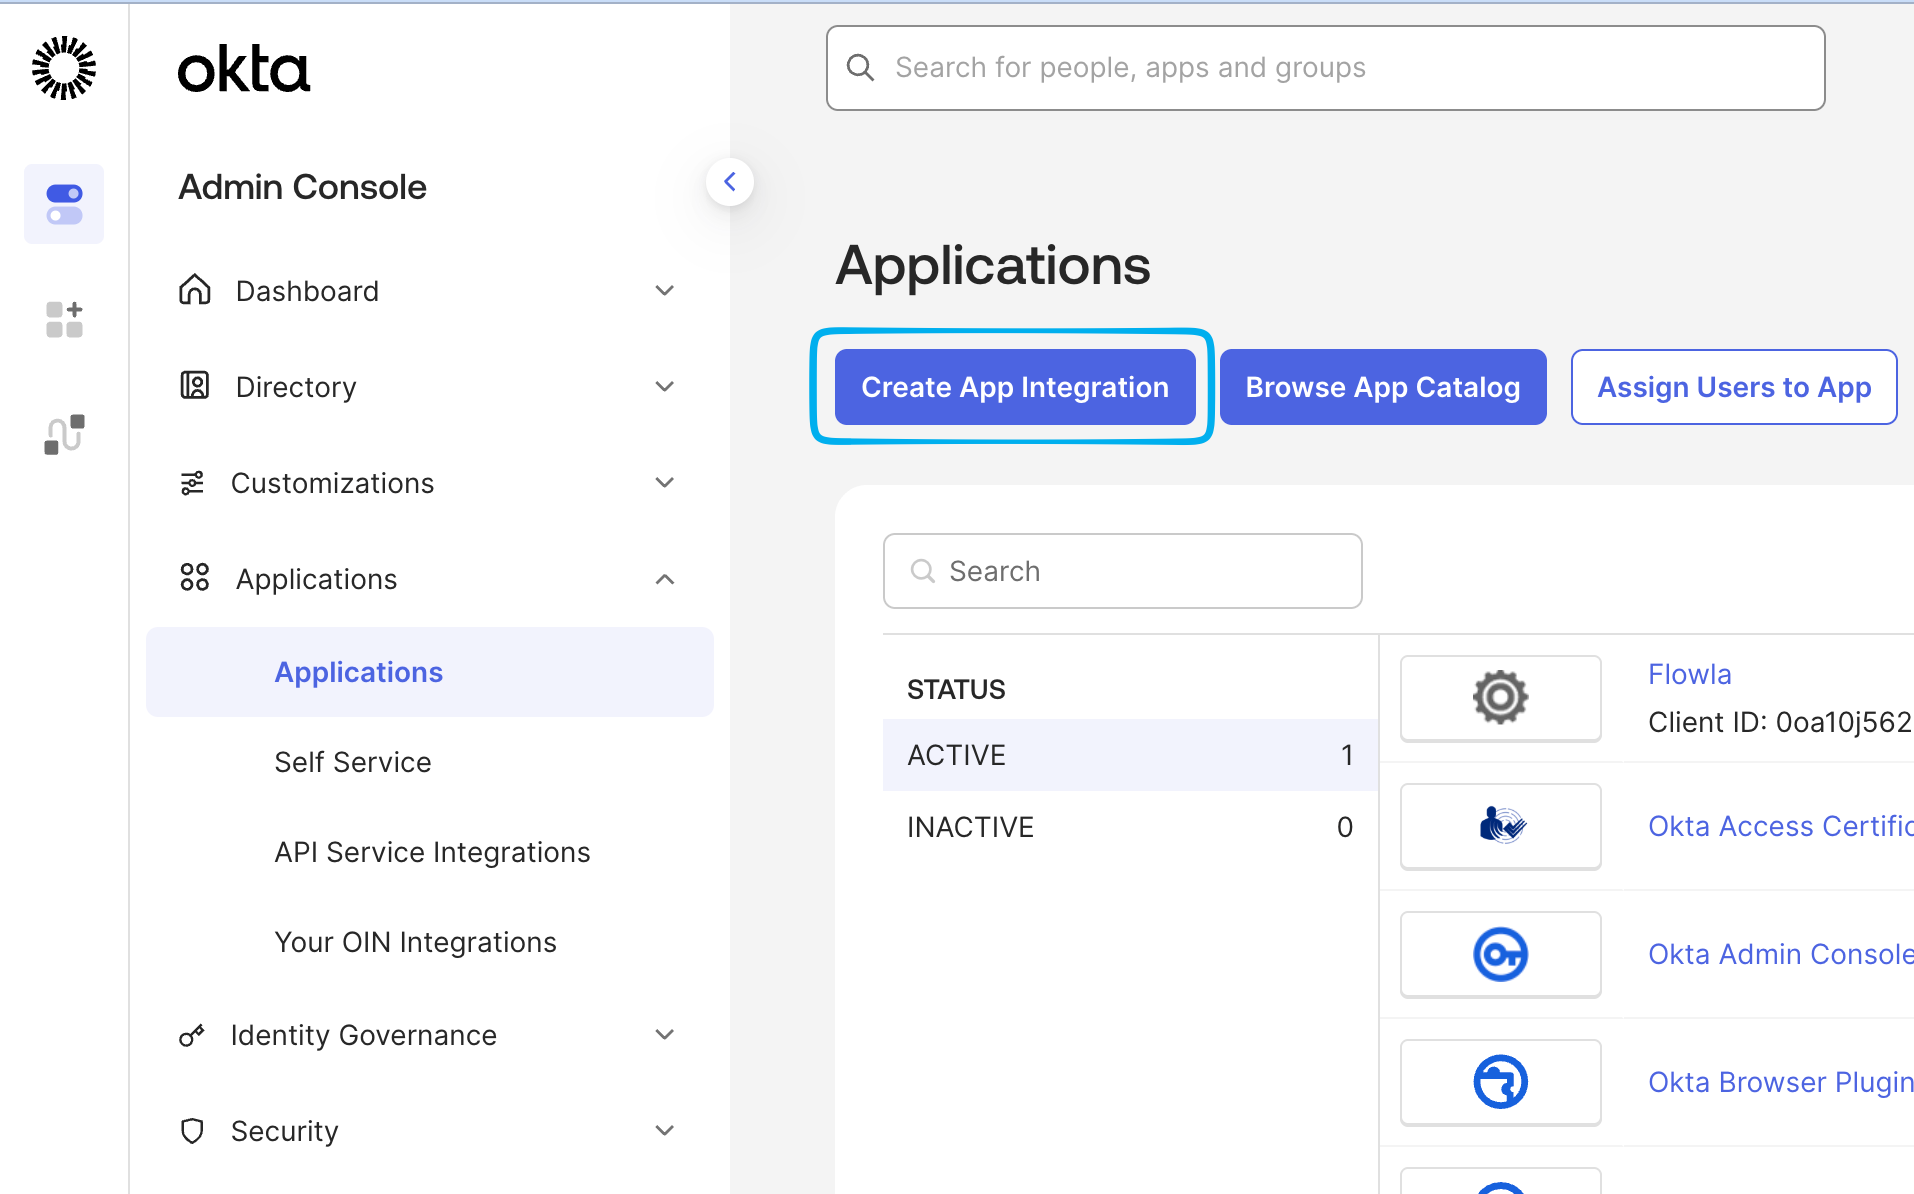
Step 2 — Select sign-in method and app type
Choose OIDC - OpenID Connect as the sign-in method and Web Application as the application type, then click Next.
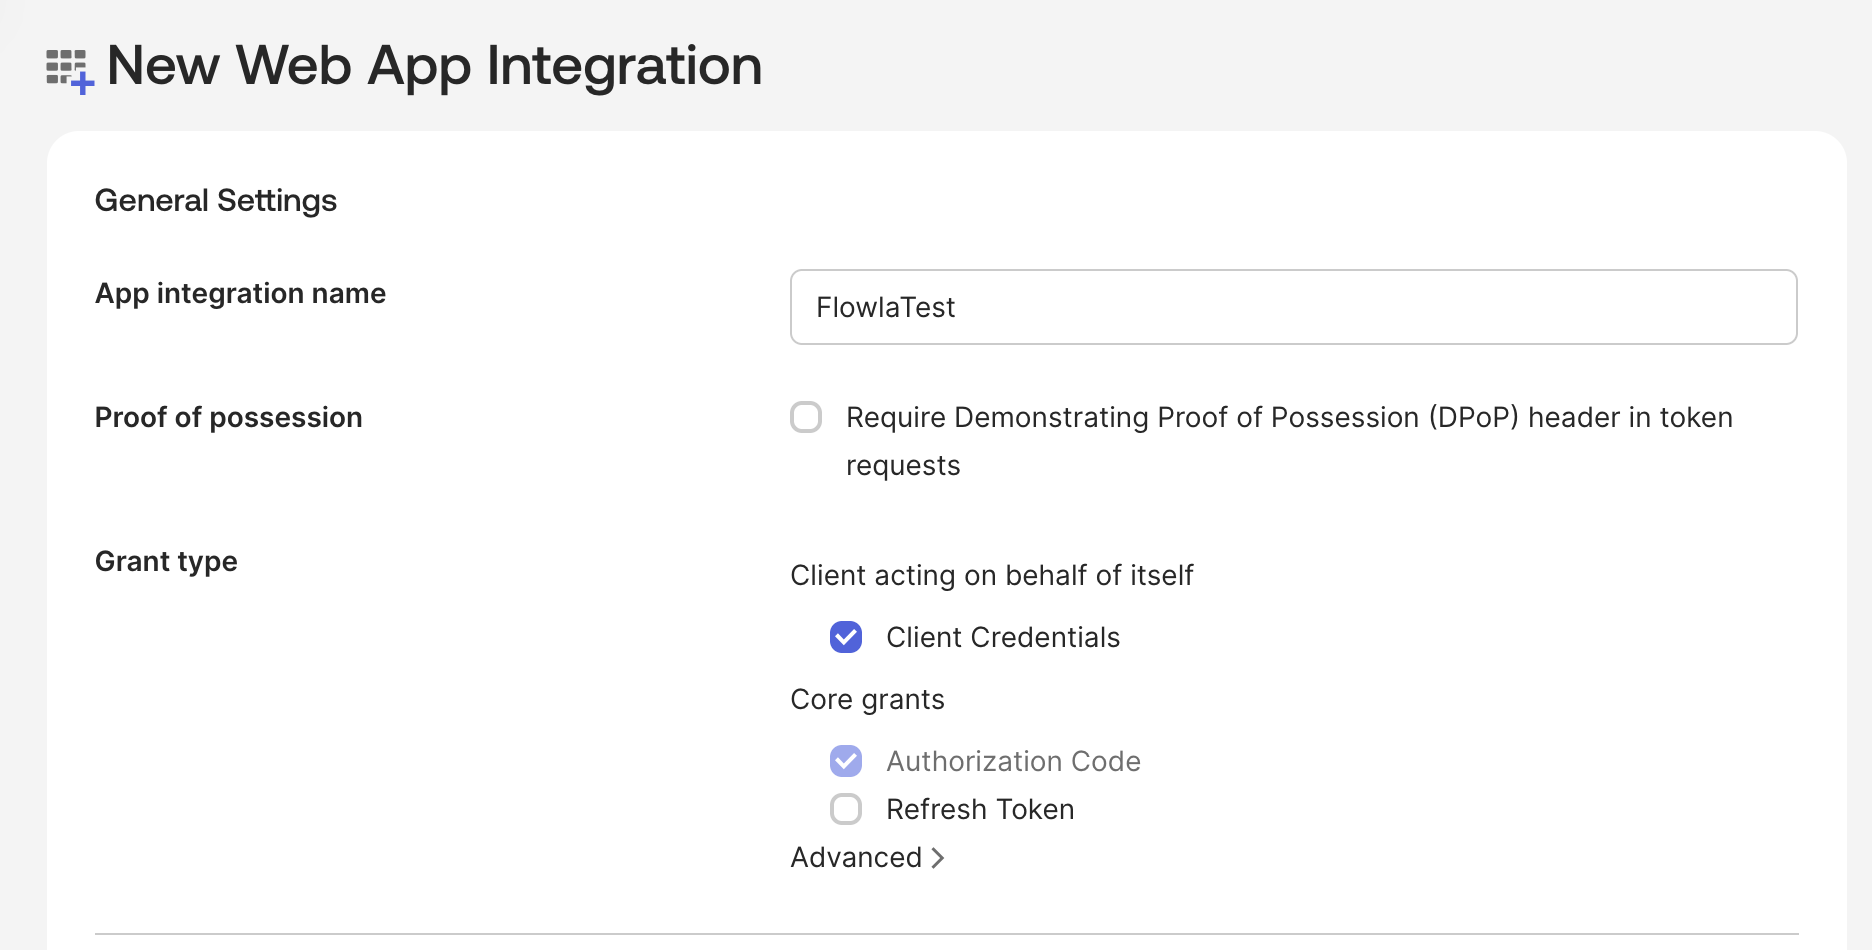
Step 3 — Configure the app integration
Fill in the following fields on the configuration page:| Field | Value |
|---|---|
| App integration name | Any name you wish (e.g. Flowla) |
| Client credentials | Enabled |
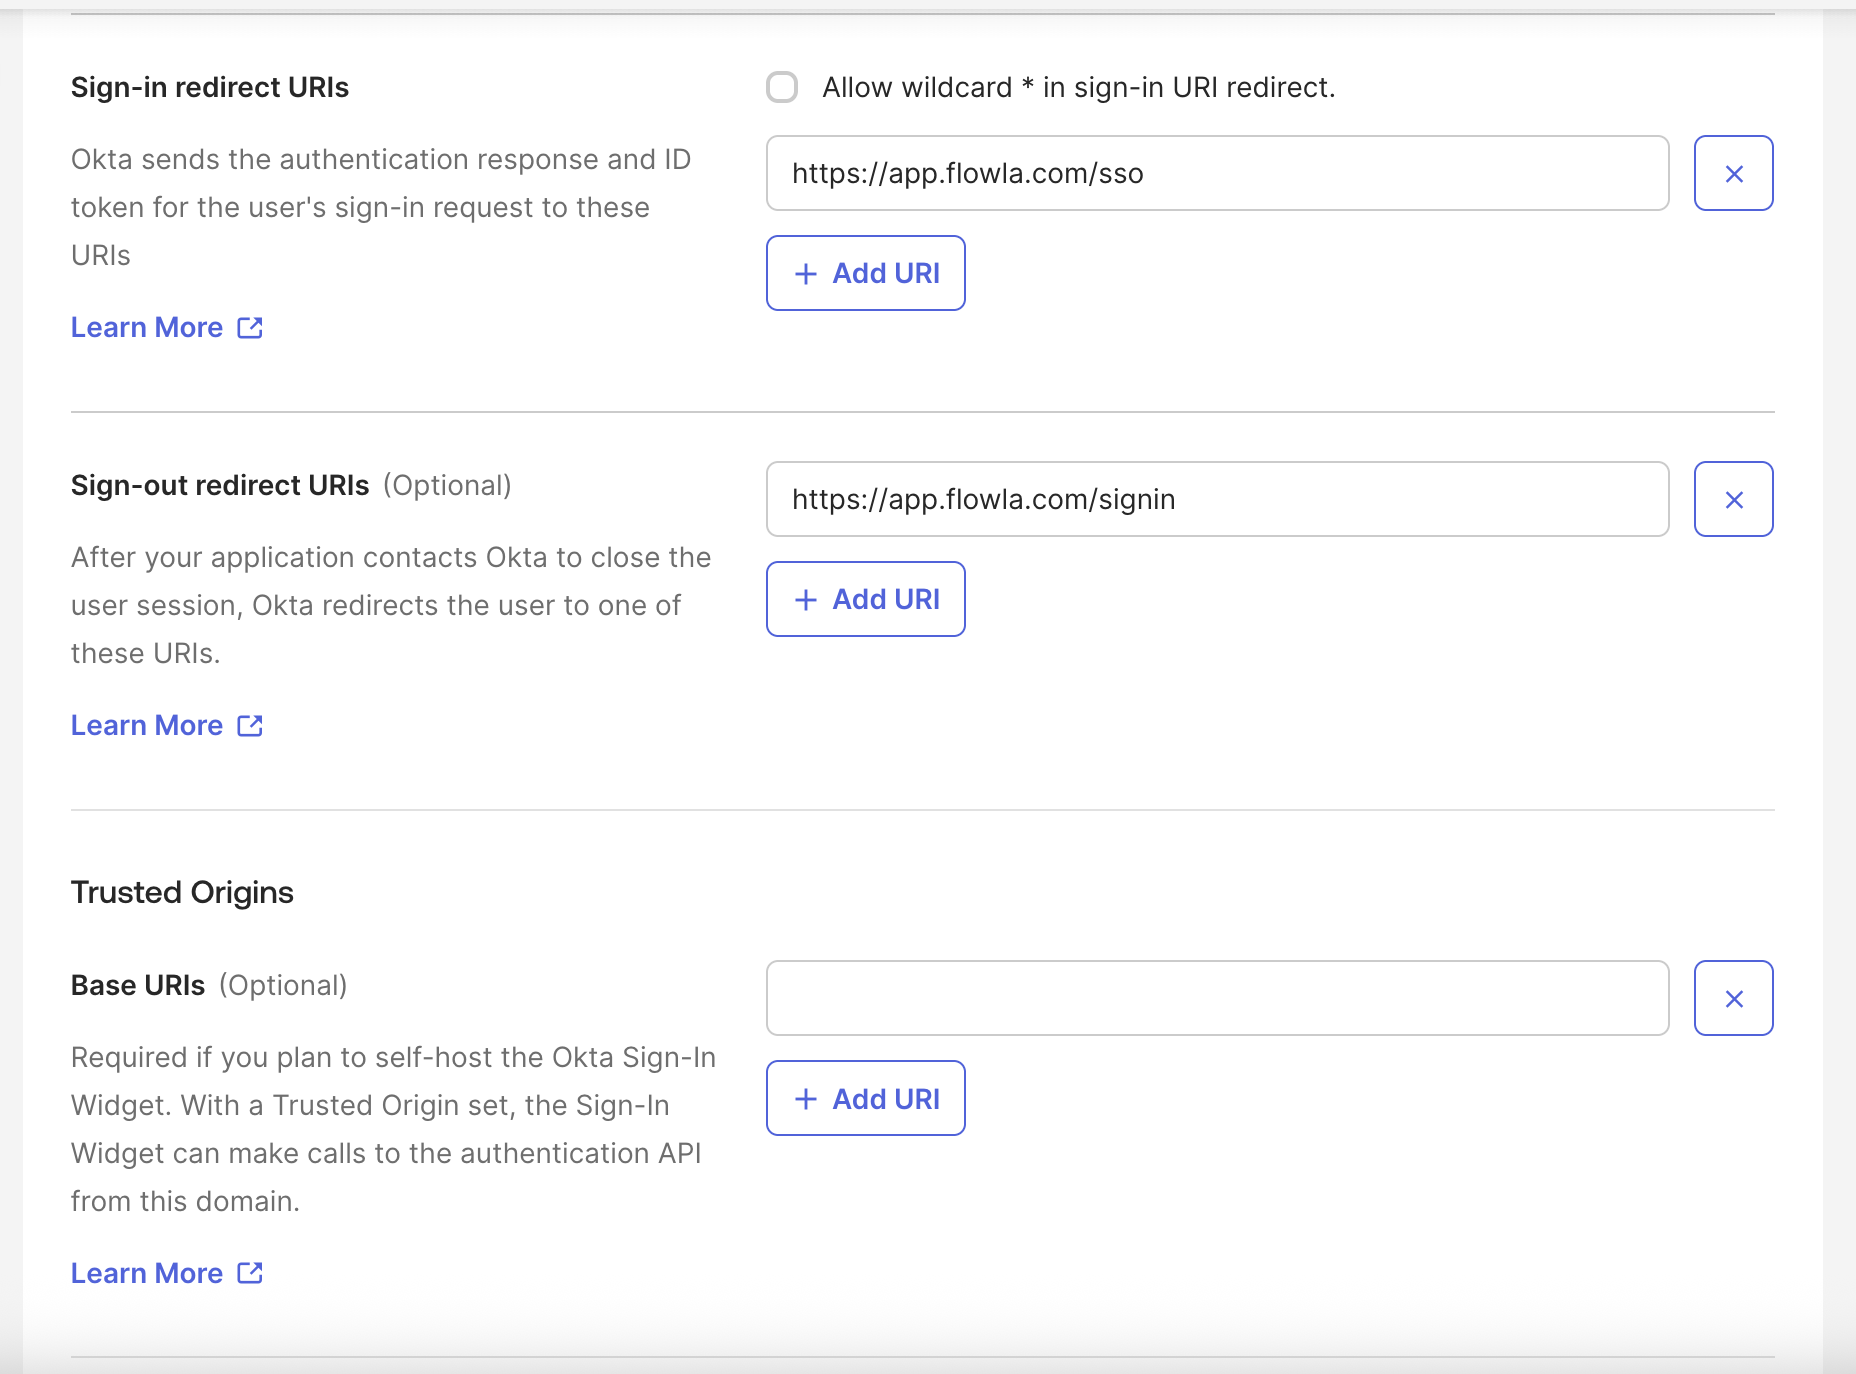
| Sign-in redirect URI | https://app.flowla.com/sso |
| Sign-out redirect URI | https://app.flowla.com/signin |
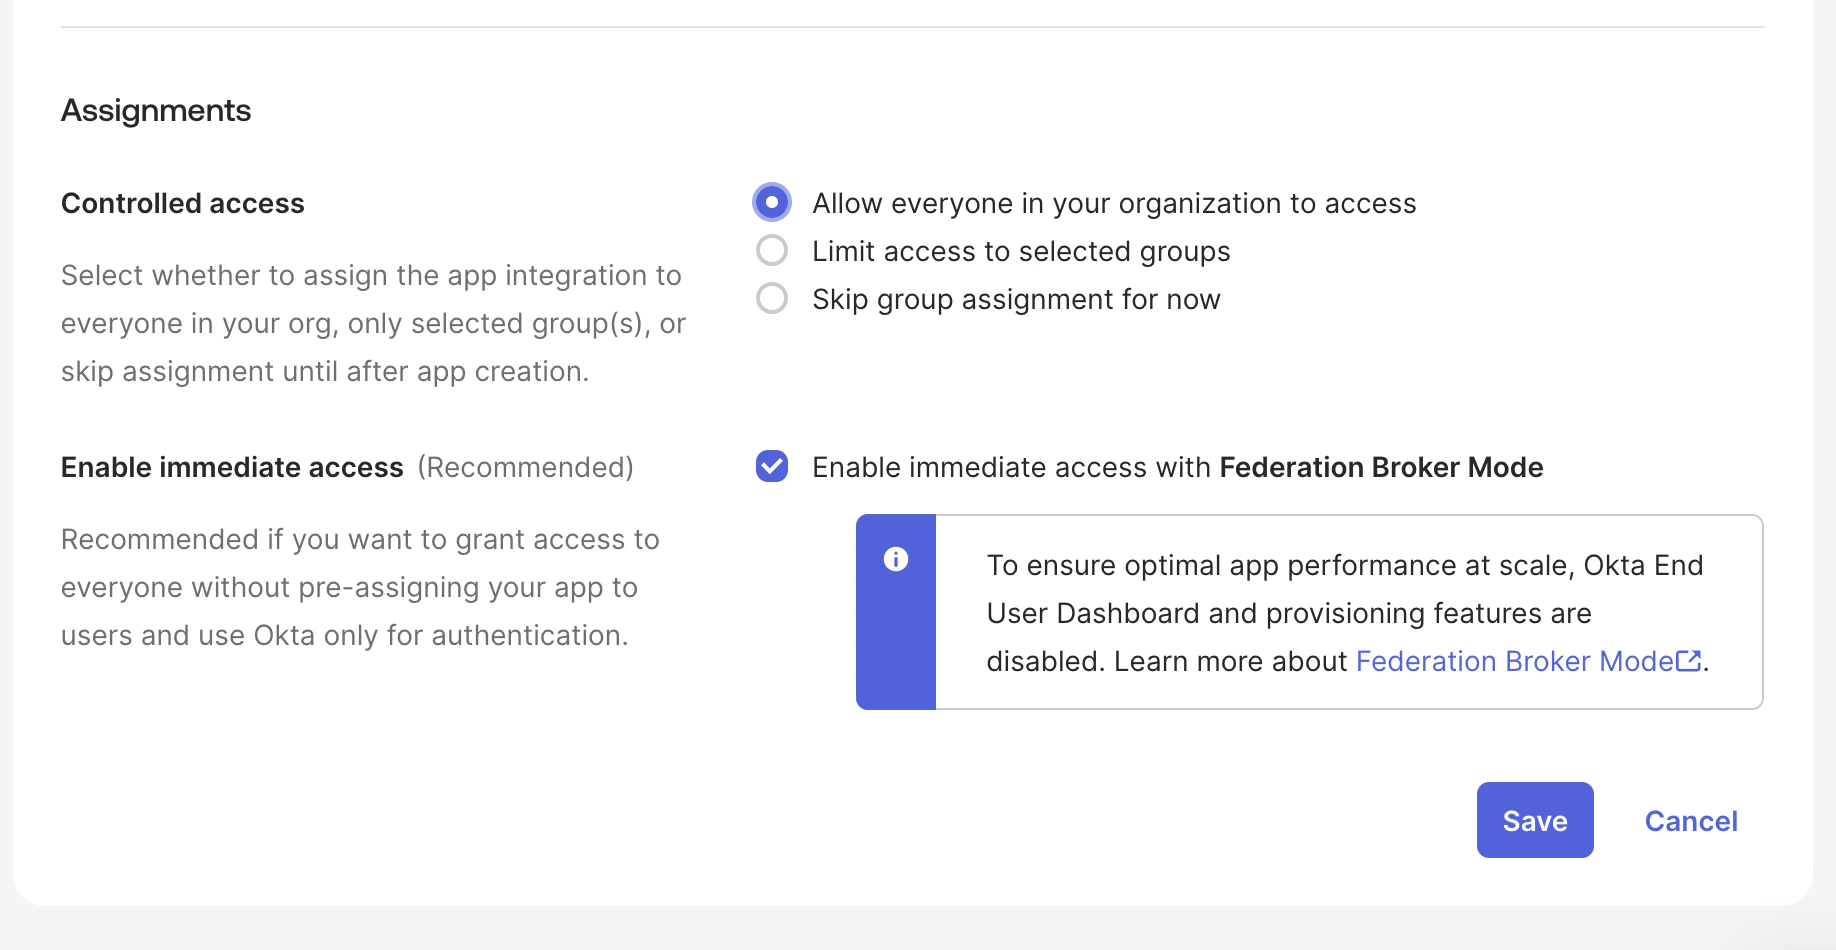
| Access | Allow everyone in your organization to access (recommended) |
| Immediate access | Enable immediate access (recommended) |
Step 4 — Copy your Client ID and Client Secret
After saving, open the General tab of your newly created app integration. Copy both the Client ID and Client Secret — you’ll need these when configuring Flowla.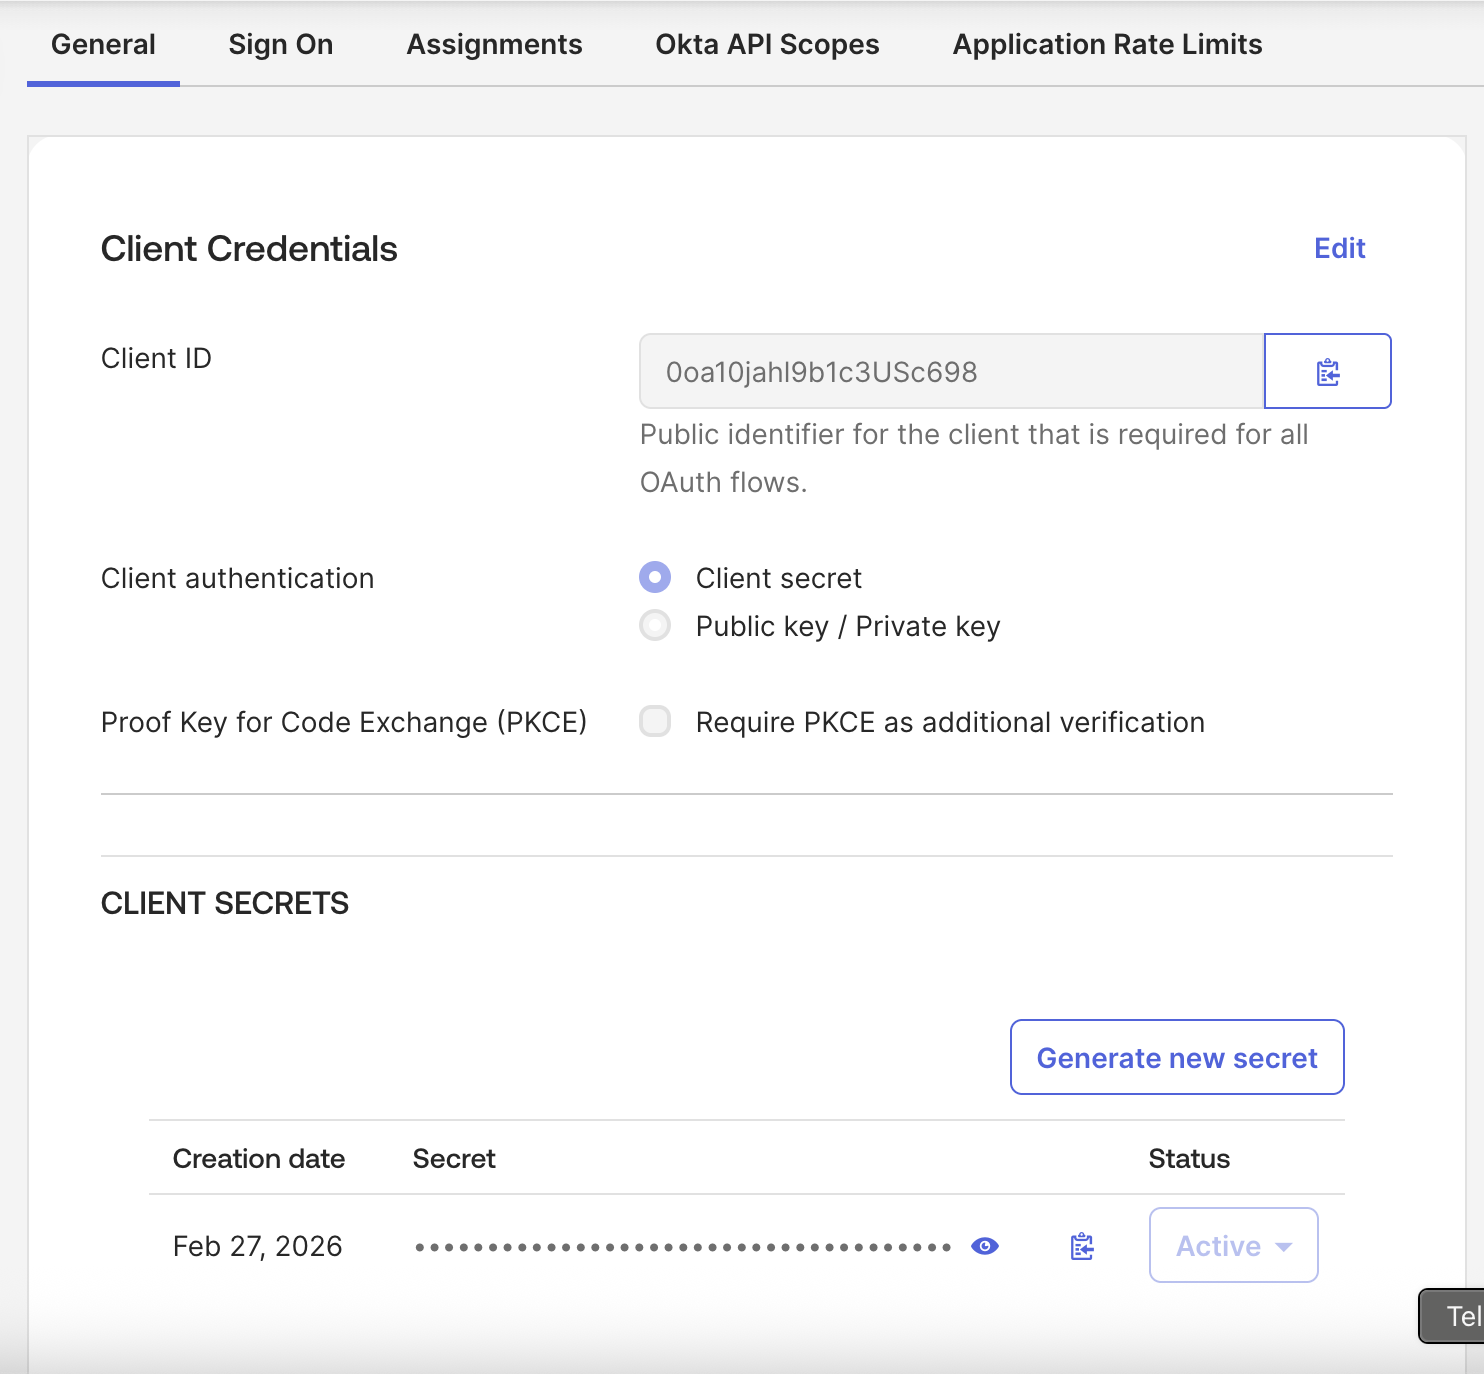
The Client Secret is only shown once — copy it before navigating away. If you lose it, you’ll need to generate a new one from the General tab.
Step 5 — Find your Identity Provider URL
Your Identity Provider URL is the base URL of your Okta account — the part of the address bar that appears before/admin.

Step 6 — Enable SSO in Flowla
In Flowla, go to Settings → Security & Permissions and click Enable SSO. Fill in the form with the values you copied from Okta: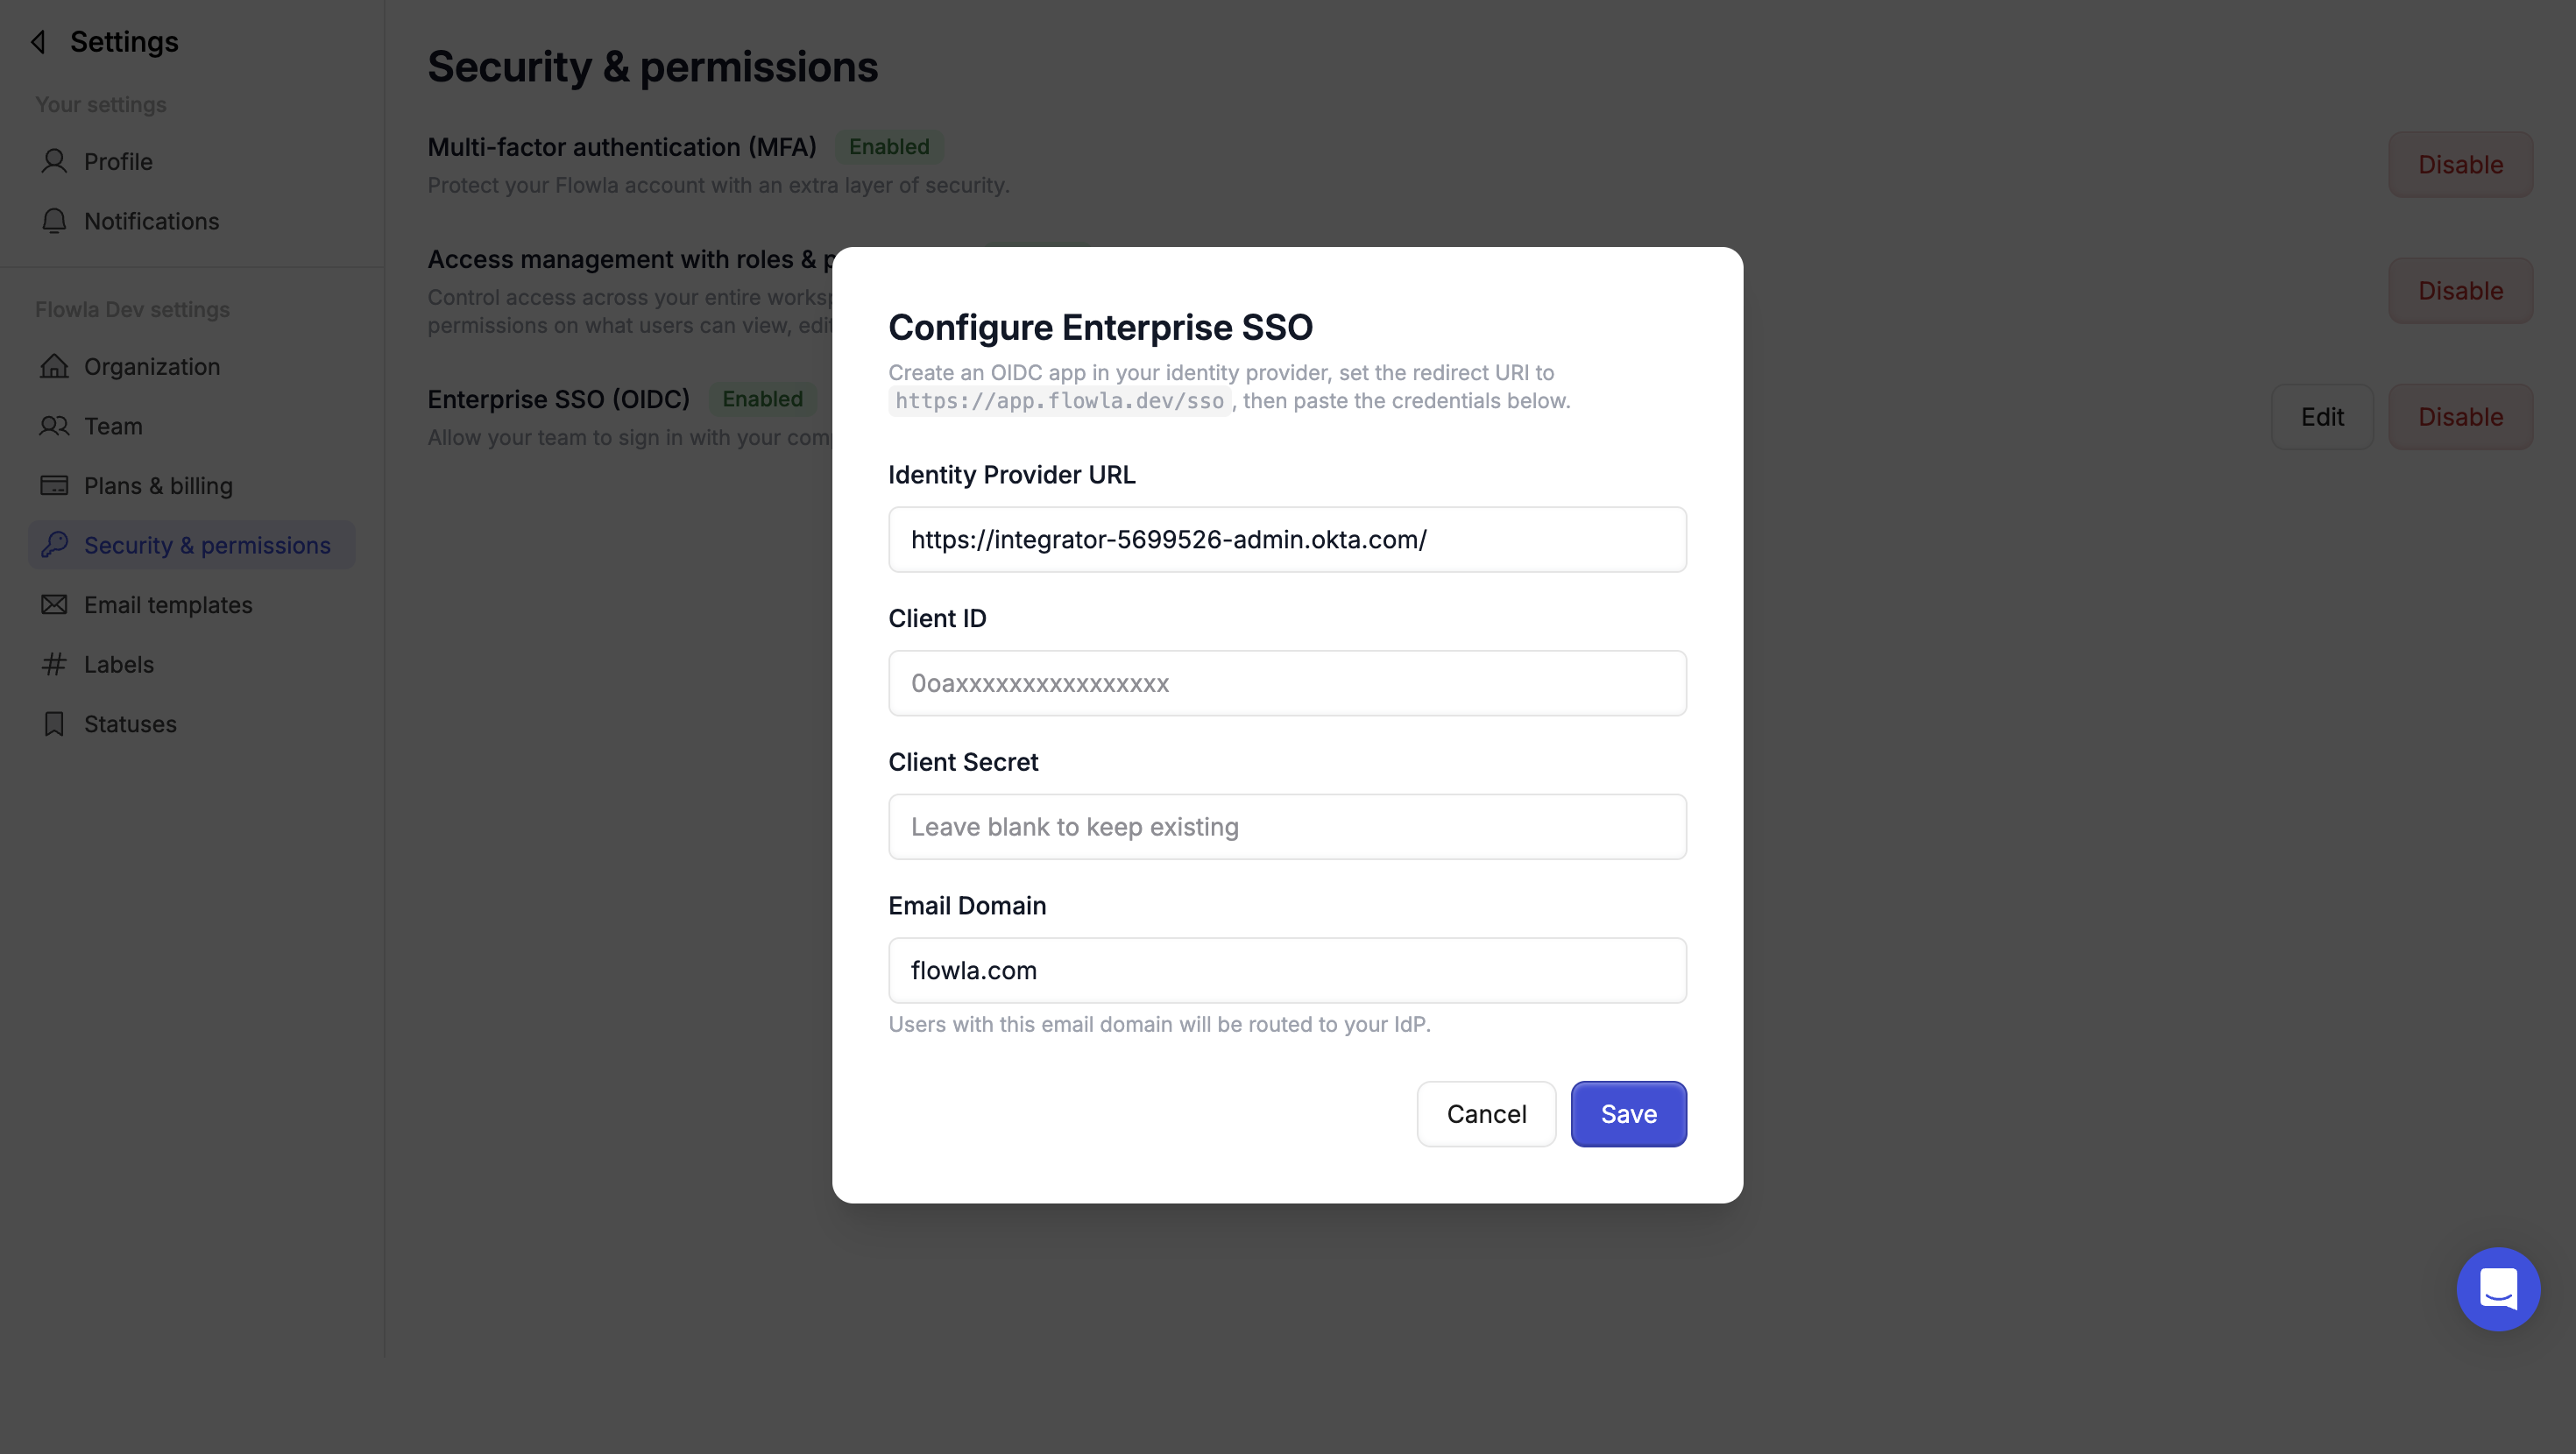
Enter your Identity Provider URL
Paste the base URL of your Okta account (e.g.
https://yourcompany.okta.com)Set your email domain
Enter the email domain your organization uses (e.g.
yourcompany.com). Users with this domain will be required to sign in via SSO.Once set up, users with your organization’s email domain will be automatically redirected to Okta when signing in to Flowla.
Troubleshooting
Users are not being redirected to Okta on sign-in
Users are not being redirected to Okta on sign-in
Likely cause: The email domain entered in Flowla does not exactly match the domain of your users’ email addresses.Fix: Check the domain setting in Flowla for typos or extra spaces, ensuring it exactly matches your users’ email domain (e.g.
yourcompany.com).Sign-in fails with a redirect URI mismatch error
Sign-in fails with a redirect URI mismatch error
Likely cause: The Sign-in redirect URI in the Okta app is incorrect or has a trailing slash.Fix: Verify the Sign-in redirect URI in your Okta app is set to exactly
https://app.flowla.com/sso with no trailing slash.Client Secret error on save
Client Secret error on save
Likely cause: The Client Secret was not copied at creation time and is no longer visible in Okta.Fix: Generate a new Client Secret from the General tab of your Okta app integration, then update it in Flowla.
Only some users can sign in via SSO
Only some users can sign in via SSO
Likely cause: Individual users or groups are not assigned to the Okta app integration.Fix: Check the Assignments tab of your Okta app. If access is not set to Everyone, explicitly assign the required users or groups.