

Learning & Coaching is in beta and available to selected organizations.
Create a course
1
Open Courses
In the left navigation, go to Learning & Coaching → Courses and click Create course. Give the course a name and an optional description.
2
Add your content
Switch to the Course tab to build it. A course is made of modules, and each module holds lessons. Click Add lesson or Add new module to grow the structure, then fill each lesson with blocks such as text, PDFs, links, videos, images, and documents. To check understanding, add a Quiz block just like any other block.
3
Configure settings
Review the course settings and module settings.
4
Publish
Publish the course when it’s ready.
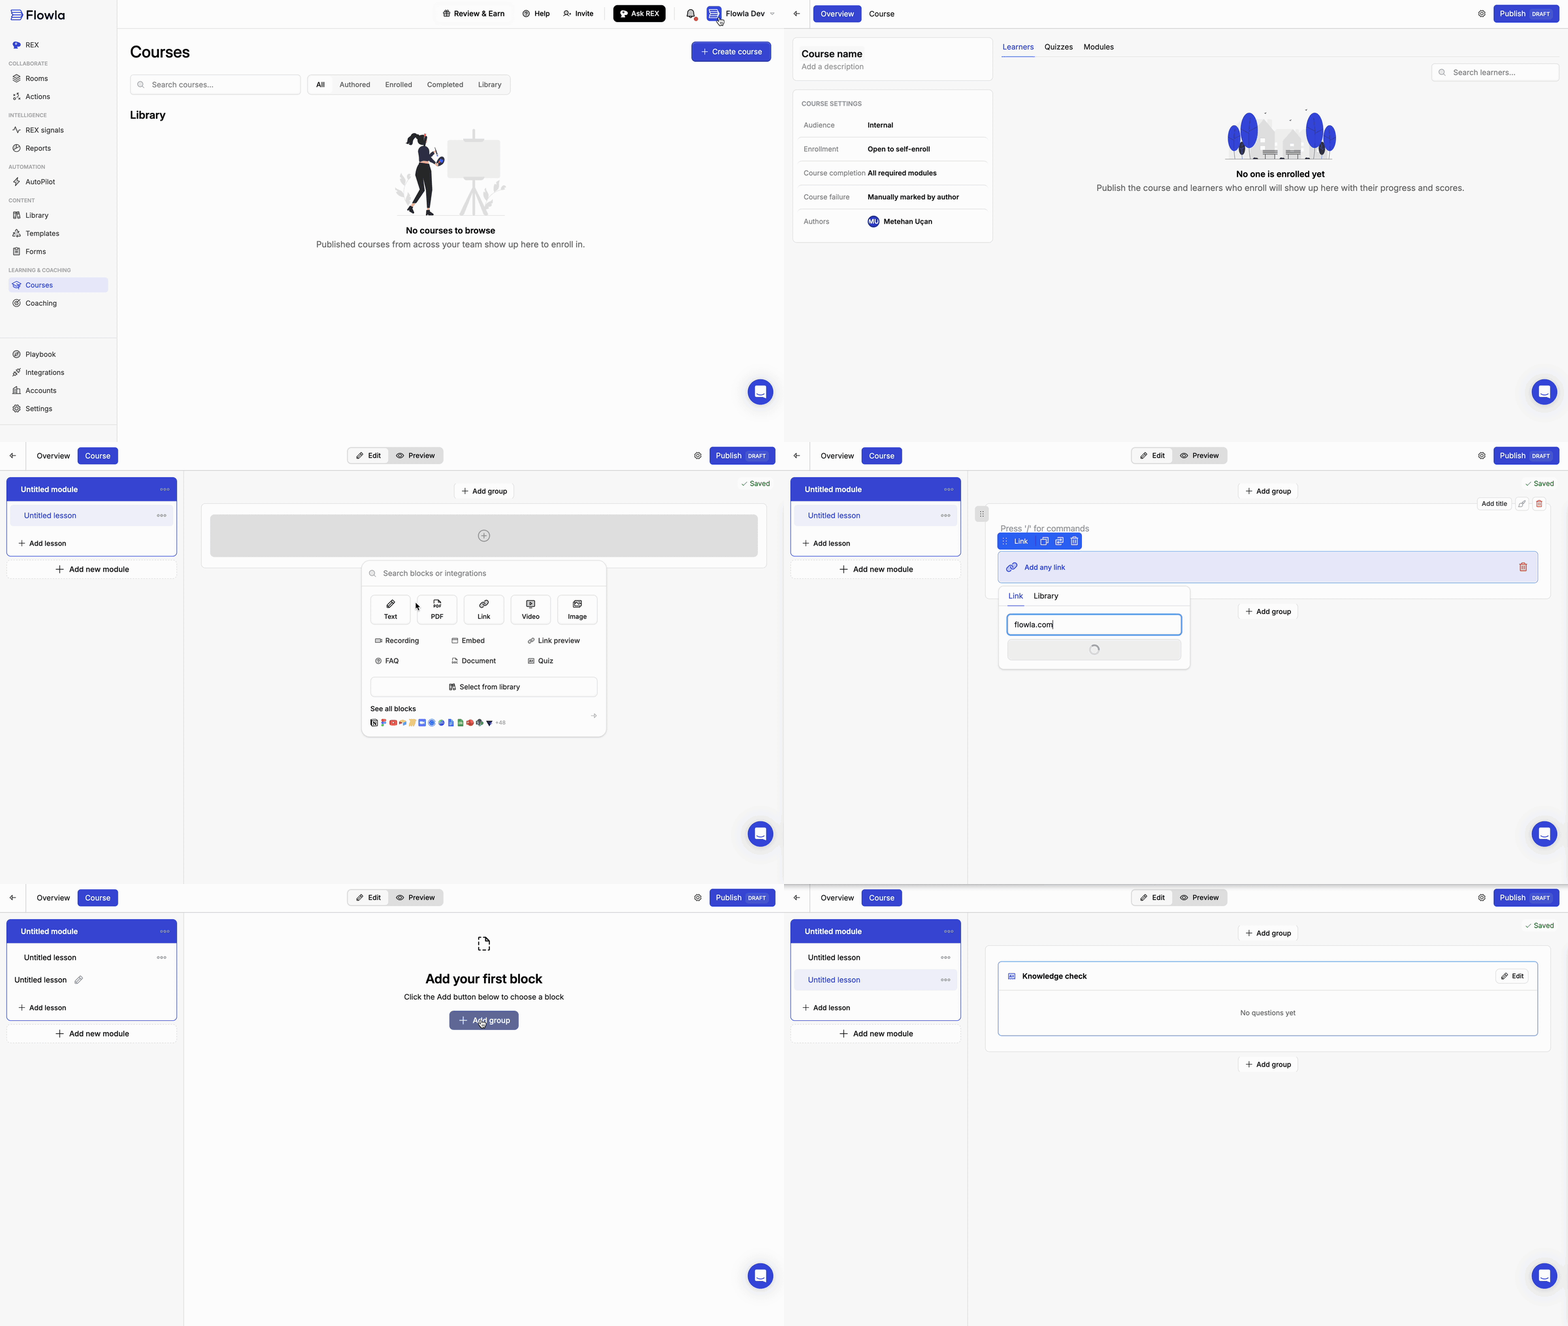
Creating a course, adding a lesson with a link, and adding a Quiz block
Course settings
During the beta, these settings are fixed to the values below. They’ll become configurable once Learning & Coaching comes out of beta.
Module settings
Open the Modules tab in the course overview to control how each module unlocks, how its lessons are shown, and when it counts as complete. Pick Course defaults or a single module on the left, and edit its rules on the right.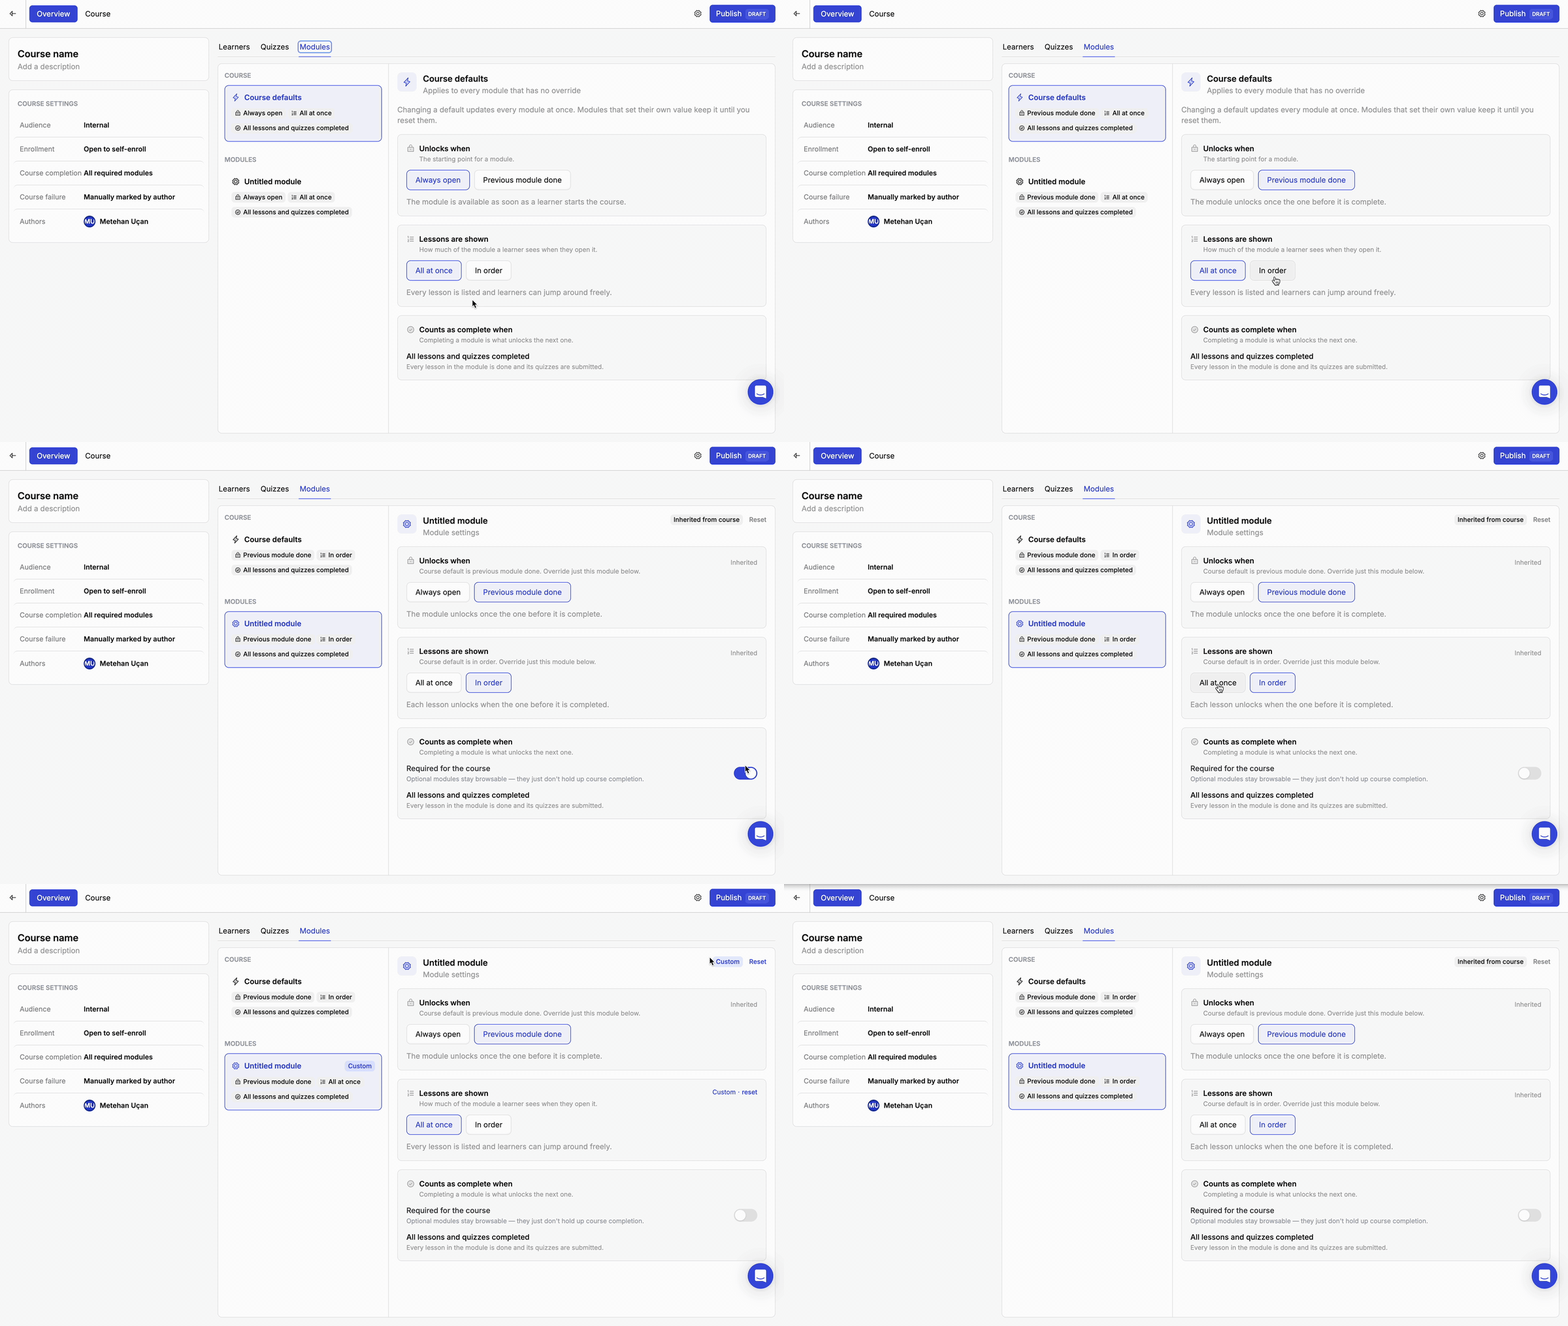
Changing the course defaults, overriding one module, and resetting it
Course defaults and overrides
Course defaults apply to every module that doesn’t have its own value. Changing a default updates all of those modules at once. To change just one module, select it and pick a different value. The module is then marked Custom instead of Inherited from course, and it keeps its own value even if you change the course defaults later. Click Reset to make the module follow the course defaults again.Rules
Quizzes
Add a Quiz block anywhere in a lesson. It’s added as Knowledge check; click Edit on the block to open the quiz editor, add your questions, and click Save. Switch to Preview to take the quiz the way a learner would.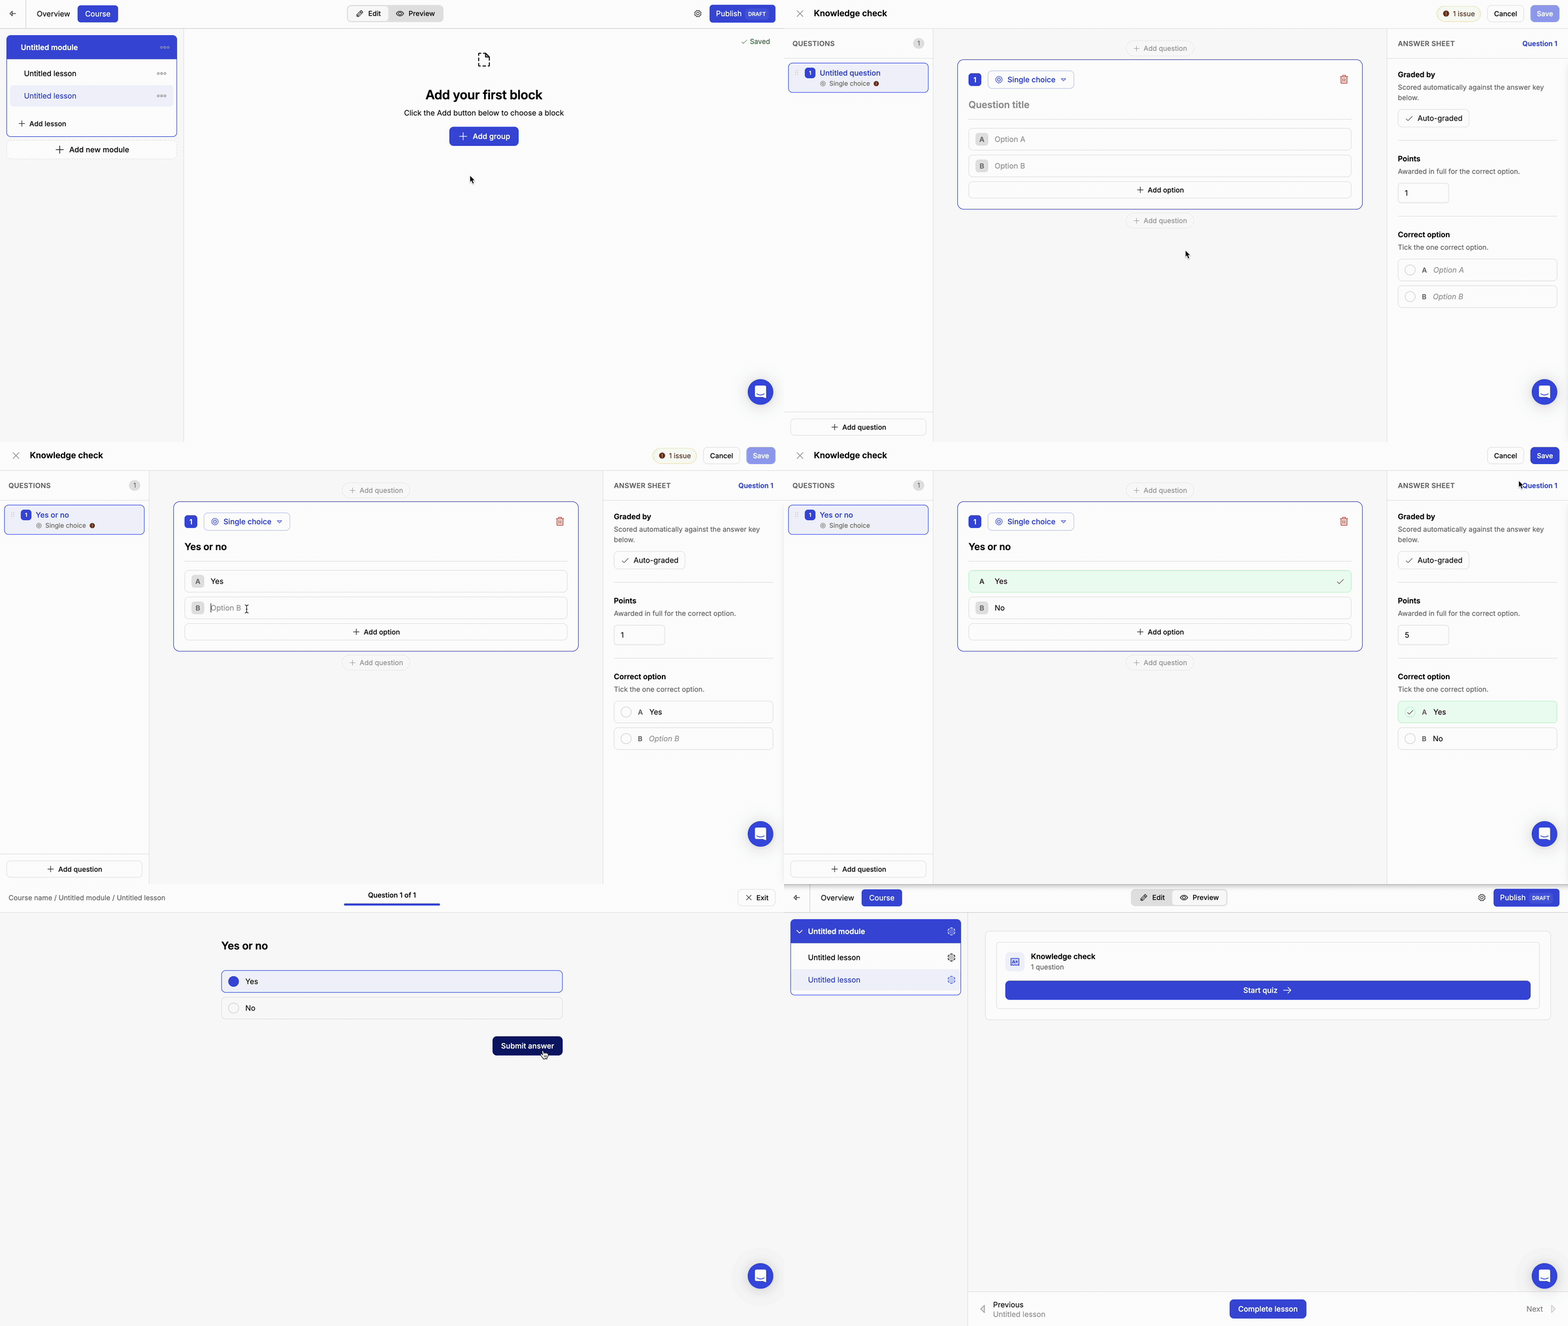
Adding a single choice question, marking the correct option, setting points, and previewing the quiz
Question types
Grading
For each question, the answer sheet on the right sets how it’s scored:- Single choice, Multiple choice, and True / False questions are auto-graded against the answer key. Mark the correct option, then set the points awarded for a correct answer.
- Open text and Video response answers are graded manually during the beta.
Publishing
A course you haven’t published yet, or one with unpublished changes, shows Publish · Draft.1
Click Publish
Click Publish in the course editor.
2
Add a publish note
Optionally describe what’s in this version, for example “First release.”
3
Publish the course
Click Publish course. Learners in the course’s audience can start it right away.
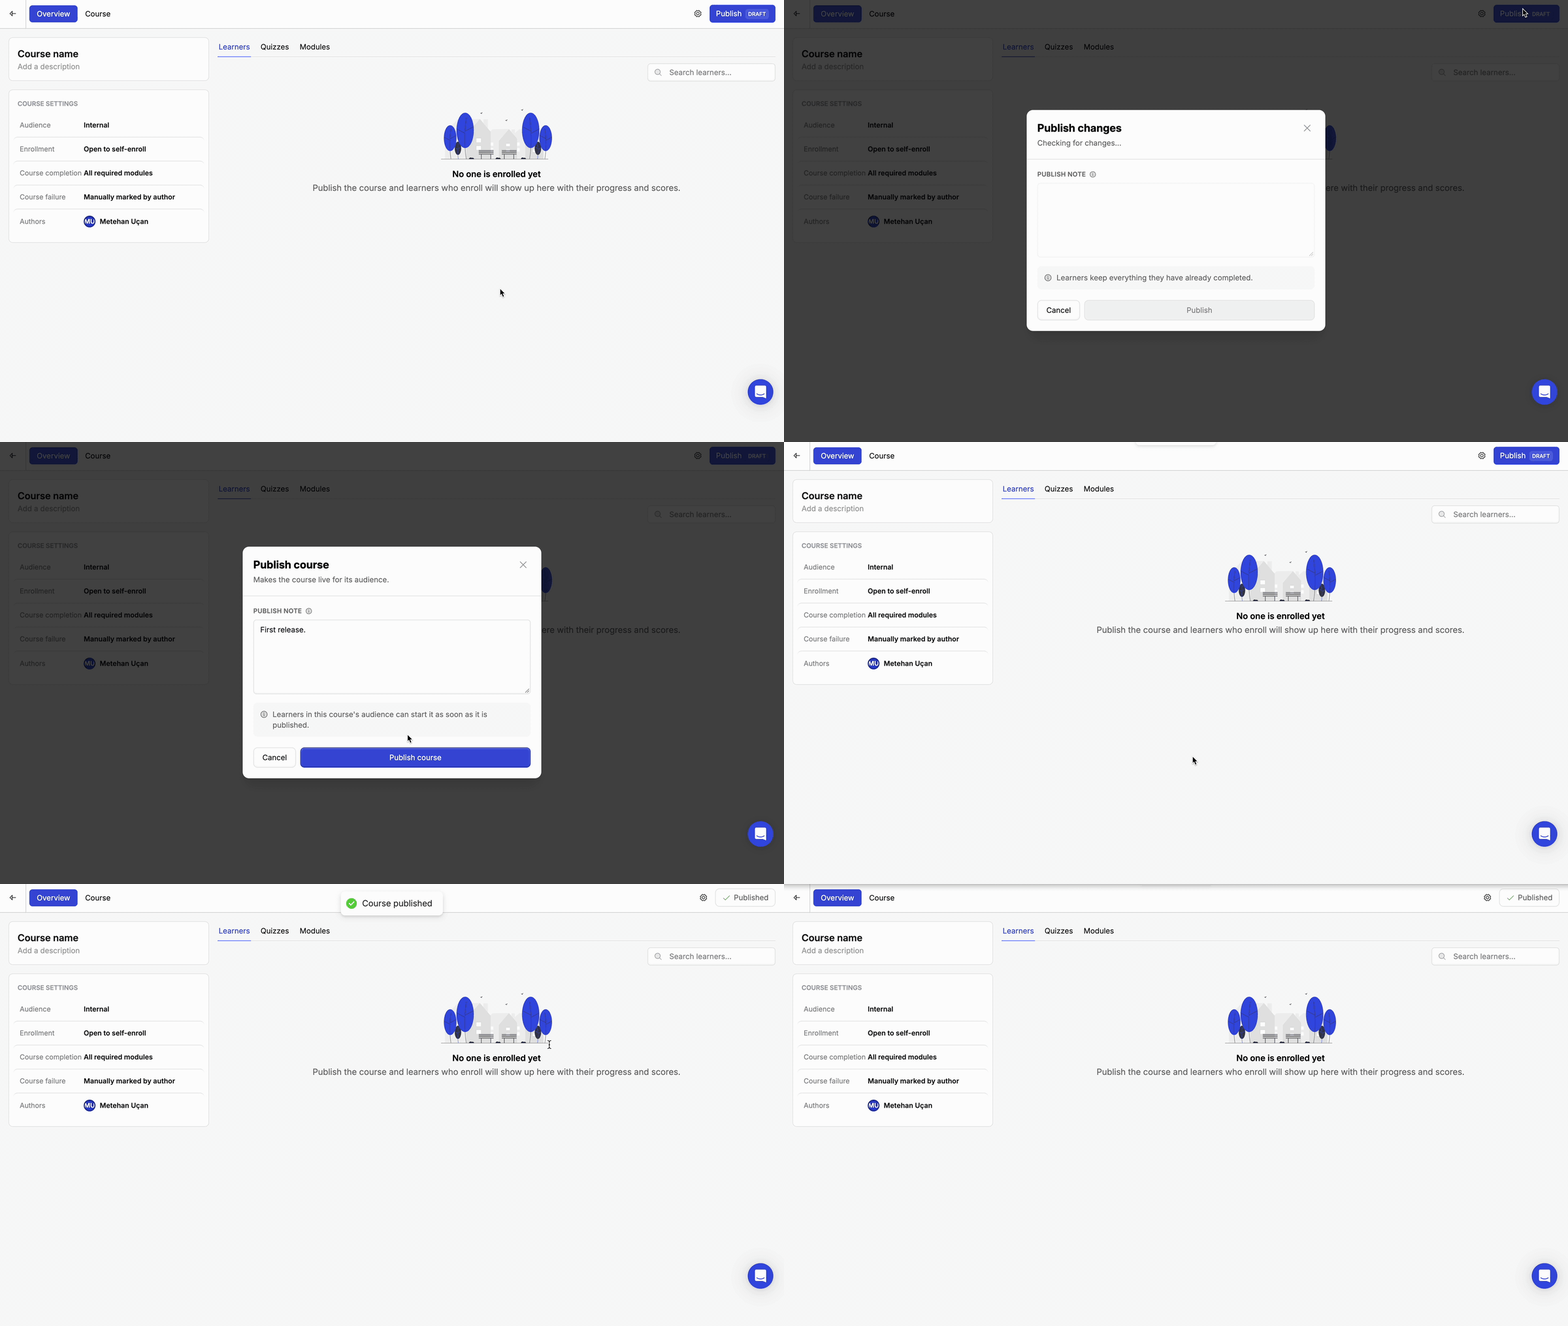
Publishing a course with a publish note
Track progress and review attempts
Once learners start a published course, open its overview to follow along.- Learners tab: everyone enrolled, with when they enrolled and completed, their average score, and their progress. Use Certify or Fail in the Review column to mark each attempt. Course failure is always marked manually by an author during the beta.
- Quizzes tab: every quiz in the course, with its number of questions, how many learners have submitted, the average score, and how many answers are waiting to be graded. Open a quiz to see its responses, filter by All, Needs grading, or Graded, and open a response to see a learner’s answers.
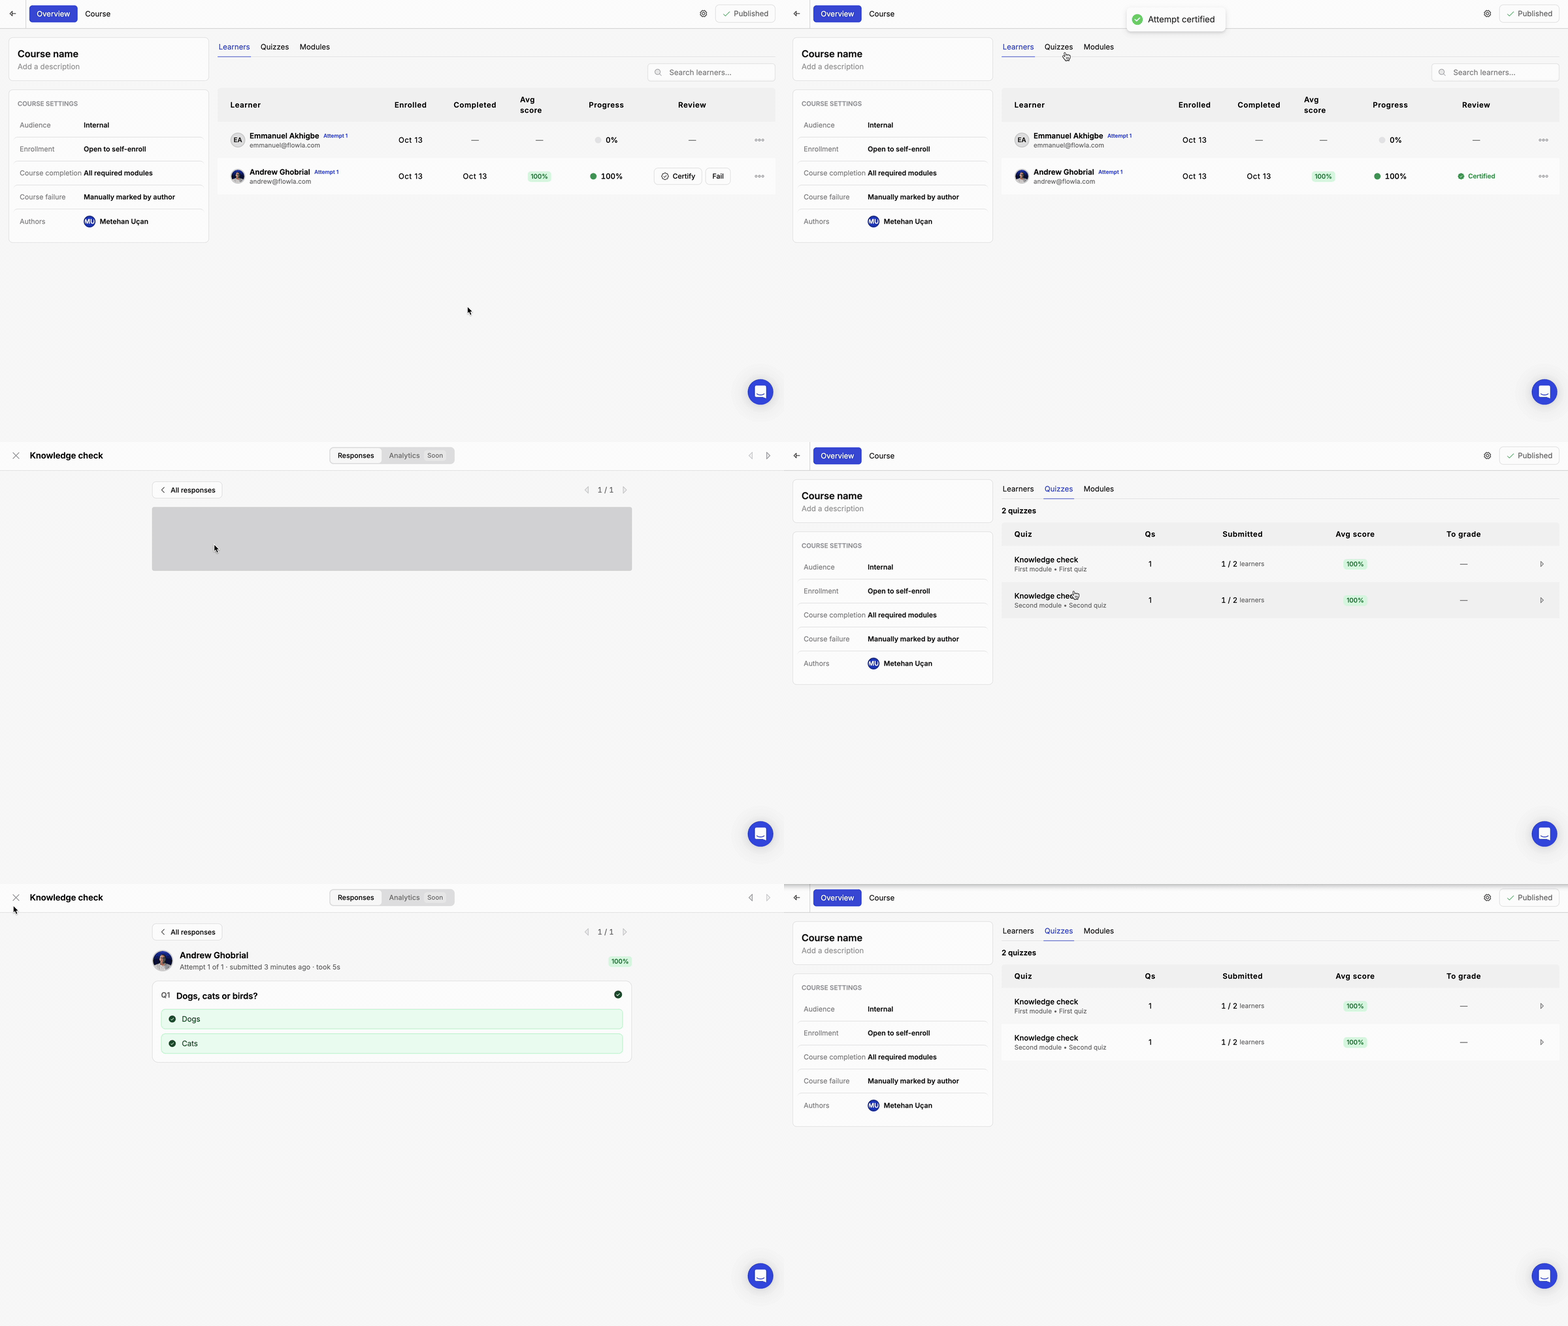
Certifying an attempt in the Learners tab, then reviewing quiz responses in the Quizzes tab
For learners
Learners find courses under Learning & Coaching → Courses. Published courses from across the team appear under Library; click Enroll to join one. Use the Enrolled and Completed filters to find courses you’ve already started or finished. Inside a course, learners work through each lesson and click Complete lesson to move on. Attempt tracking records their progress, so authors can follow how far everyone has got.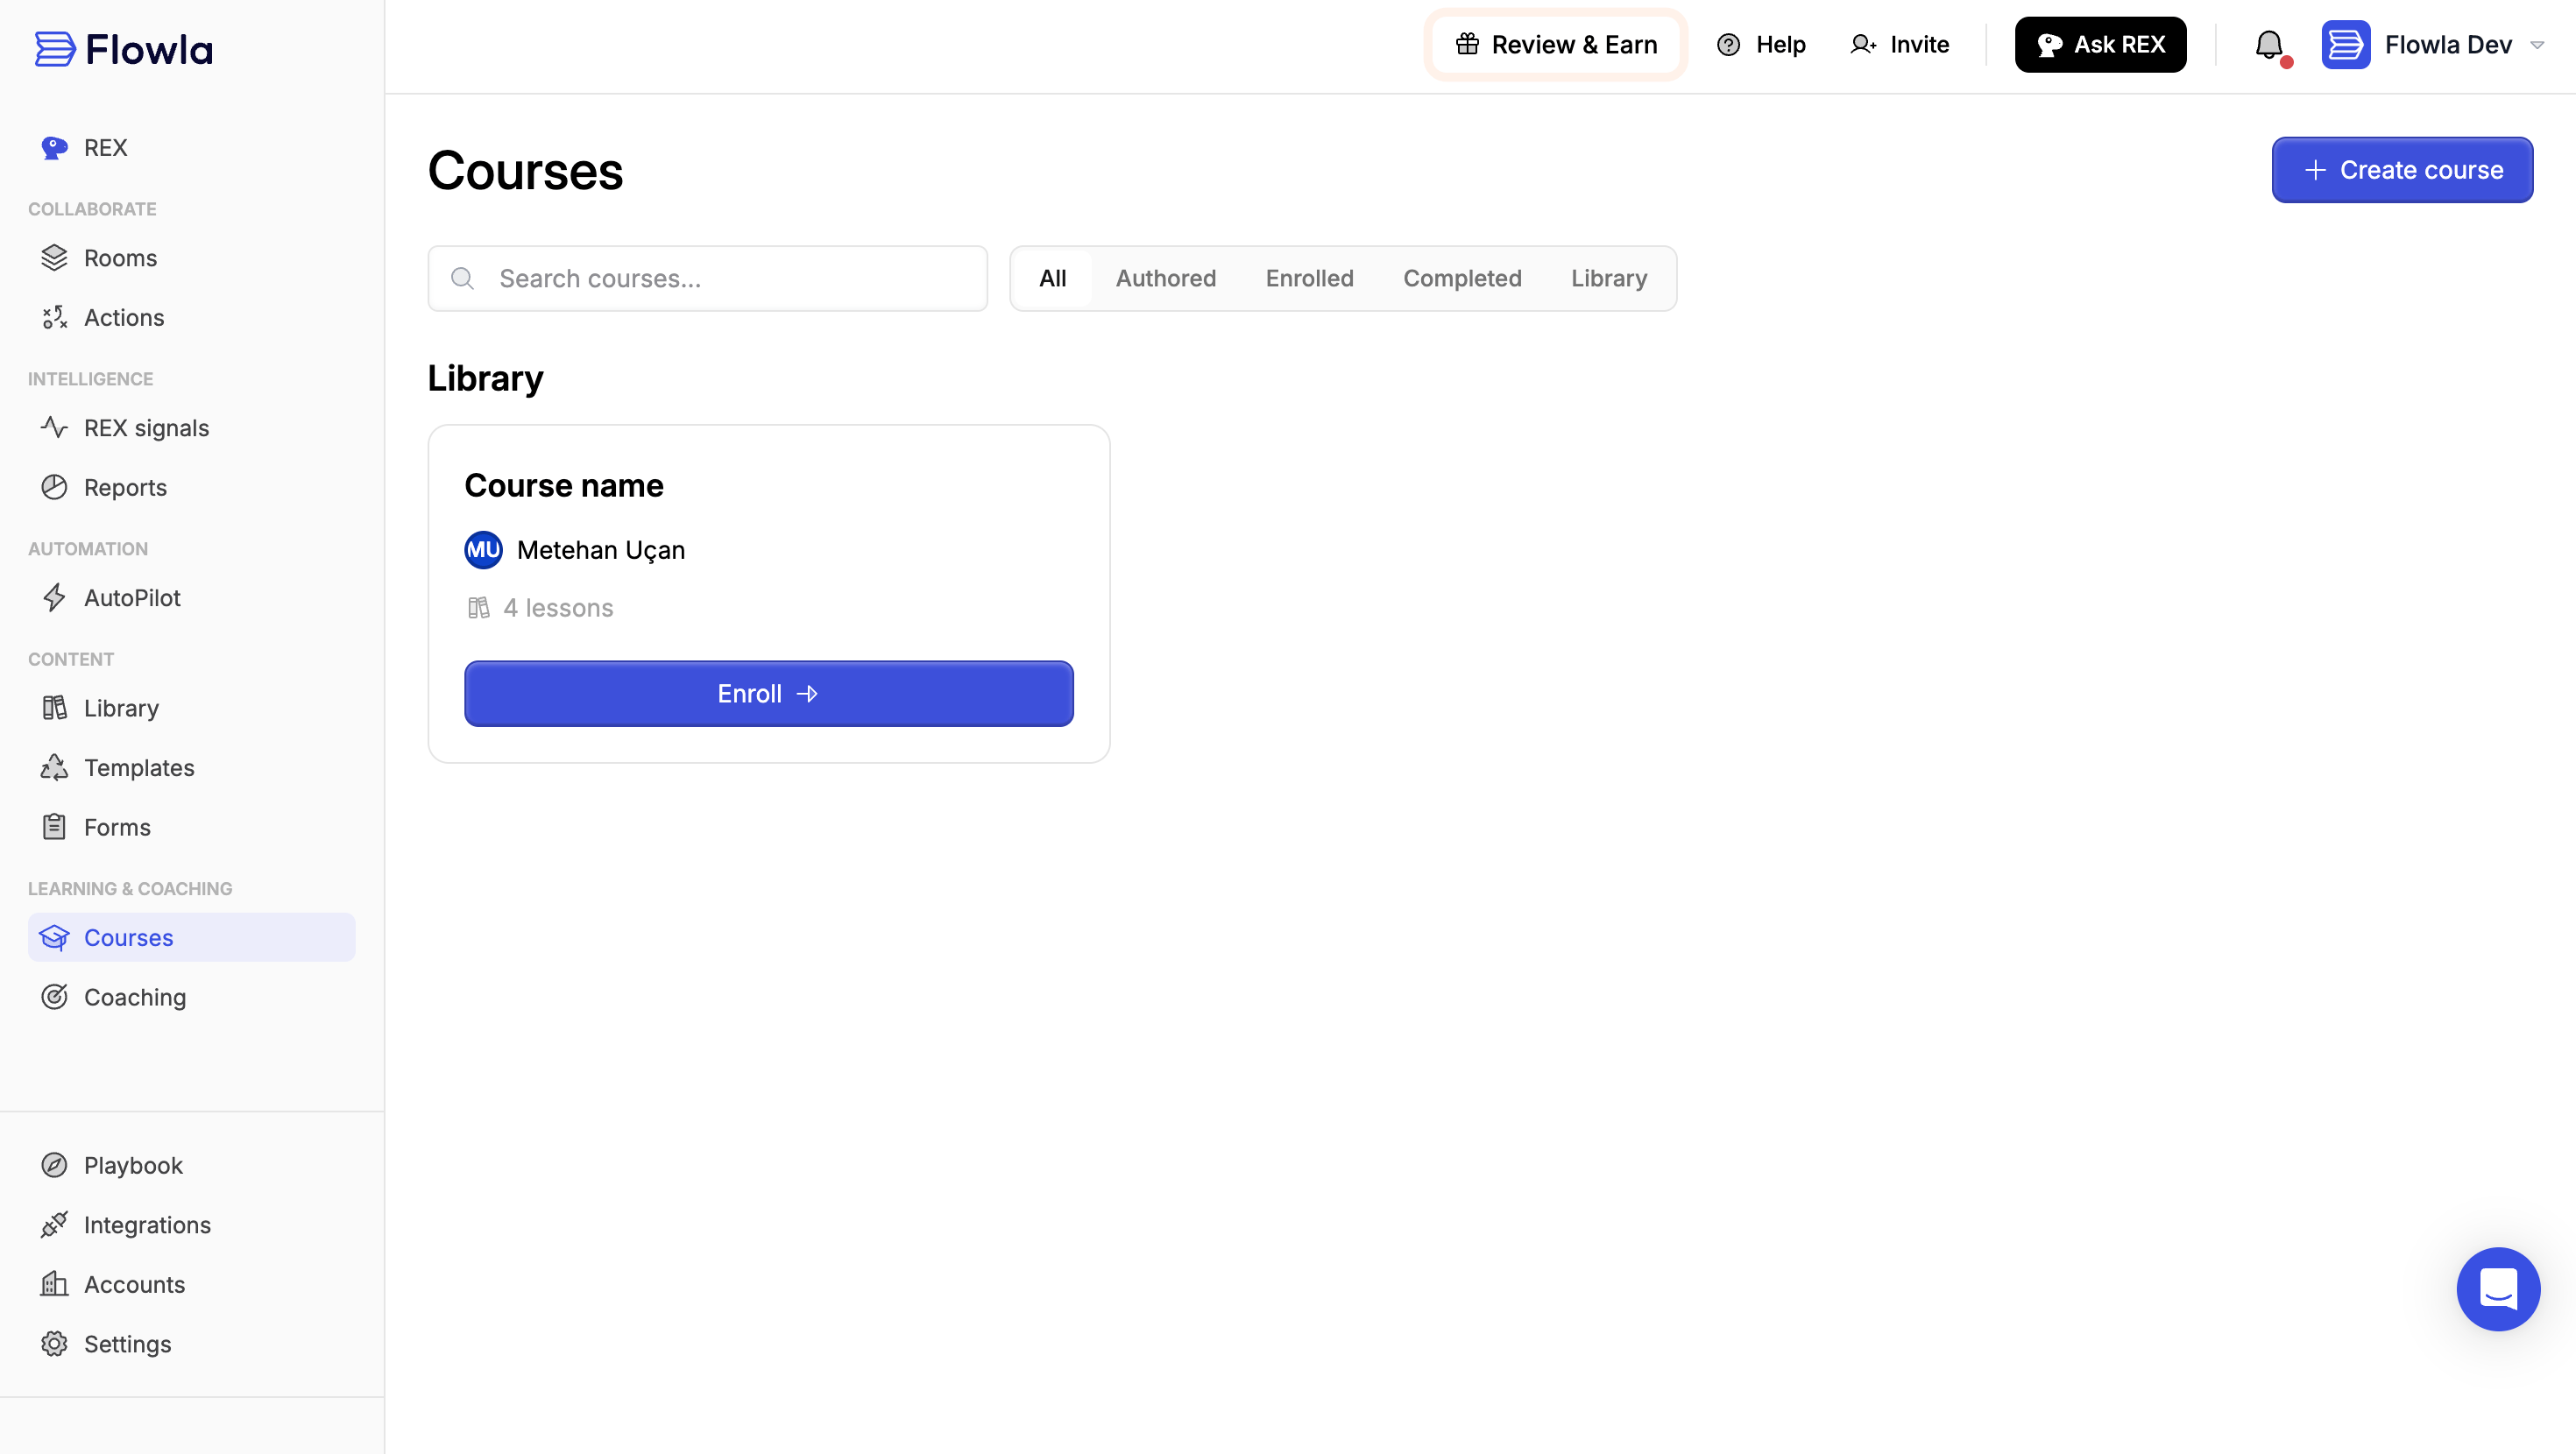
A published course in the Library, ready to enroll