- Current Version
- Legacy Version
Overview
Connect Salesforce to Flowla and your deal rooms and CRM stay in sync — no manual work required. Pull in opportunity, contact, and account data to personalise rooms automatically, and push buyer engagement back into Salesforce so your CRM always reflects what’s happening in the deal.The Flowla Salesforce integration enables automatic two-way synchronisation of opportunity, contact, and account data between Salesforce and Flowla. This allows your team to:- View and manage rooms inside your opportunities
- Pull in CRM data to personalize rooms automatically
- Push Flowla engagement data (views, form submissions, completions) back into Salesforce
Setup Instructions
Prerequisites
Before you begin, make sure you have:- Salesforce Edition: Enterprise, Unlimited, or Developer edition (the integration requires API access, which is not available on Salesforce Essentials)
- Salesforce Admin access: You need admin-level permissions to install packages and modify page layouts
Step 1: Install the Flowla Managed Package
The managed package installs the Flowla component, configures trusted URLs, sets up API permission sets, and creates the necessary external credentials — all automatically.Install the Flowla managed package
Use this installation link — you will be redirected to the Salesforce AppExchange / package installer.
Select Install for All Users
Choose Install for All Users so every user can see Flowla data on their opportunity records, then click Install.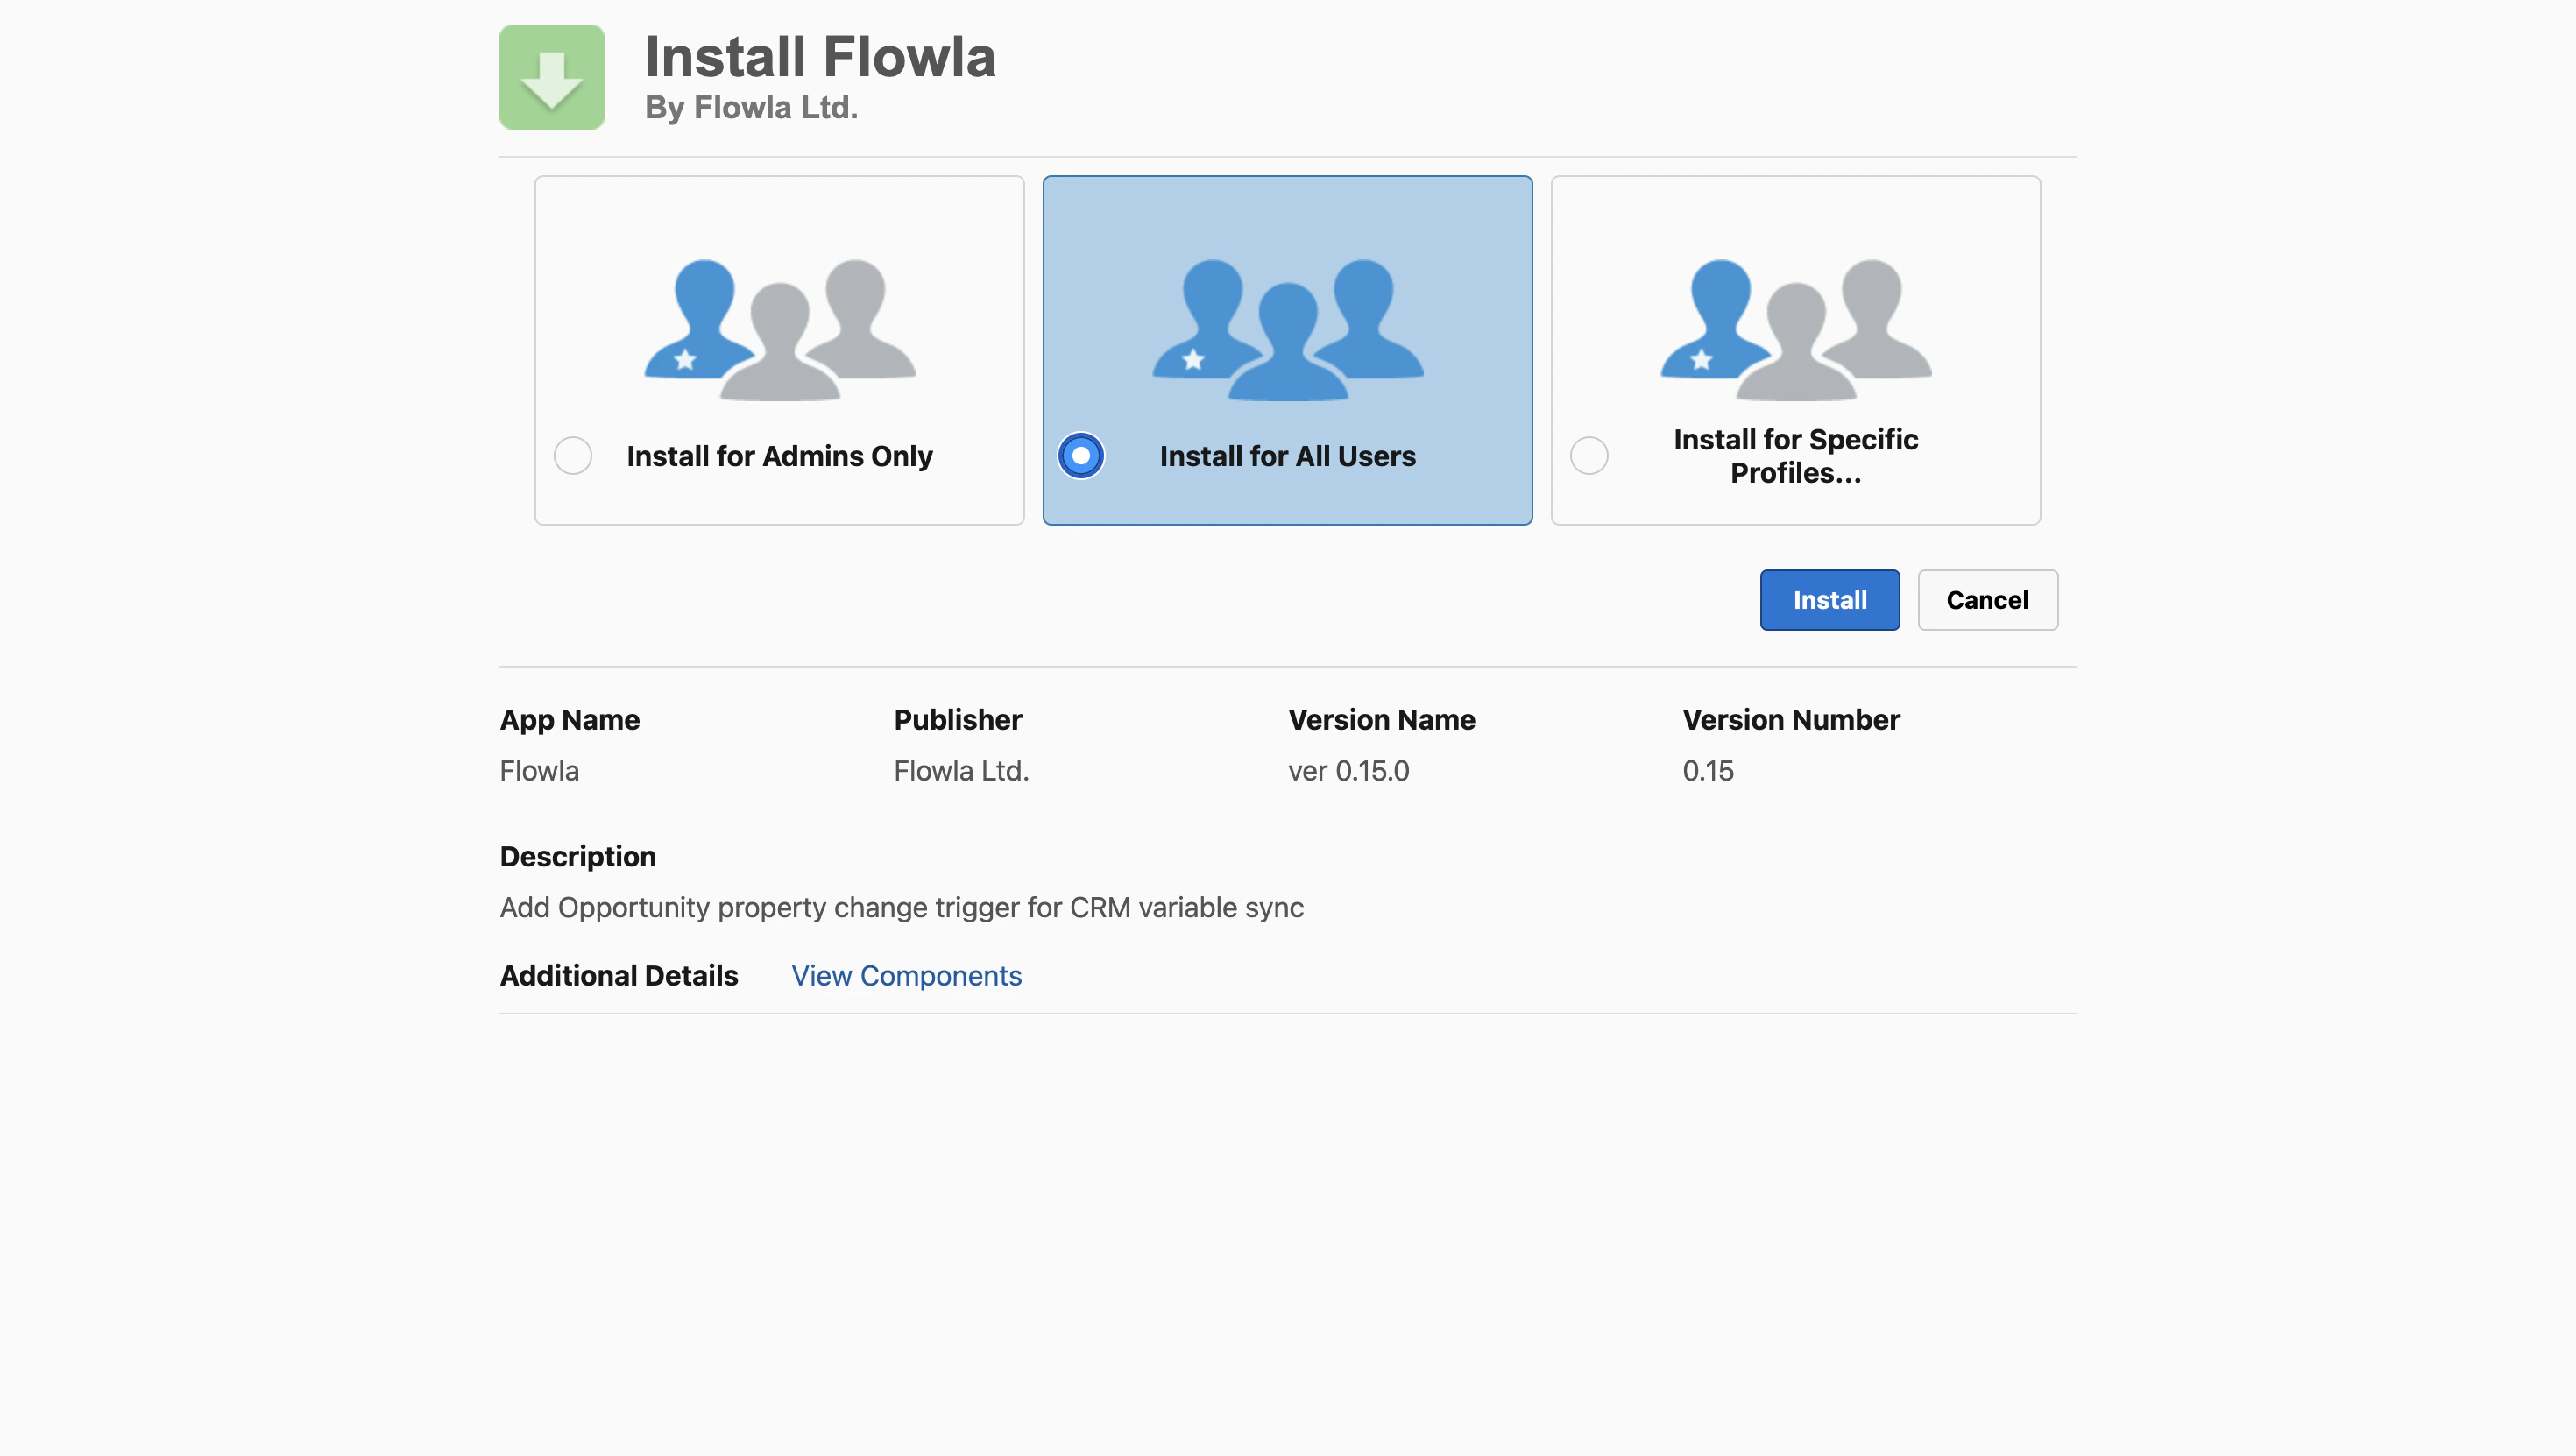
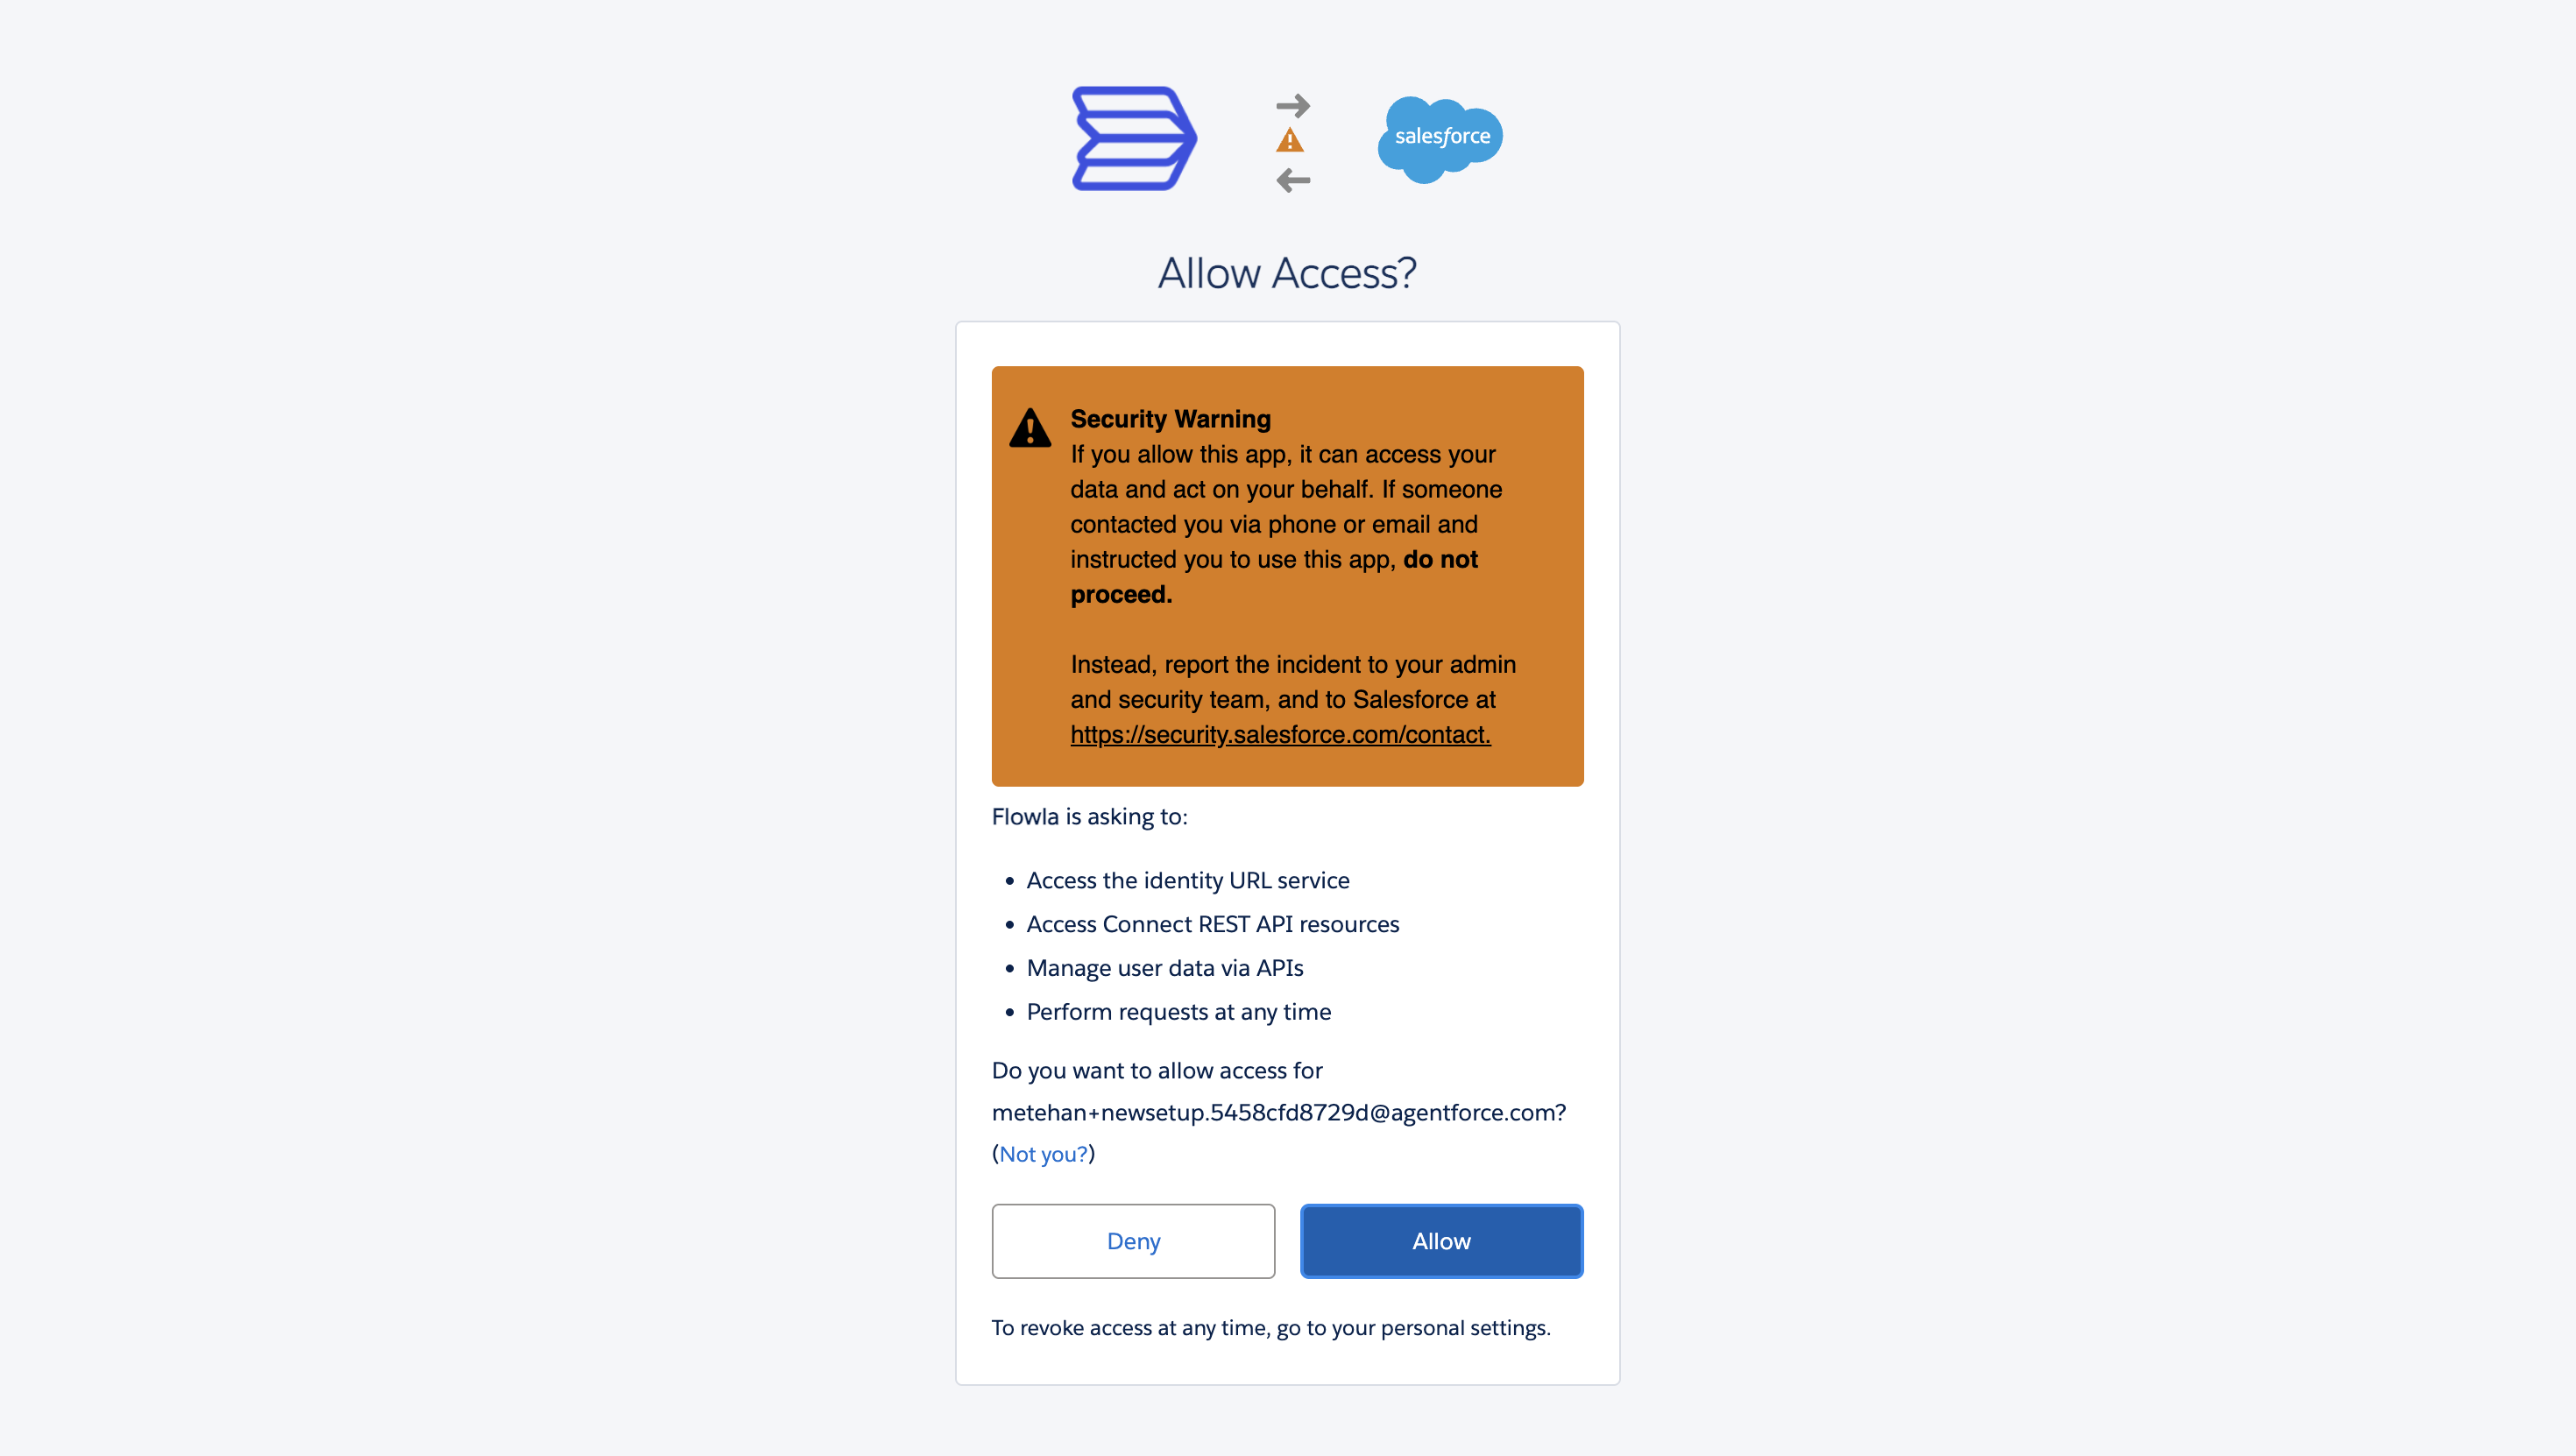
Approve Third-Party Access
If prompted, check the box and click Continue — this allows the package to communicate with Flowla’s API.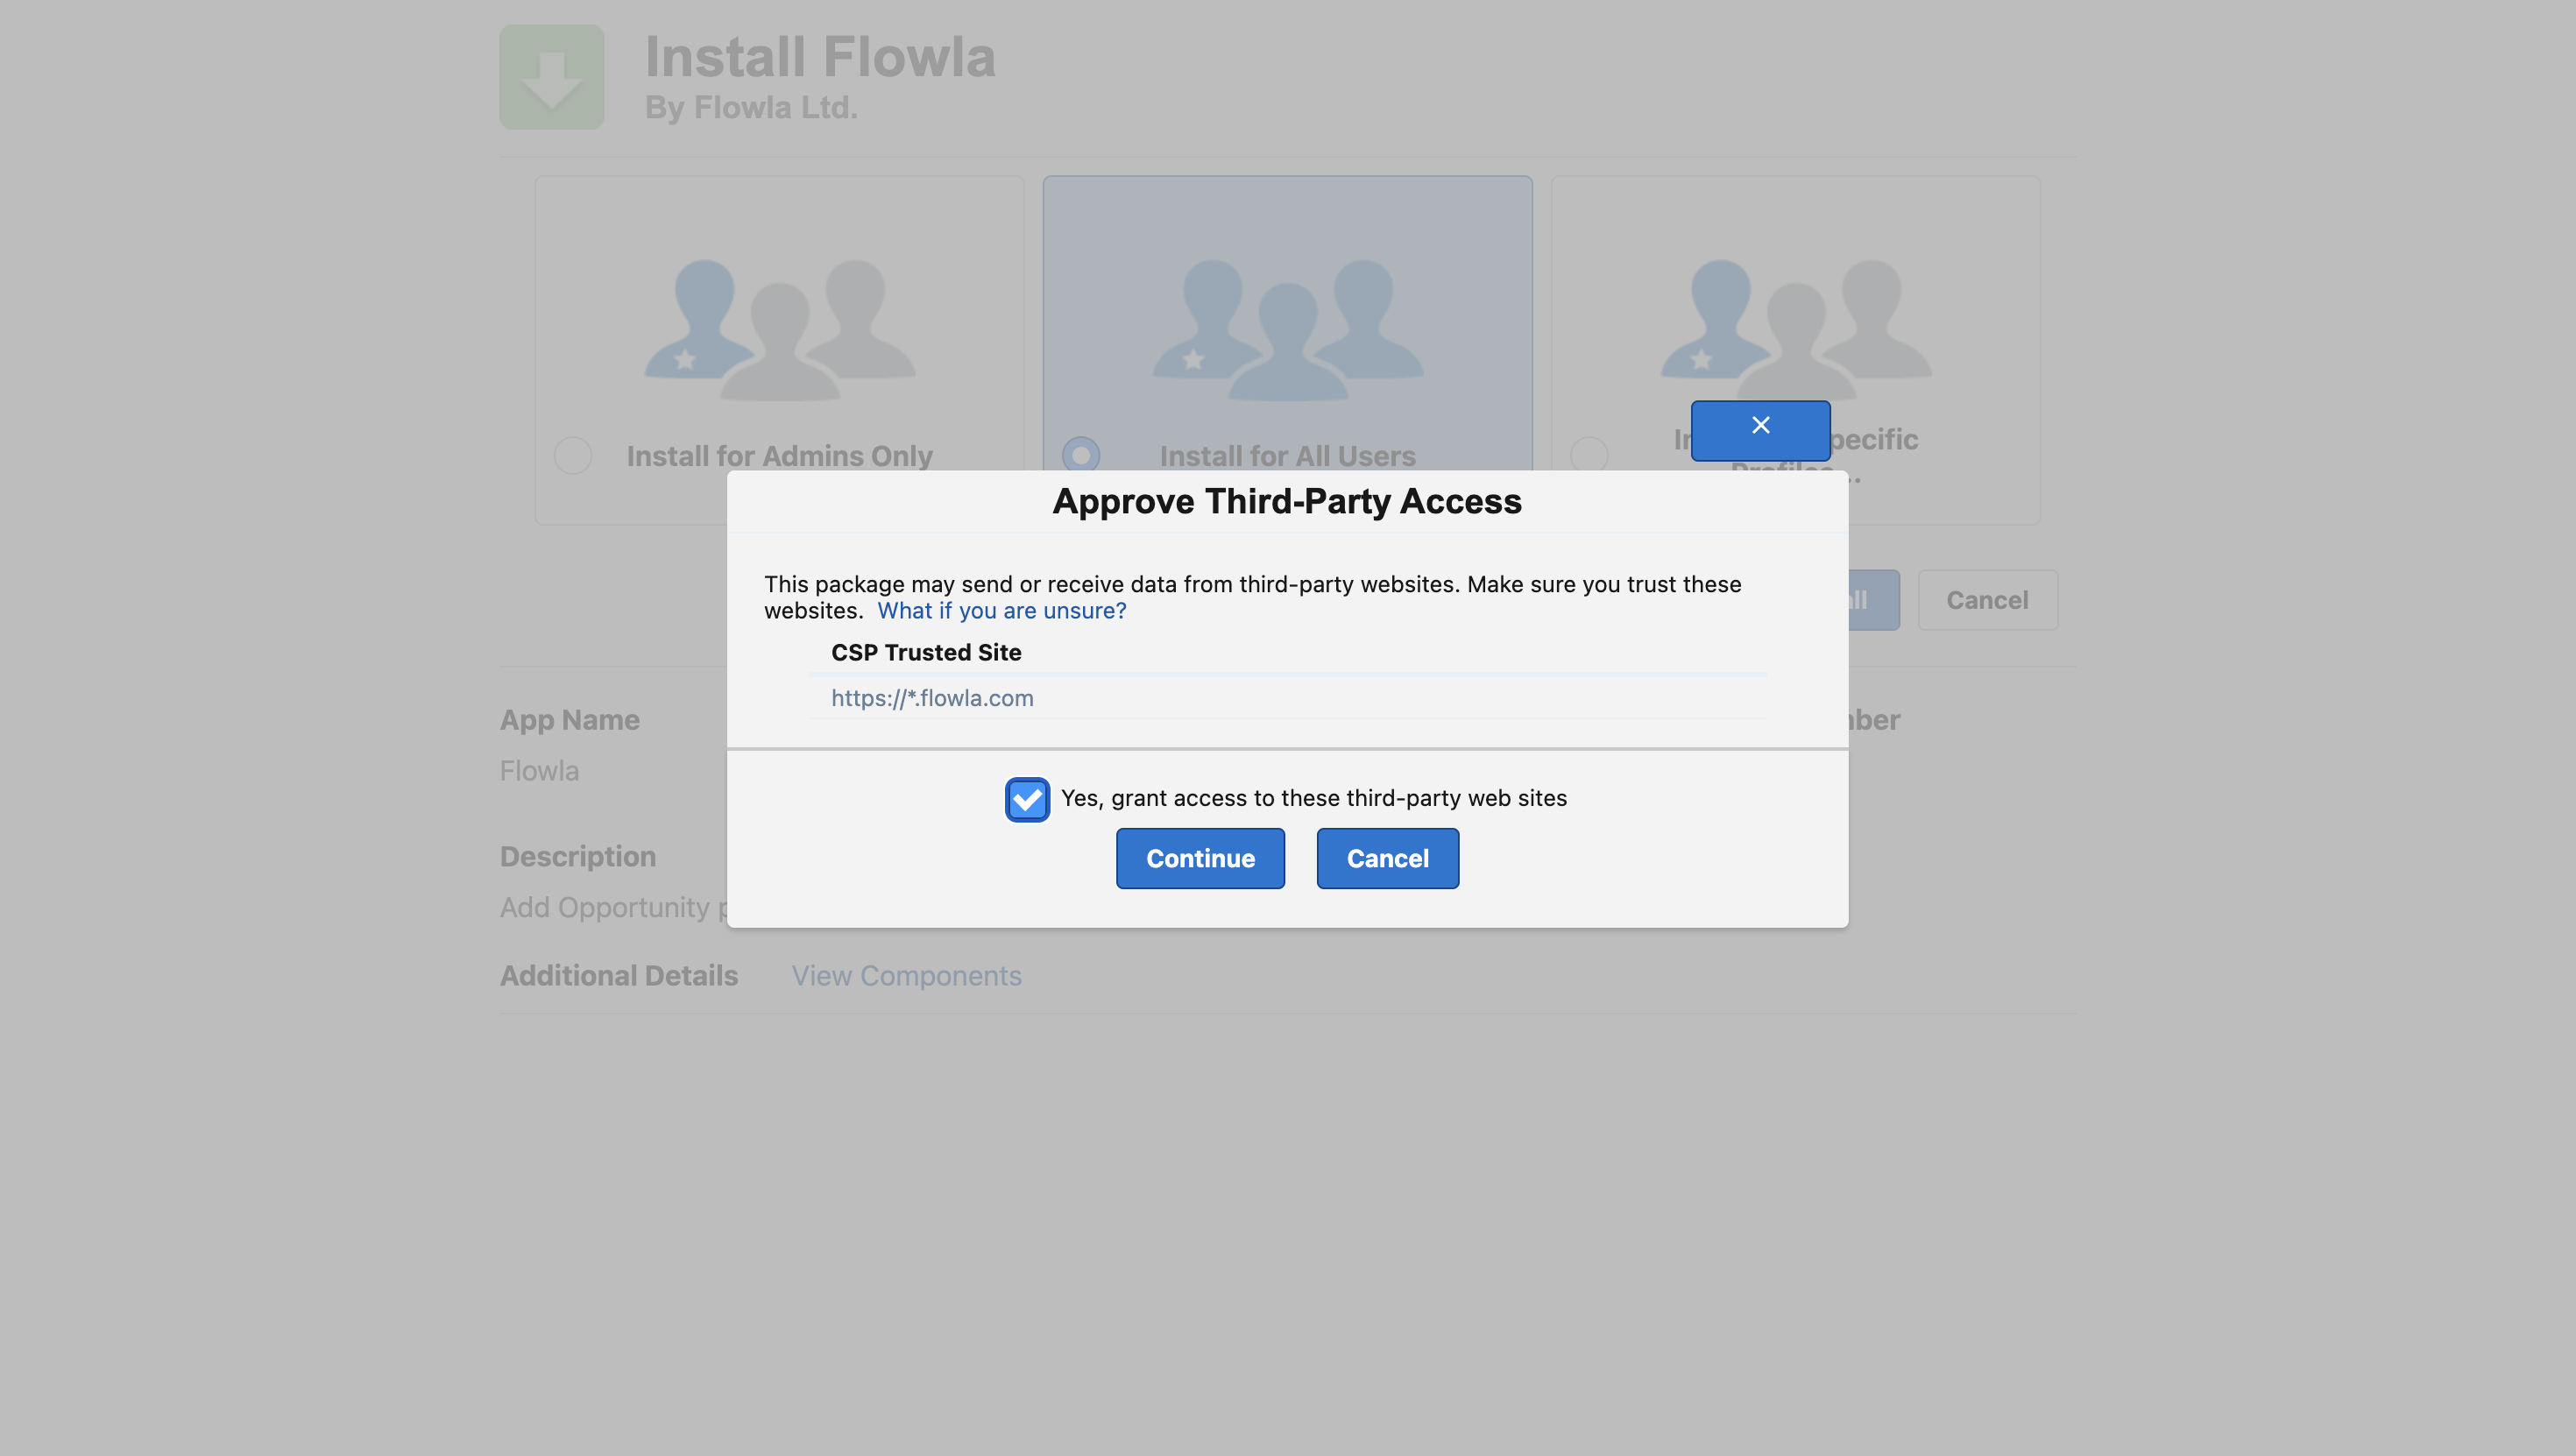
Step 2: Connect Salesforce to Flowla
This step links your Salesforce org to your Flowla workspace. The OAuth connection automatically handles API credential setup and user assignments that were previously done manually.Open Integrations in Flowla
In the left sidebar, click Integrations. Find Salesforce and click Connect.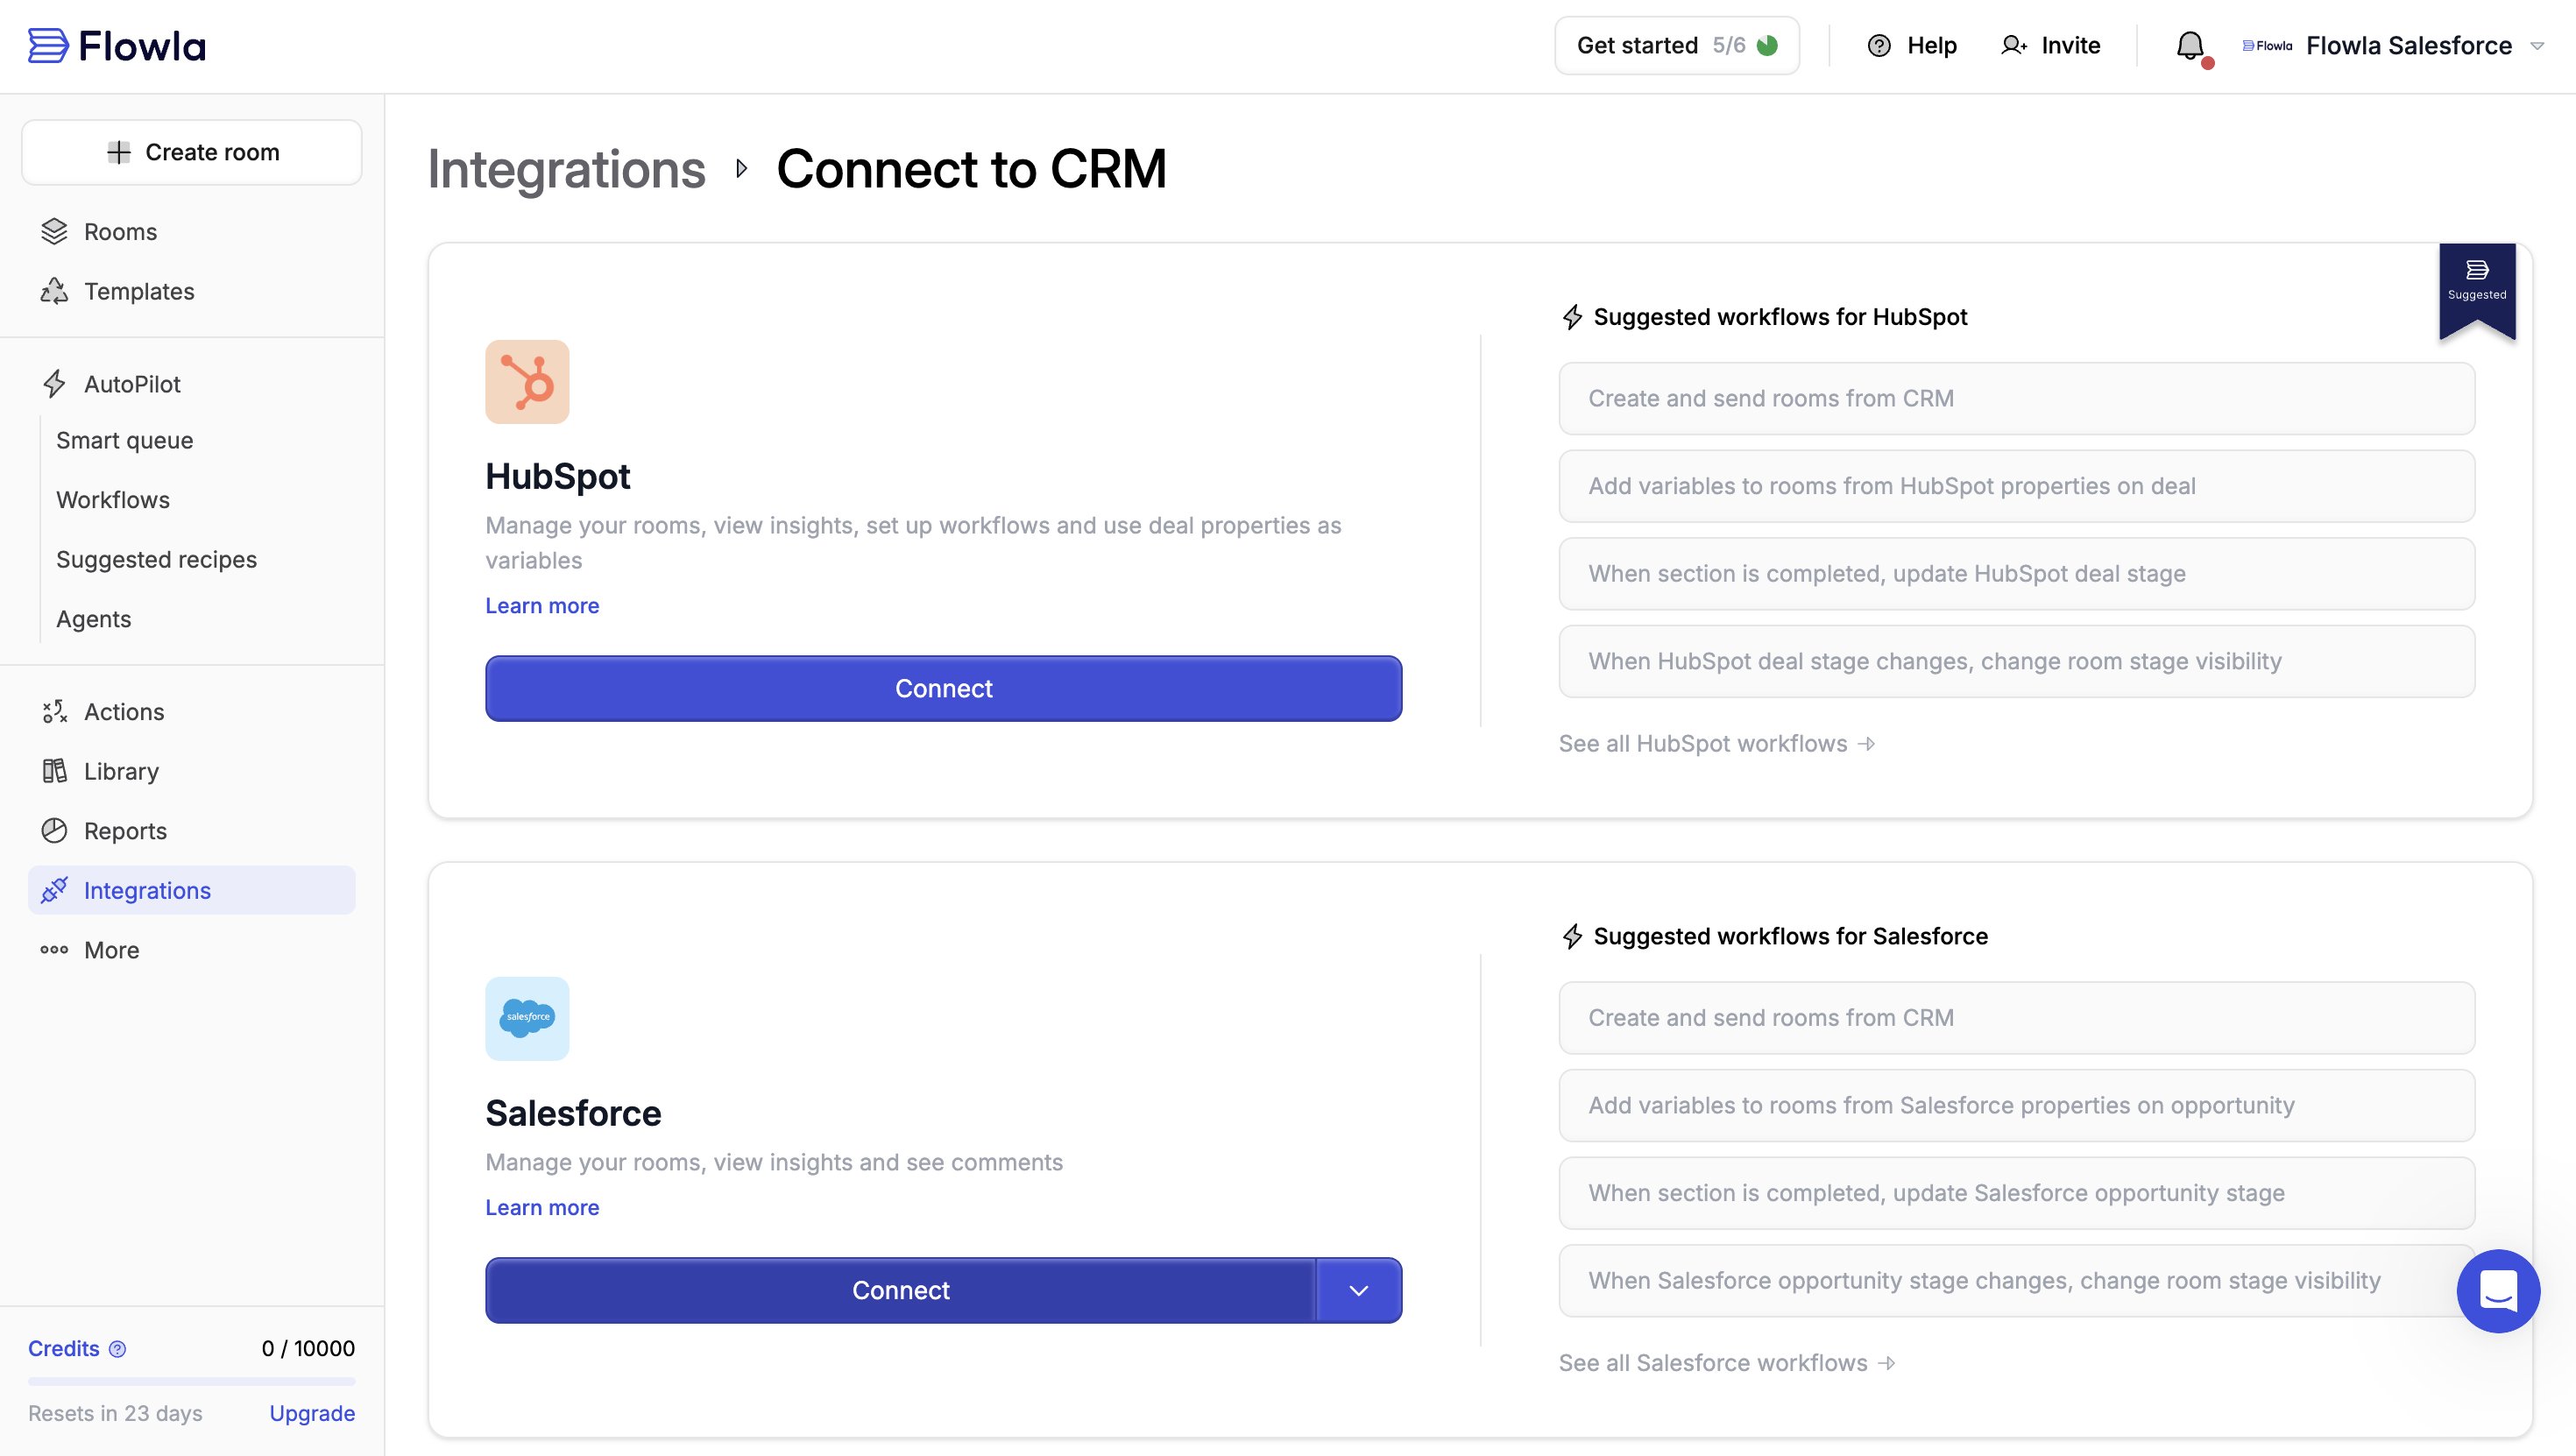
Log in with a Salesforce admin account
You will be redirected to Salesforce’s OAuth login screen. Log in with a Salesforce admin account — the account used here determines the API access level for the integration.Use a dedicated integration user or admin account — not a personal user account. If that user is deactivated, the integration will break. The connecting user must have API Enabled and admin rights in their Salesforce profile.
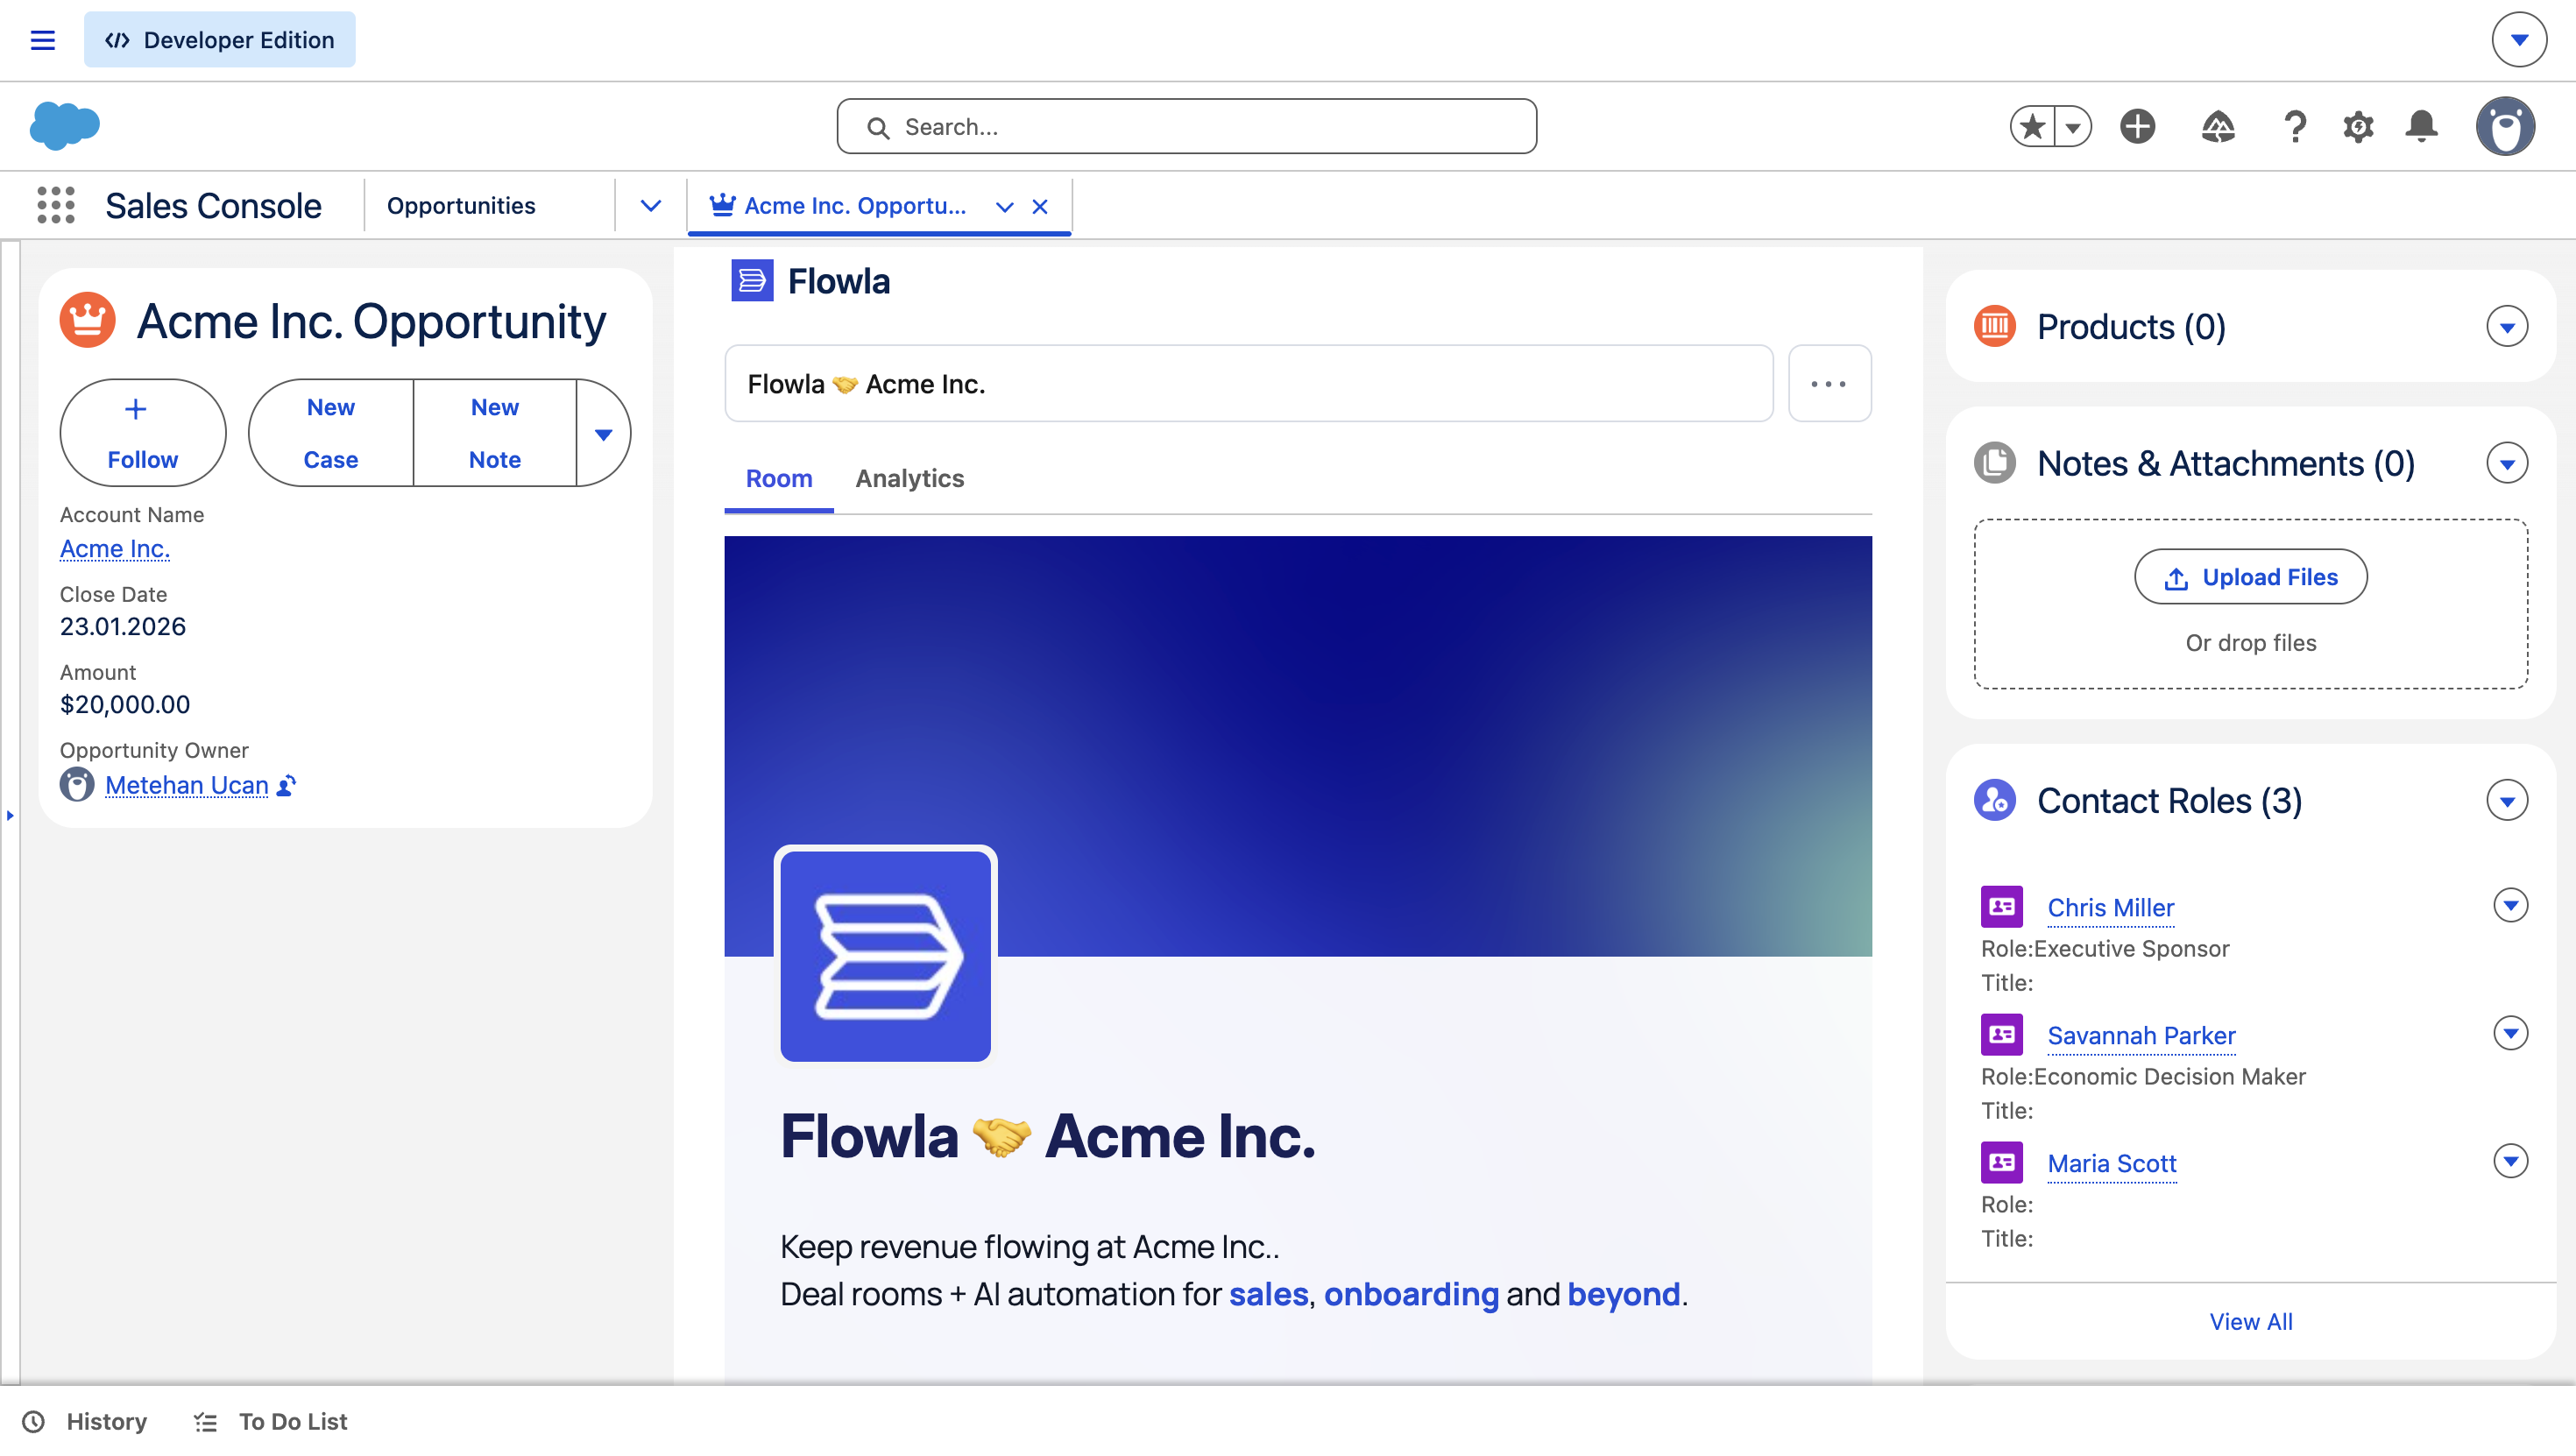
Step 3: Add the Flowla Component to the Opportunity Page Layout
This step embeds the Flowla widget directly inside your Salesforce opportunity records so users can see Flowla room and detailed activity without leaving Salesforce.Open Edit Page on an Opportunity
Open the Sales Console app, navigate to any Opportunity record, click the gear icon (⚙) in the top-right corner, and select Edit Page.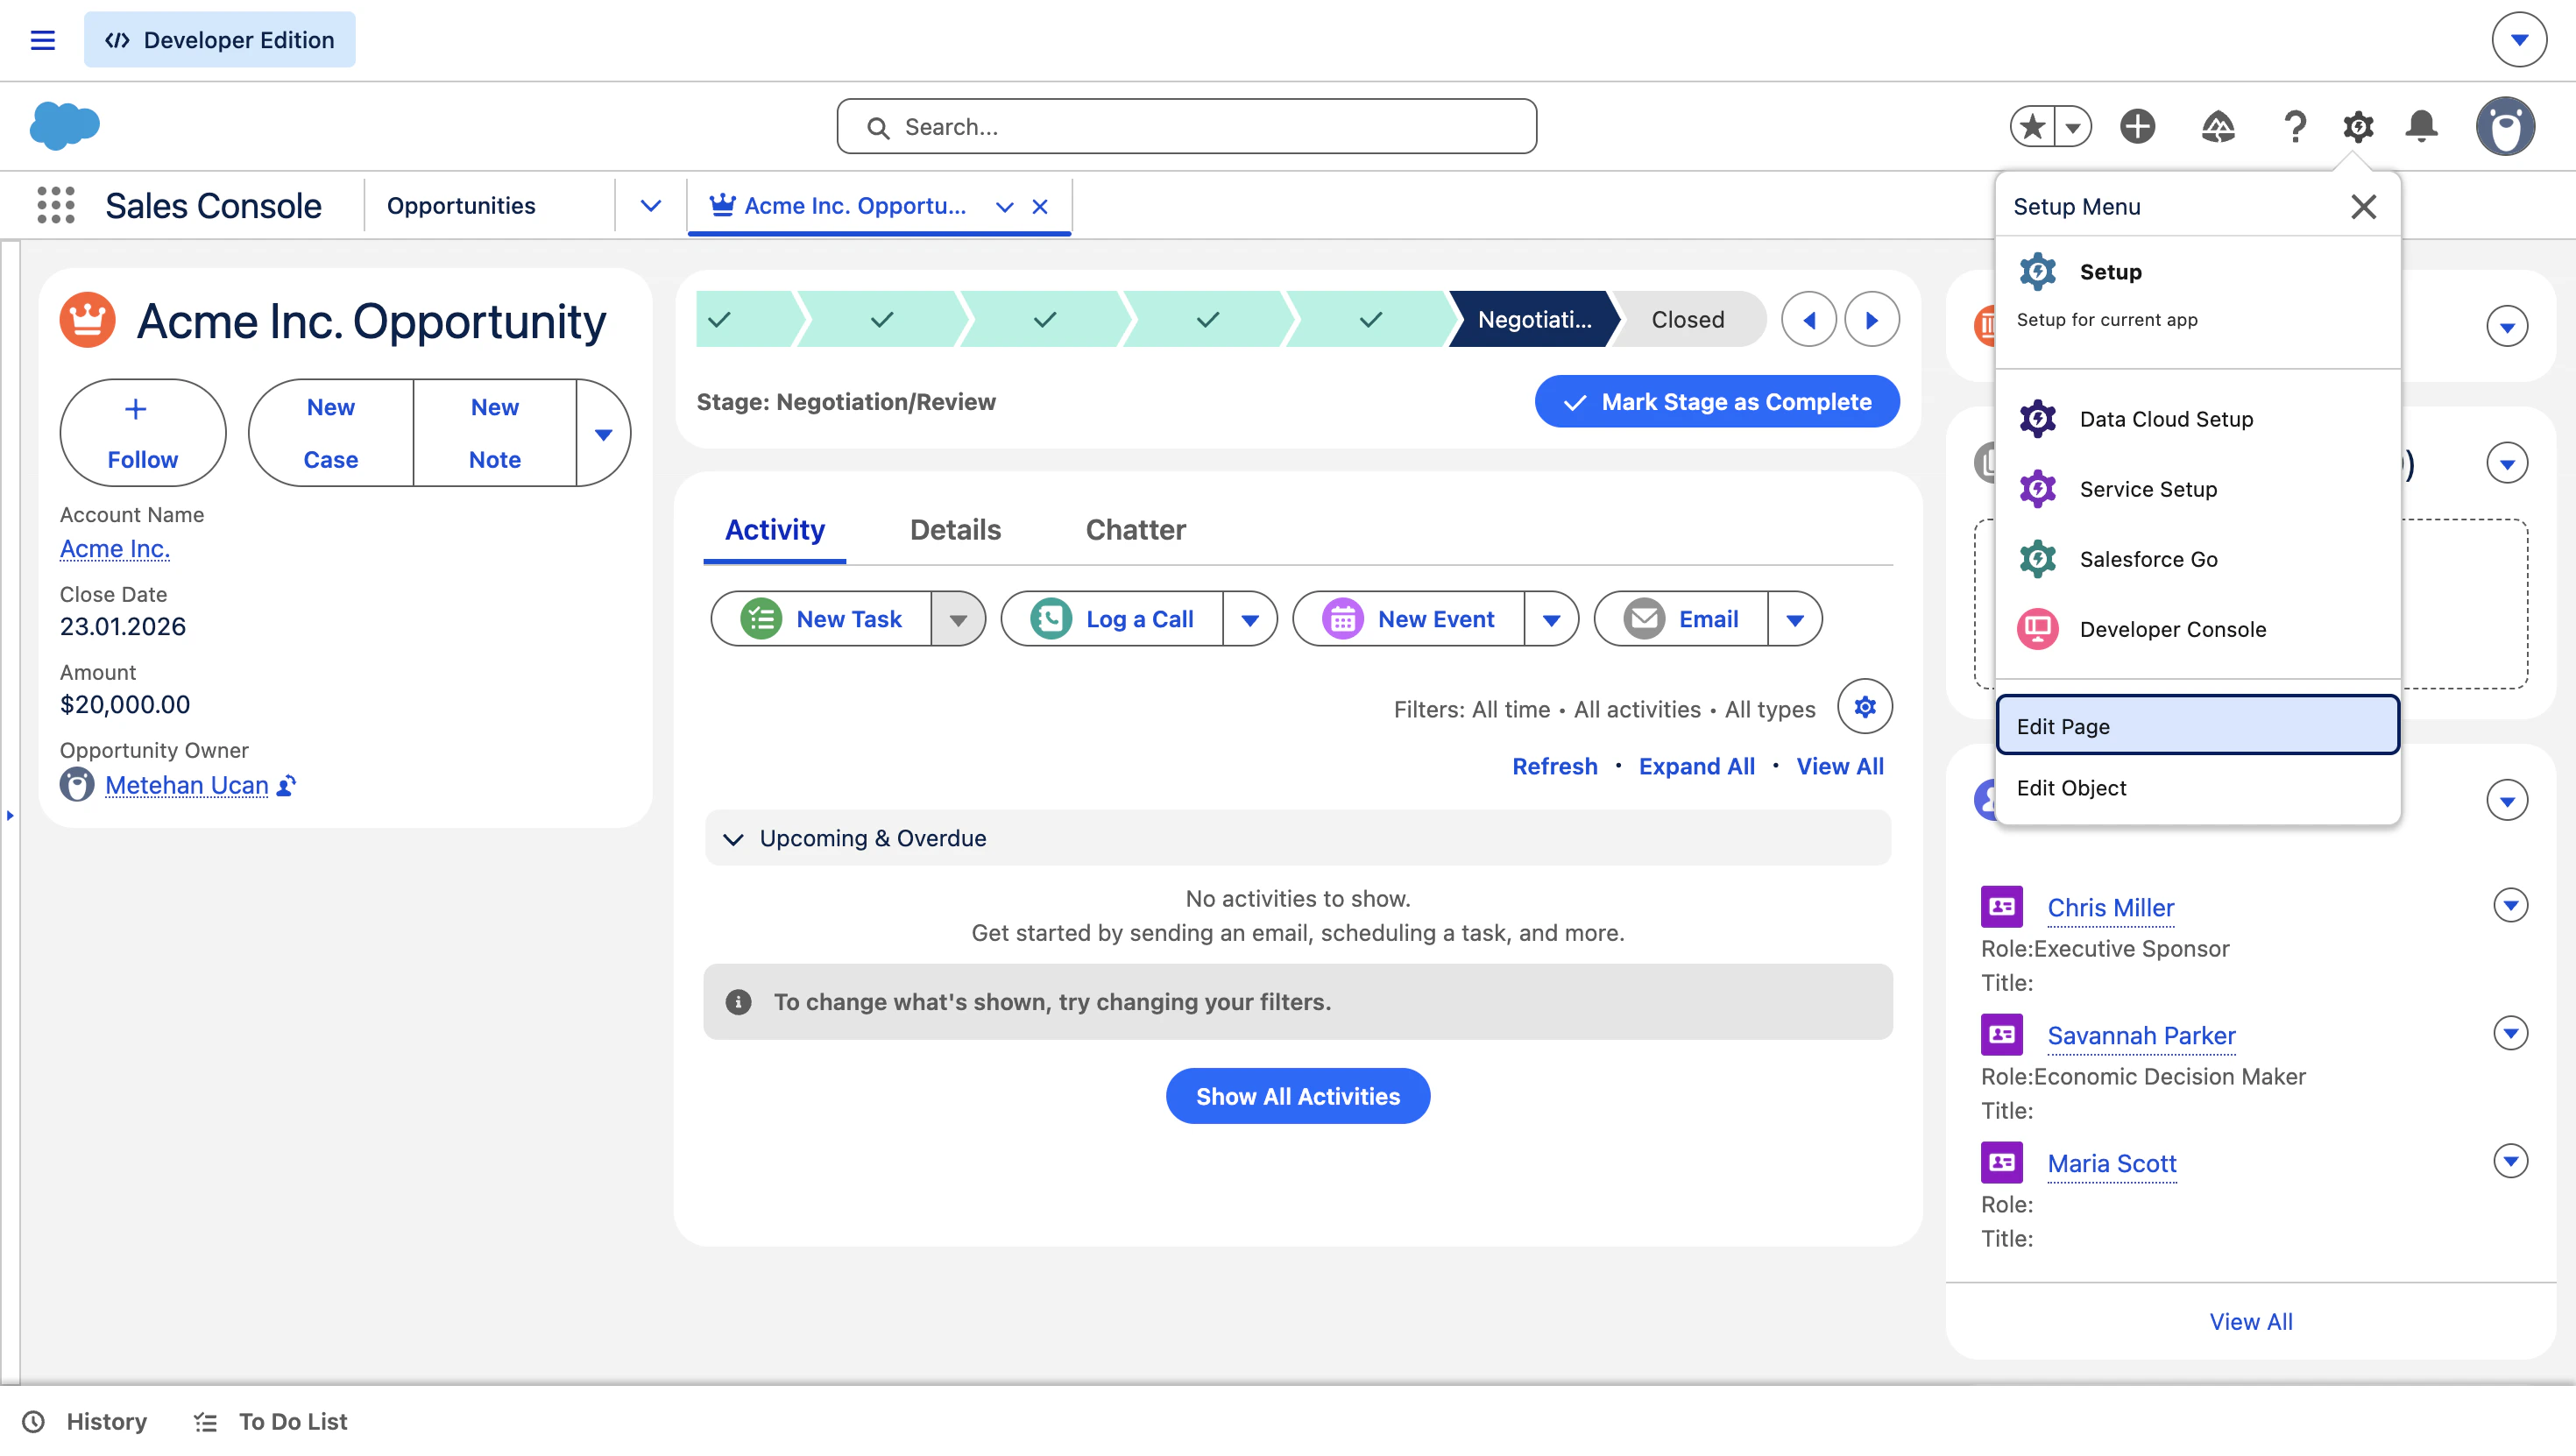
Add the Flowla Aura Component
In the Lightning App Builder, find the Flowla Aura Component in the left-hand panel (search for “Flowla”) and drag and drop it onto your preferred location on the layout.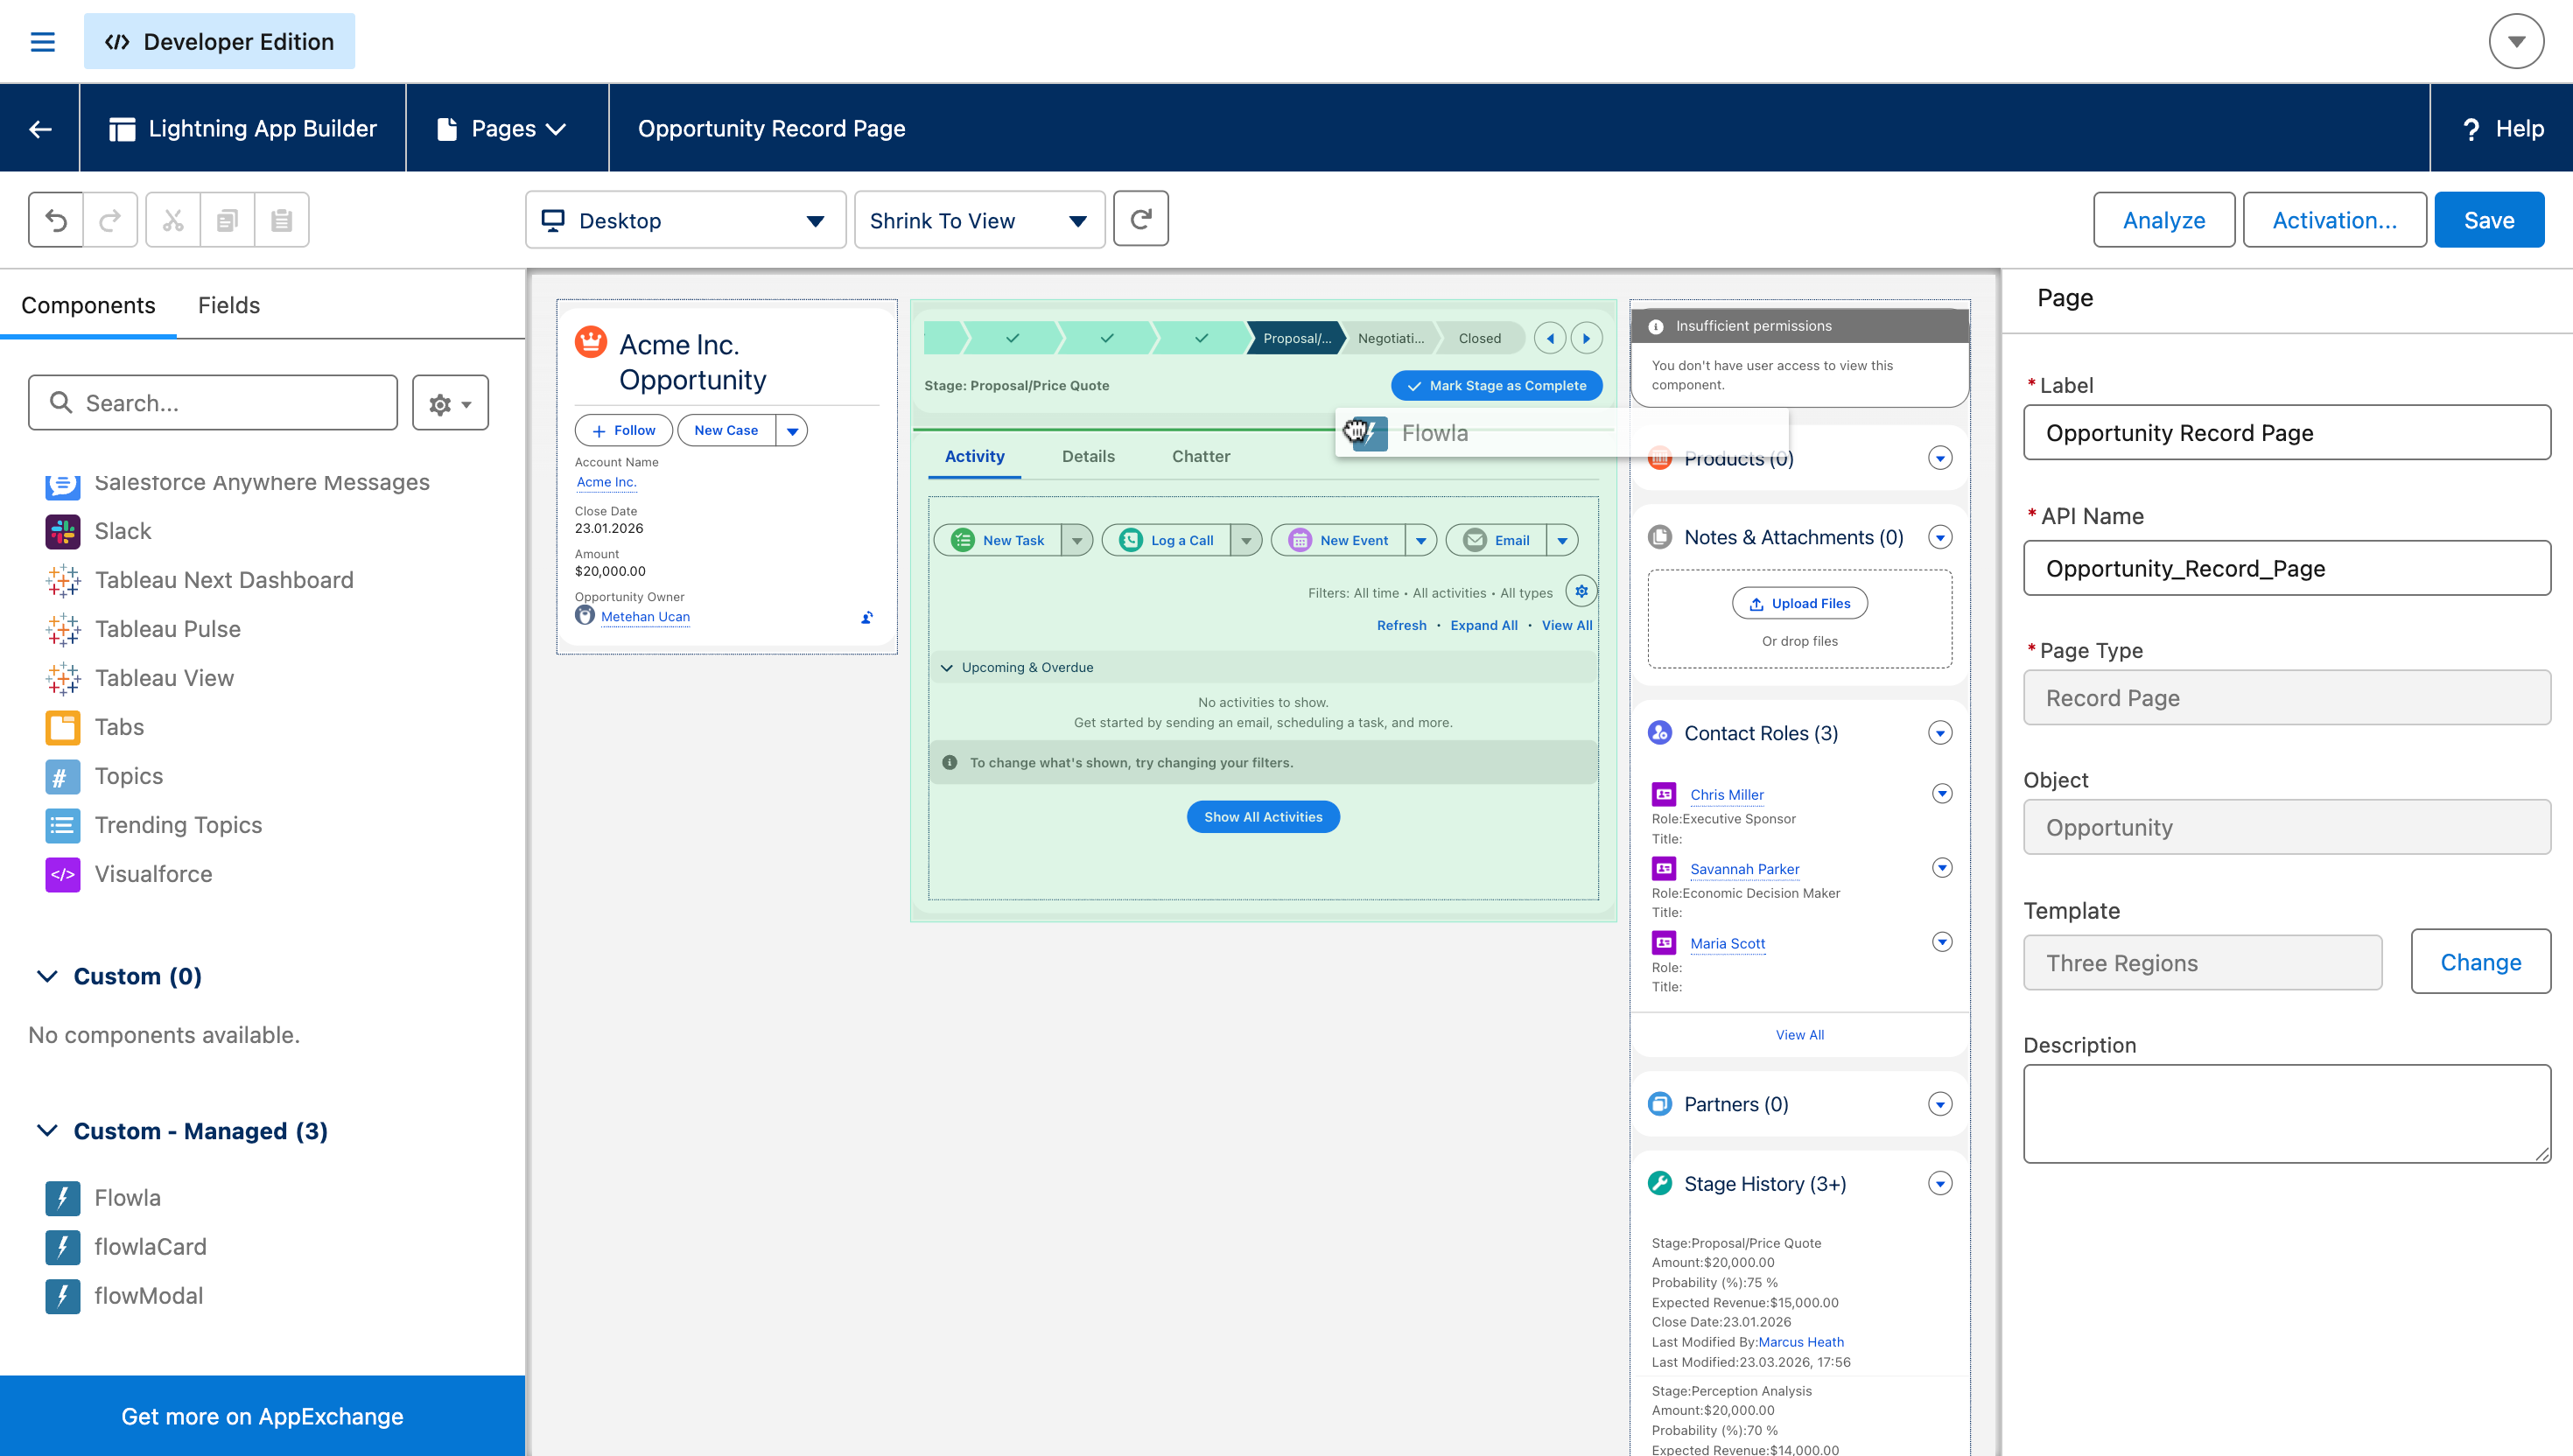
Save and activate
Click Save. When prompted to activate, select Assign as App Default so the change applies to all users, then click Back to exit the builder.
To verify: open any Opportunity record — the Flowla widget should appear in the position you placed it. If the opportunity is linked to a Flowla room, engagement data will appear automatically.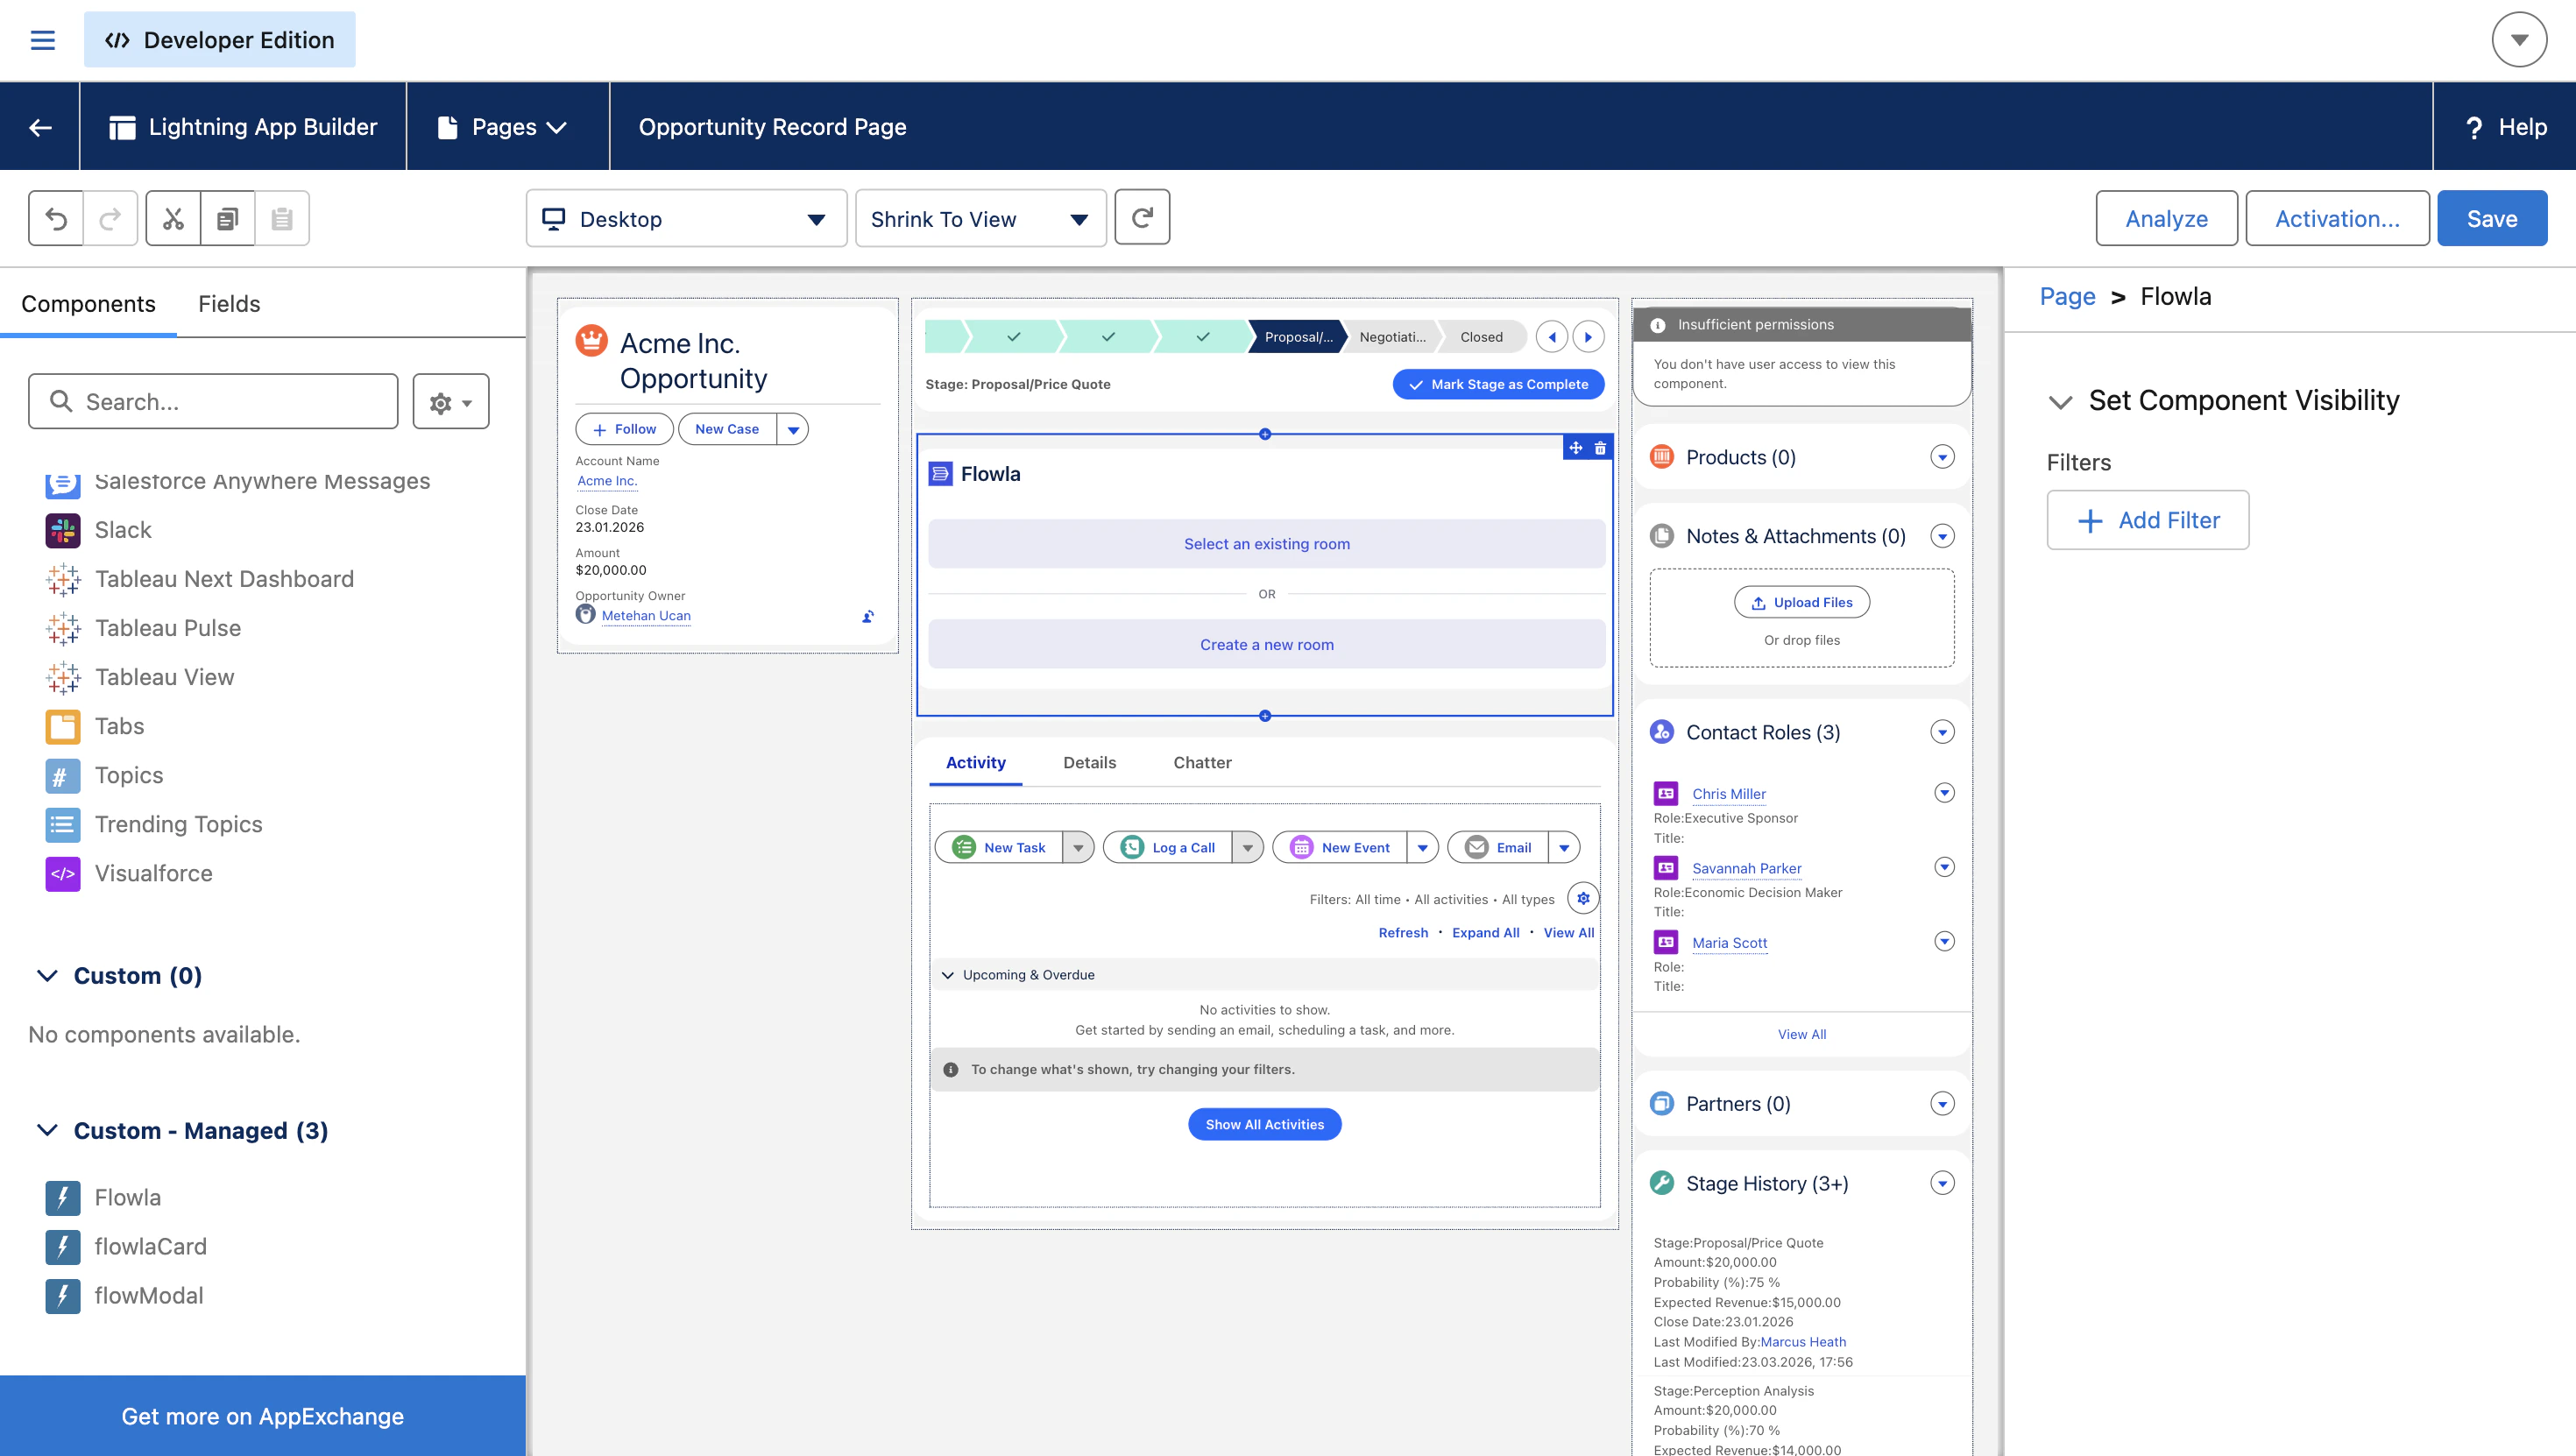
CRM Integrations
- Stale variable fix: When the primary company or contact on a deal changes, all synced CRM variables now refresh immediately. No more outdated names, emails, or fields showing the previous contact’s data (HubSpot & Salesforce)
Meeting list & single meeting blocks
Meetings that auto-sync into your rooms can now be surfaced directly as content blocks inside the editor — closing the loop between meeting intelligence and your buyer-facing rooms.- Add a meeting list block to display all meetings linked to the room, automatically populated as new calls are matched and synced
- Add a single meeting block to highlight a specific call — title, description, date, and attendees rendered cleanly inline
- Meetings are linked from room, not duplicated — any update to the meeting data reflects everywhere it’s used
- When you add a meeting block, a picker opens to select from the room’s matched meetings, making it easy to pull in the right call without manual work
- The meeting list stays in sync automatically — as new calls are matched to the room via auto-sync, they appear in the block without any manual action
Mapping Salesforce properties to variables
Any Salesforce property — from opportunities, contacts, or accounts — can be mapped to a Flowla variable and used anywhere in your rooms and templates.Select a Salesforce object
Search for or select the object you want to pull from: Opportunity, Contact, or Account.
Find the property
Browse or search for the specific property within that object (for example, Close Date or any custom property on the object).
This works for any property on standard objects (Opportunity, Contact, Account), including custom properties you’ve added to those objects. For Salesforce custom objects, use an Autopilot workflow to pull the data instead — see Salesforce automations.
FAQ & Troubleshooting
The Flowla card is not showing data for a linked Opportunity for all users
The Flowla card is not showing data for a linked Opportunity for all users
Likely cause: API credentials were not automatically configured during the OAuth connection.Fix: Set them up manually in Salesforce:
- Go to Setup → search for Named Credentials → click the External Credentials tab
- Find and click Flowla API, then scroll to Principals → FlowlaAPIPrincipal → Edit
- Under Authentication Parameters, add: Parameter Name
ApiKey, Value = your API key from Flowla → Integrations → Salesforce → Settings & more - Click Save, then refresh the Opportunity page
Only one specific user cannot see Flowla room data on Opportunities (other users are fine)
Only one specific user cannot see Flowla room data on Opportunities (other users are fine)
Likely cause: That user is missing the Flowla API permission set assignment in Salesforce.Fix: Go to Setup → Permission Sets → Flowla API → Manage Assignments → Add Assignment. Search for the affected user, click Assign, and ask them to refresh the page.